Selecting multiple values for user-defined fields
You can select more than one value for single-instance and multiple instance user-defined fields if your administrator has defined the fields as Multi Select.
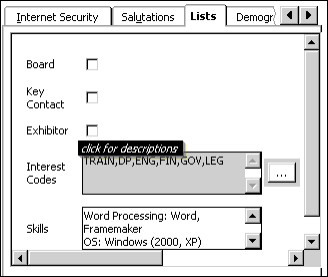
A multi-select field for a single-instance, user-defined tab displays as a gray, read-only list box that displays the selected codes as a comma-delimited list.
- Single-instance multi select fields have a Select Values button located to the right of the field. When you click this button, the Select Values window opens, allowing you to make and modify selections for the field.
- Multiple instance multi-select fields have a drop down arrow to the left of the field. When you click this button, the Select Values window opens, allowing you to make and modify selections for the field.
The Select Values window contains two columns of text:
- The Selected Values column contains those values currently selected for the multi-select field.
- The Available Values column contains the values available for selection. These values are defined by your administrator.
To move values between the two columns, click the Left and Right arrow buttons located between the Available Values column and the Selected Values column.
All fields listed in the Selected Values column will be saved for the loaded customer when you click the Save button.
If you click the Cancel button, when the page reloads the selected values will revert to the previously saved values (if any).
If no values exist for a single-instance, multi-select field, no values will display in the Selected Values column.
Note: If you make changes to a multi-instance tab, you must save or cancel your changes before selecting another tab. If you make any changes in a multi-instance, user-defined tab and attempt to change tabs, a message asking you to save or cancel your changes is displayed.
To select multiple values for a user-defined field
- From Customers, select Manage customers.
- Select the user-defined tab that contains the multi-select field.
- Click the Select Values button located to the right of the field to open the Select Values window.
- Move items from the Available Values column to the Selected Values column:
- Click an item in the Available Values column to highlight it then click the Left arrow button to move the item to the Selected Values column, or double click the item to move it from one column to the other.
- Repeat to move additional items.
- Move items from the Selected Values column to the Available Values column:
- Click an item in the Selected Values column to highlight it then click the Right arrow button to move the item to the Available Values column, or double click the item to move it from one column to the other.
- Repeat to move additional items.
- Click OK. The values you selected in the Select Values window are displayed in the field.
To enter single-instance user-defined information
Once a user-defined window is chosen, you will need to select a field within the window to be able to tab through the fields.
- Open a customer's record in the Manage customers window.
- Select the appropriate tab to display a single-instance user-defined window (for example, the Lists tab).
- Select one of the following:
- Any option to enable or disable a field, for example, the Newsletter option.
- Any character field to enter text, for example, the List Codes field.
- Any scrolling-list to select values, for example, the Interest Codes scrolling-list.
- Click Save or continue entering additional detail information.
Note: See Selecting multiple values for user-defined fields.
To enter multi-instance user-defined information
- Open a customer's record in the Manage customers window.
- Select the appropriate tab to open a multi-instance user-defined window.
- Click in the first field on the tab to display the drop-down list.
- Select the drop-down arrow and select the appropriate value.
- Tab to each field and enter the appropriate values. Pressing Tab while in the last field of the row enables the next row.
- Click Save when you are done entering data.
To delete data from a multi-instance, user-defined record
You can use the following two methods to delete data from multi-instance, user-defined tabs:
- Select the entire row in a tab and press Delete on your keyboard. When you select this method, all of the fields in the row are deleted from the user-defined tab from which you perform the delete, as well as any other multi-instance, user-defined tabs that contain those fields.
- Select the data in a field and press Delete on your keyboard. When you select this method, the data in the field is deleted from the user-defined tab from which you perform the delete, as well as any other multi-instance, user-defined tabs that contain the field.
Note: When deleting data from multi-instance, user-defined tabs, a data row is not permanently removed from the database until all the fields for the multi-instance table are deleted, either by blanking data from a field or by selecting and deleting an entire row.
To view multiple-select fields
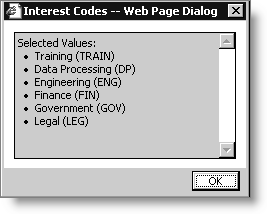
If a multi-select field contains any value, positioning the cursor over the field displays a tooltip containing the message click for descriptions above the cursor. To view the selected values for the field, click the mouse while the tooltip is displayed. The field contents display in a window even if the field is read-only for the current user. You can use the scroll bars or resize the window, if needed.
Note: To display tabs for user-defined windows, you must add the window to the list of visible tabs on the Customer Portfolio Tab Preferences window.


To view read-only text fields
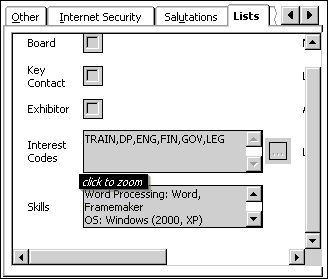
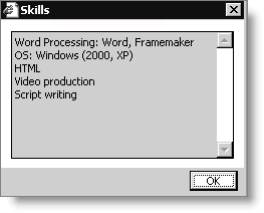
When the data in a read-only text field is not fully visible because the data exceeds the field size, positioning the cursor over the field displays a tooltip containing the message click to zoom. To view the full contents of the field, click the mouse while the tooltip is displayed.
Note: To display tabs for user-defined windows, you must add the window to the list of visible tabs on the Customer Portfolio Tab Preferences window.


The data in the window is display-only. You can use the scroll bars or resize the window if needed. Click OK to close the window.
To view data on multiple-instance, user-defined tabs in a non-grid format
You can view or enter/edit data in a multi-instance, user-defined tab in a non-grid format by opening a window for a specific row in the data grid. The row-specific data window displays if you double-click on a data grid row.
If you have permission to edit the values in the data grid, you can edit values in the row-specific data window. Any values that are changed in this window are automatically updated in the corresponding data grid rows when you click OK on this window. If you click Cancel, any values changed in the window will not be transferred to the corresponding grid row.
If you have permission to enter records in the data grid, you can enter new records directly in the row-specific data window. Records entered in the row-specific data window will be added to the data grid when you click OK.
Changes or additions made in the row-specific data window are not saved to the database until you click Save on the Manage Customers window.
If the data grid is read-only, a record can be viewed in a row-specific data window, but the information in the window cannot be edited and you cannot enter new records in the window.
Validation of values entered in the row-specific data window uses the same logic as the validation of values entered in the data grid. Values entered in the row-specific data window are saved to the database after clicking OK on the row-specific data window and then clicking Save on the Manage customers window.


To view or edit data on multiple-instance, user-defined tabs
- From Customers, find a customer record.
- Select the multiple-instance, user-defined tab you want to view.
- Double-click on the gray box located to the left of the row you want to display in a non-grid data window.
- View or edit fields.
- Click Cancel to close the window without making changes.
- Edit fields in the window, then click OK and click Save on the Manage Customers window.