Great Plains Dynamics - Integration Manager
iMIS provides support to meet export requirements for Great Plains Dynamics version 5.0 or greater with the Integration Manager. This support is in place in iMIS version 4.11 and later and iMIS LAN version 3.52 and later.
Note: Address line 3, which was added in iMIS 10.6, is supported for AP refunds in iMIS 15.x export files but not in iMIS 10.6.x export files.
To set up iMIS for Dynamics
This document provides some implementation setup steps for integrating iMIS with Dynamics using the Integration Manager. Also included are the instructions for importing the iMIS export/import files into Dynamics.
On the Dynamics side, follow the steps in the Dynamics Integration Manager setup instructions.
- From AR/Cash, select Set up module, and click G/L Interface to open the AR/Cash General Ledger Interface window.
- Click Edit.
- From the GL interface type drop-down list, select Dynamics 5.0. The Taylor and Taylor OIM choices remain for those users who have not upgraded from older versions of Dynamics and Taylor GL Integration Kit (GLIK). If you use Dynamics version 3.15 through 4.0, select Taylor OIM. If you use an earlier version of Dynamics, select Taylor.
- You also may need to modify the Output file path/name to dictate the naming and placement of the output files. The Output file path/name you enter in iMIS AR/Cash GL Interface should agree with the path and file name that you enter for your Query in the Dynamics Integration Manager (DIM).
- The Dynamics Integration Manager requires two import files: a header file and a detail transaction file. iMIS correctly exports the two needed files, but it provides a single Output file path/name data entry box for naming the General Ledger export files. iMIS assigns the name you specify as the Path/Name in setup to the detail transaction file. It names the header file the same, except that it appends the letter H to the end of the specified name. For example, if you enter a path/file name of C:\TEMP\GLINT.TXT, iMIS creates a file named GLINT.TXT for the transaction export and a file named GLINTH.TXT for the header export file.
- Click Save.
To set up Dynamics Integration Manager
The following instructions were established with the assumption that Dynamics has been fully installed/upgraded and is functioning properly. Dynamics must be installed before the following steps can be performed. Refer to the Dynamics Installation Procedures manual if you need assistance installing Dynamics.
Note: Be sure to enter your new or revised Dynamics registration keys at the appropriate point during the Dynamics install or upgrade. These keys make it possible for you to access the Integration Manager after it is properly installed.
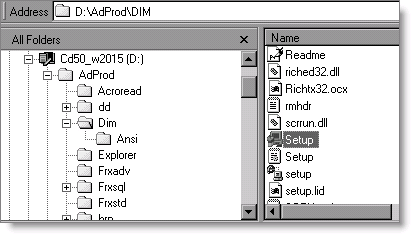
Execute Setup.exe located in the AdProd\Dim directory of the Dynamics Installation CD. Follow the installation instructions in the Dynamics Integration Manager manual.
- Launch Dynamics and answer Yes to include the new code.
- If necessary, fine-tune the directory and/or file name for the export/import files.
- Use an iMIS Integration to import accounting data from the export file generated by the iMIS GL Interface and AP Interface. To use an iMIS Integration, perform the following steps:
- Make a backup of your existing IM.MDB. This is an Access database that is distributed with the Dynamics Integration Manager 5.0. It contains consolidated information regarding integrations and queries for use by the DIM. It is located under the \..\Dynamics\IM\ folder of your Dynamics 5.0 installation.
- Copy and paste the IM.MDB file from the iMIS CD to \..\Dynamics\IM\.
- If your iMIS setup is complete, you are now ready to begin exporting iMIS GL and AP transactions and to run iMIS integrations in Dynamics.
- (AP Interface only) In some circumstances, you may want to set up a special iMIS vendor classification (for example, to change the due date calculation). In this case, make a slight modification to the existing vendor interface setup.
To change a Vendor Class (AP Interface Only)
The iMIS-to-Dynamics setup tables are currently set so that all imported vendor records default to the default Vendor Class. If you wish, you can establish a special iMIS class (for example, to alter the payment terms) and make a minor modification so that all iMIS vendors receive this special classification.
- Select Setup > Purchasing > Vendor Class and insert a new iMIS vendor class. The Vendor Class Setup window opens.
- Click Insert on the left palette.
- Enter the appropriate information in the setup fields.
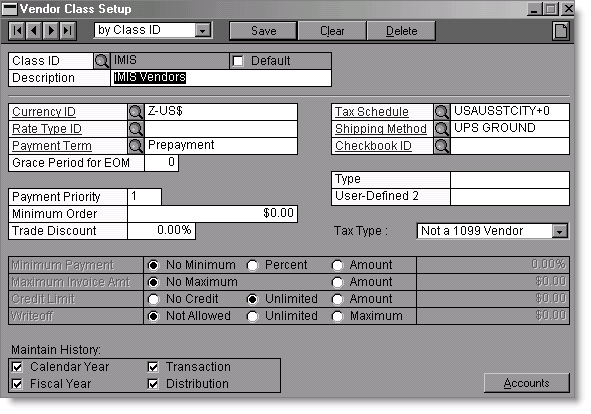
To set up the Dynamics import/export files
The setup instructions are looking for specifically named export files in specific directory locations. If possible, create the specified directory and be sure to specify the same directory and file names in the iMIS setup.
The built-in external file names for the GL Interface are set as:
- GL Header Import File: C:\DYNAMICS\SYSTEM\GLINTH.TXT
- GL Transaction Line File: C:\DYNAMICS\SYSTEM\GLINT.TXT
The built-in external file names for the AP Interface are set as:
- Vendor Import File: C:\DYNAMICS\SYSTEM\VENDOR.TXT
- GL Transaction Line File: C:\DYNAMICS\SYSTEM\INVOICE.TXT
If you can maintain the file name but change the directory location, you can use the Pathname Translation tab under Tools > Options in the Dynamics Integration Manager to reroute the directory location that the iMIS Location ID points to. See the Dynamics Integration Manager manual.
If you are operating in a multi-entity situation within iMIS (for example, the entity code becomes a part of the export file name: GL#.TXT translates to GLDEMO.TXT, etc.), you can modify the import/export file name directly and no special setup provisions are required for DIM version 5.0.
To run an iMIS GL transactions integration
- Launch Dynamics 5.0.
- Select Tools > Integrate > Run Integration. The Run Integration window opens.
- Double-click iMIS GL Transactions.
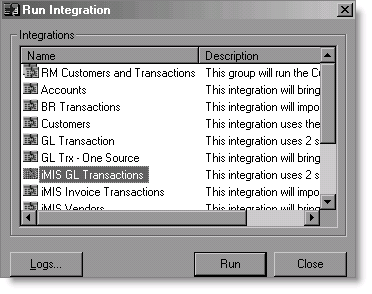
As the integration runs, Dynamics 5.0 temporarily disappears, but reappears when the integration is complete. The iMIS GL Transactions Progress window opens.
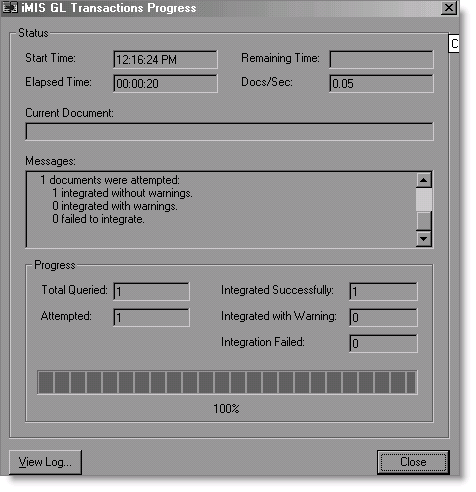
- If the integration was successful, click Close. Otherwise, click View Log… to examine the error log.
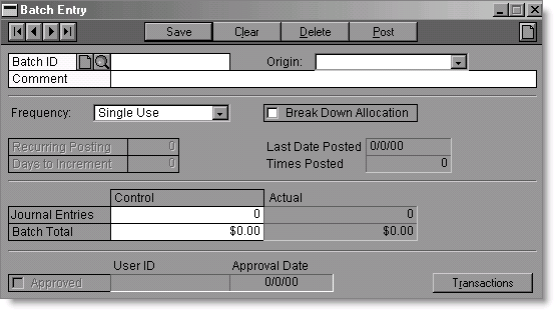
- Verify that the integration of iMIS GL transactions was successful from within Dynamics 5.0: select Transactions > Financial > Batches. The Batch Entry window opens.
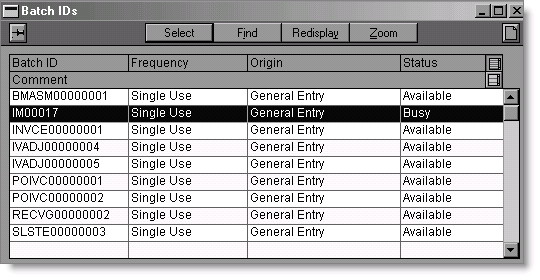
- Click the magnifying glass icon for Batch ID to display a listing of Batch IDs.
- Locate and select the Batch ID corresponding to the integrated GLINT.TXT file. If the batch is still in a Busy Status, wait a few minutes for the Status to change to Available before viewing.
Note: One of the most likely reasons that integration fails is invalid data (such as account numbers that do not match the required format and segmentation specified in Dynamics 5.0 during initial installation). If this is the case, review your account numbering scheme for compatibility in Dynamics and iMIS.
To run an iMIS vendors integration
This integration must be run before performing the iMIS Invoice Integration because it imports vendor data that is used later in the process. The integration steps for vendor integration are the same as in the iMIS GL transactions integration.
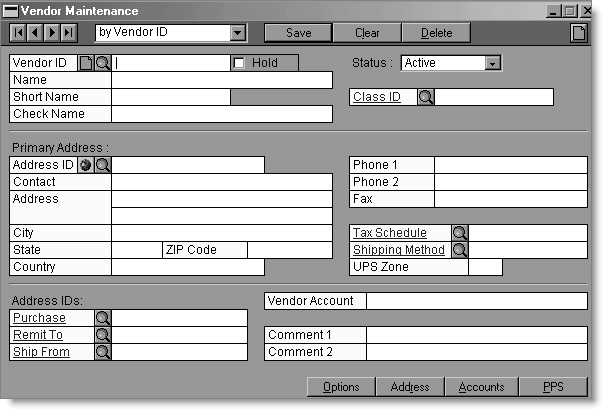
- After successfully completing the iMIS Vendors Integration, in Dynamics, select Cards > Purchasing > Vendor. The Vendor Maintenance window opens.
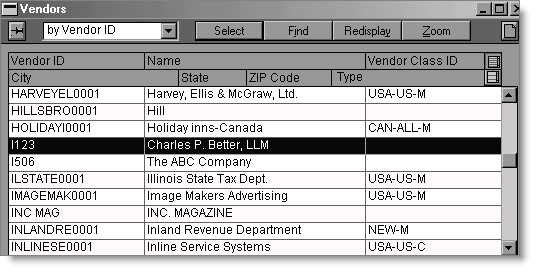
- Click the magnifying glass for Vendor ID and select the vendor(s) that corresponds to the one(s) you imported.
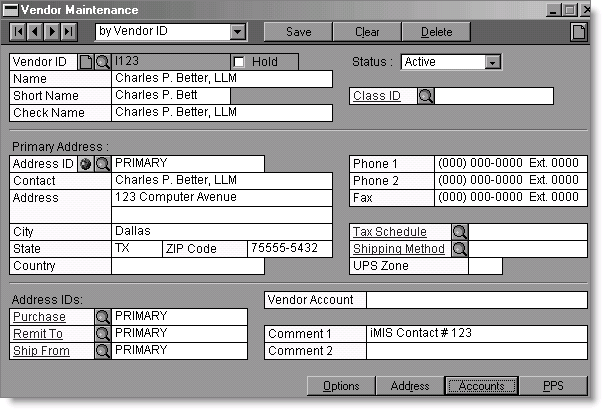
- Review the Vendor data in the Vendor Maintenance window for accuracy.
To run an iMIS invoice integration
You must run the iMIS vendor integration before iMIS invoice integration because the Vendor ID in the INVOICE.TXT file must cross-reference the Vendor ID in the VENDOR.TXT file. The integration steps for invoice integration are the same as in the iMIS GL transactions integration.
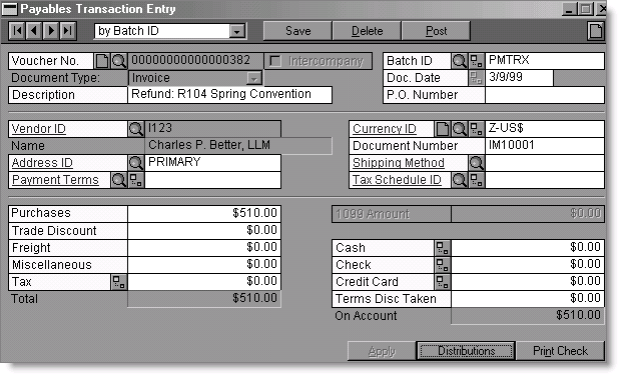
- When the iMIS Invoice Transactions integration is complete, select Transactions > Purchasing > Transaction Entry. The Payables Transaction Entry window opens.
- Click the magnifying glass for Voucher No. and select the voucher number that corresponds to the imported transaction.
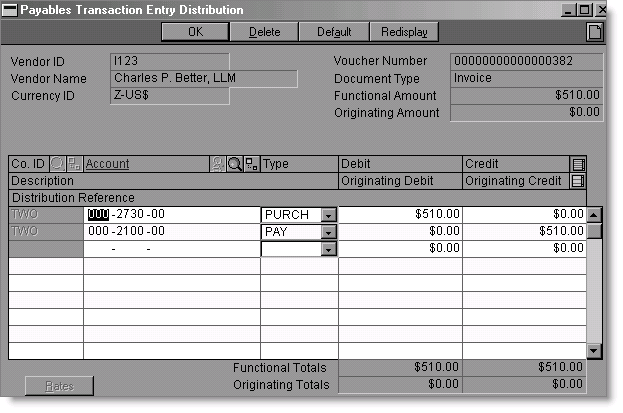
- Click the Distributions button to display the Payables Transaction Entry Distribution window.
- Confirm that the distributions are correct. Pay particular attention to the accounting entries and the Purchases account number.

To modify an iMIS integration
- From Dynamics 5.0, launch the Integration Manager from Tools > Integrate > Integration Manager.
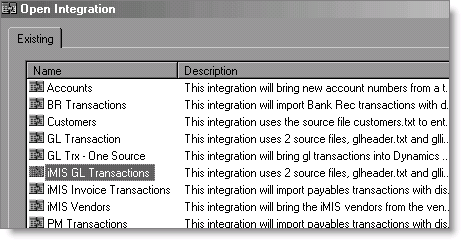
- Click the Open button from the top row of buttons to display the available integrations.
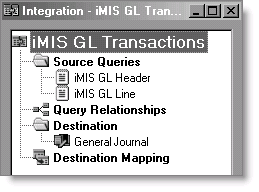
- Select the integration to modify (such as iMIS GL Transactions). The Integration – iMIS GL Transactions window opens.
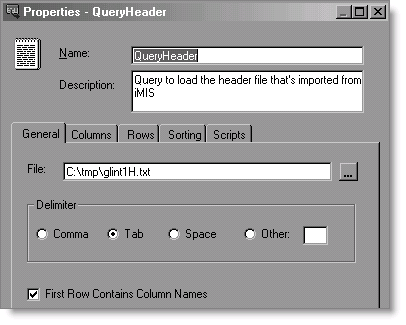
- Double-click the desired source query (such as iMIS GL Header). The Properties - QueryHeader window opens.
- Modify the path and filename in the textbox under the General tab to correspond to your actual system. Note that the path/file name combination you specify here must match what you have set up for the Output file path/name under the GL Interface section in iMIS AR/Cash System Setup.
- If you modify the path/file name combination for the iMIS vendors’ integration or the iMIS invoice integration in the Dynamics Integration Manager, make the corresponding change to the Output file path/name under the AP Interface section in AR/Cash System Setup.
