Peachtree for Windows
iMIS provides support to meet export requirements for Peachtree for Windows version 6 and greater. This support is in place in iMIS as of version 4.11.13.04.
To set up iMIS for Peachtree
The setup steps from iMIS include making appropriate choices on the AR/Cash General Ledger Interface.
- From AR/Cash, select Set up module, and click G/L Interface to open the AR/Cash General Ledger Interface window.
- Click Edit.
- From the GL interface type drop-down list, select a version of Peachtree. The version you select depends upon which version of Peachtree Windows you are using.
- Select Peachtree V6 from the drop-down list if your version is 6 or greater.
- Otherwise, select the Peachtree V3_B5 option.
- Select an option from the Summarize by drop-down list.
- Enter the Output File Path/Name, which dictates how iMIS should name the export/import file and where it should be stored.
- Use a # sign in the file name to instruct iMIS to create files for each iMIS organization code, with the ORG code inserted in the file name.
- Use a ? mark in the file name to instruct iMIS to create sequentially numbered files with each subsequent file that is generated.
- Click Save.
For example, #glint?.csv will create ORG1glint1.csv and ORG2glint1.csv for the first export and ORG1glint2.csv and ORG2glint2.csv for the next export.
Note: The default extension for Peachtree import files is .CSV (Comma Separated Values). Peachtree uses the default directory bcs subfolder under the peachw folder when looking for import files. Although you can name and position Peachtree import files anything or anywhere you wish, you may wish to keep these defaults in mind when considering the name and location of the export file.
To set up Peachtree Windows
The setup within Peachtree Windows includes a simple step to fine-tune the General Journal Import definition.
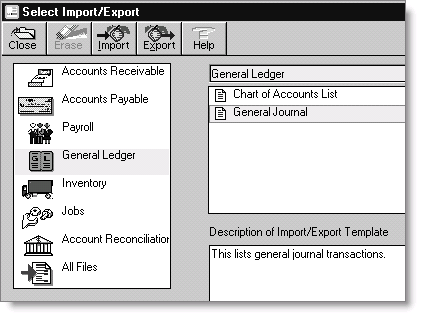
- Select File > Select Import/Export. The Select Import/Export window opens.
- From the Select Import/Export window, highlight General Ledger on the left and General Journal on the right
- Click the Import button. The General Journal window opens.
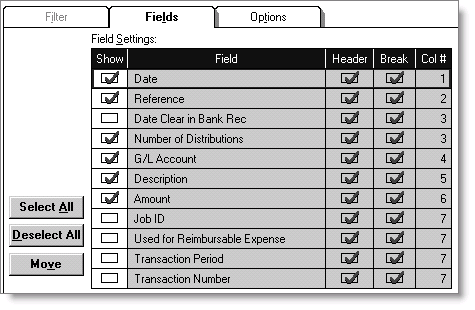
- From the General Journal window Fields tab, uncheck the Show box for the following fields:
- Date Clear in Bank Rec
- Job ID
- Used for Reimbursable Expense
- Transaction Period
- Transaction Number
- When you finish, six fields remain checked to match the iMIS Peachtree export output:
- Date
- Reference
- Number of Distributions
- G/L Account
- Description
- Amount
- Click the Options tab.
- Click the right arrow icon under the Import/Export File prompt and browse to the correct export/import directory and file name.
- Click the Save button on the window.
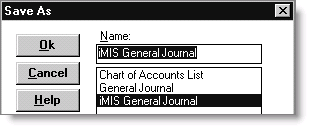
- Assign a new name (for example, iMIS General Journal) to the revised Import Definition in the Save As window.
- Click OK.

If you wish to process the import, click the OK button on the Import definition window, or click the Cancel button to exit.
To create the export file from iMIS (Peachtree)
- Select AR/Cash > Process month-end procedures > Create GL Journal to generate the general ledger transaction export files.
To import data into Peachtree Windows
Make sure you have a current backup before you begin the import process.
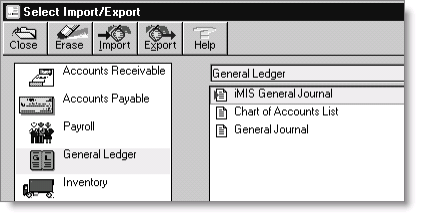
- Select File > Select Import/Export to open the Select Import/Export window.
- Select General Ledger on the left.
- Select iMIS General Journal, or the name assigned in step 9 above.
- Click Import.
- Click the Options tab and verify that the Path and file names are correct for the export file created by iMIS.
- Click OK from the Import window to proceed with importing the iMIS general journal entry. The following verification message displays.
- Click Yes to proceed with the import.
Note: If your file name varies with each import, or if you have multiple files to import, click the right arrow icon under the Import/Export File prompt and select the correct export/import and file name.
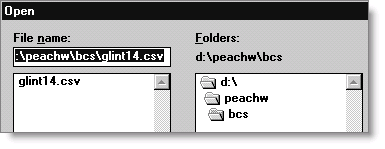
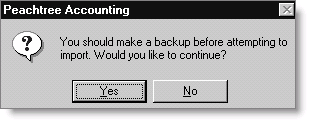
Make sure you have a current backup.
To view transactions imported from Peachtree
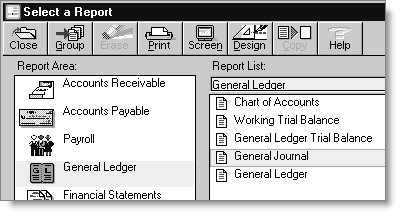
- Select Reports > General Ledger. The Select a Report window opens.
- You may need to click the Design icon and override the date range for the report.
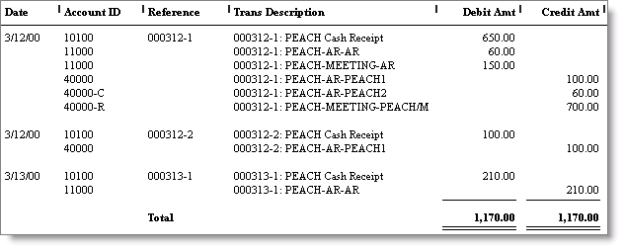
Export/Import File Example
The GL Interface process creates a single comma-delimited file containing the transactions selected for export in iMIS. The transactions are summarized based on the option selected in AR/Cash System Setup.
04/12/2011,"110412-1",6,"10100","110412-1: PEACH Cash Receipt",650.00
04/12/2011,"110412-1",6,"11000","110412-1: PEACH-AR-AR",60.00
04/12/2011,"110412-1",6,"11000","110412-1: PEACH-MEETING-AR",150.00
04/12/2011,"110412-1",6,"40000","110412-1: PEACH-AR-PEACH1",-100.00
04/12/2011,"110412-1",6,"40000-C","110412-1: PEACH-AR-PEACH2",-60.00
04/12/2011,"110412-1",6,"40000-R","110412-1: PEACH-MEETING-PEACH/MAIN",-700.00
04/12/2011,"110412-2",2,"10100","110412-2: PEACH Cash Receipt",100.00
04/12/2011,"110412-2",2,"40000","110412-2: PEACH-AR-PEACH1",-100.00
04/13/2011,"110413-1",2,"10100","110413-1: PEACH Cash Receipt",210.00
04/13/2011," 110413-1",2,"11000","110413-1: PEACH-AR-AR",-210.00