Platinum SQL
iMIS provided support to meet export requirements for Platinum SQL version 4.2 or greater. This support was in place in iMIS 4.10.
The iMIS to Platinum SQL Interface works through the Platinum SQL Import Manager. The Import Manager serves as the bridge to bring information from outside packages, such as iMIS, into the normal Platinum SQL files. The Import Manager provides the mechanism for bringing financial (accounts receivable/cash/income) data generated through iMIS into your Platinum SQL General Ledger.
To set up iMIS for Platinum SQL
The setup steps from iMIS include making appropriate choices on the AR/Cash General Ledger Interface window and an optional step to establish a PLATINUMSQL General/Lookup Validation Table.
Step 1 – Change the GL Interface Type
- From AR/Cash, select Set up module, and click G/L Interface to open the AR/Cash General Ledger Interface window.
- Click Edit.
- From the GL interface type drop-down list, select Platinum SQL.
- Select an option from the Summarize by drop-down list.
- Enter the Output File Path/Name, which dictates how iMIS should name the export/import file and where it should be stored. The path should point to the IMDATA directory of the drive where the related Platinum SQL Server (PAS) resides. Furthermore, the export/import file must be assigned the name “glintdet.tab”.
- Click Save.
Step 2 – Set up a special PLATINUMSQL General Lookup/Validation Table
Create the Platinum lookup table. This step depends on whether you can use the iMIS default settings related to the Platinum company code and currency code. The default settings are to use the iMIS organization code for the Platinum company code and the literal “USD” for the currency code. If you need to use a different value for either the company code or the currency code, you must establish a PLATINUMSQL table and map the necessary codes to each iMIS organization code.
- From Customers, select Set up tables > General lookup/validation to open the General lookup/validation window.
- Select (New Table) from the list of table types. The New Table Type window opens.
- Enter a New Table named PLATINUMSQL and click Save.
- Insert a record for each iMIS organization code, filling in the organization code in the Code field.
- Enter the appropriate Platinum company code in the Expansion field and the currency code in the Description field. Be sure to enter non-blank values for both fields.
- Click Save.
To set up Platinum SQL
- The setup within Platinum SQL includes simple steps to establish processing options for both the Trial and Final Import processes. These instructions are saved in Configuration files.
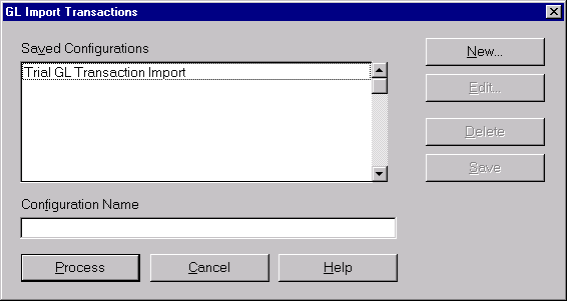
- From System Manager, select Import > GL Import > GL Transactions from the System Manager menu bar to open the GL Import Transaction window.
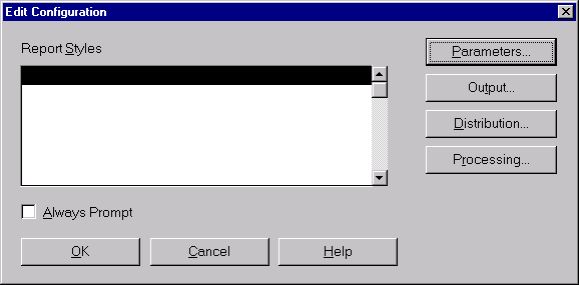
- Click New to create the Import. An Edit Configuration window opens.
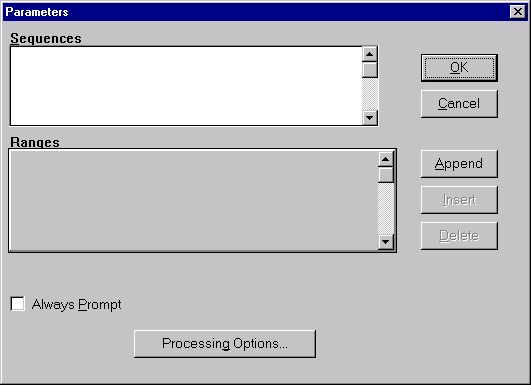
- From the Edit Configuration window, click the Parameters button.
- From the Parameters window, click the Processing Options window.
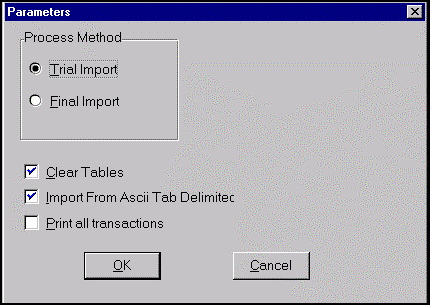
- On the Options (Parameters) window, click the Processing Options button to open the Parameters window.
- Set the Processing Method to Trial Import. This allows you to review the import report for errors prior to the final run.
- Enable the Clear Tables and Import From Ascii Tab Delimited options.
- Click OK.
- Click OK to close the main Parameters window.
- Optionally, click the Output, Distribution, and Processing buttons to change any default settings on those windows.
- Click OK on the Edit Configuration window.
- Enter an appropriate Configuration Name and click Save.
- If you have a sample set of export/import files, click the Process button to test. Otherwise, click Cancel.
- Repeat steps 1 through 9 to setup similar Configuration Instructions for the Final Import step. However, this time select the Final radio button within Processing Options in step 5.
To create the export file from iMIS (Platinum SQL)
- Generate the general ledger transaction export files using AR/Cash > Process month-end procedures > Create GL Journal.
To import data into Platinum SQL
- From System Manager, select Import > GL Import > GL Transactions from the System Manager menu bar to open the GL Import Transaction window.
- Highlight the appropriate Trial Import Configuration Name on the list and click Process.
- Once the import is complete, review the import report: report.out , which is located in the Winplt directory.
- If there are no errors reported, repeat steps 1 and 2, choosing the Final Import Configuration in step 2.
- If errors are recorded, analyze the results. In cases such as an incorrect or blank GL account, it may be easiest to correct the import file and repeat the process.
To view and post imported transactions
- Select Applications > General Ledger.
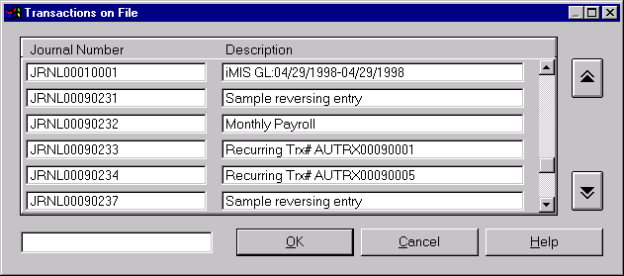
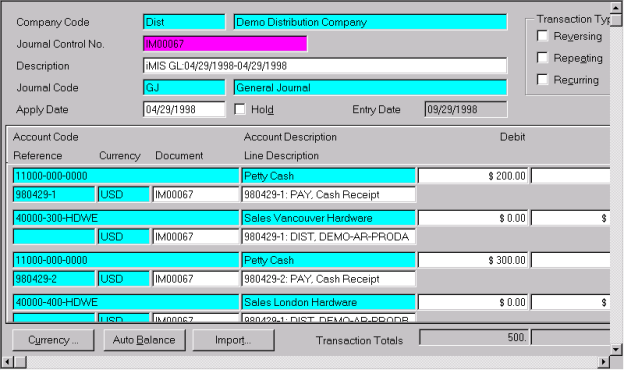
- View the transactions by choosing Processing > Standard Transactions > Transaction Entry.
- Tab to the Journal Control No field and press Ctrl+Z. Double-click the line that contains the iMIS description.
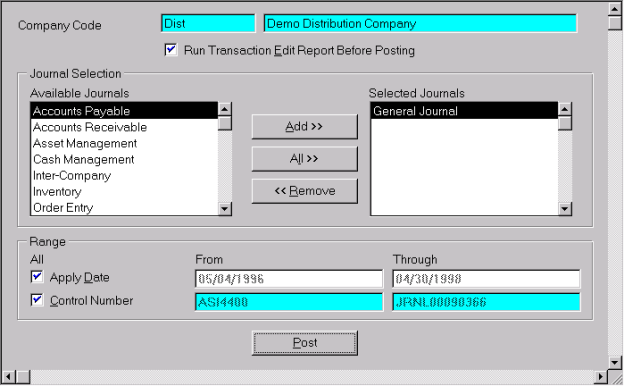
- To post the imported transaction, select Processing > Standard Transactions > Post Transactions.
- Optionally, enable the Run Transaction Edit Report Before Posting option.
- Click Post.
Export/Import File Example
Note: The GL Interface process creates two tab-delimited files, a single line header file (GLINTHDR.TAB), and a multi-line detail file (GLINTDET.TAB). The header file contains the transaction date to be assigned to the journal entry. The begin date within the interface date range is used for this purpose. The detail file contains one line for each debit or credit entry.
Note: As you enter general ledger account numbers in iMIS, you can include dashes to separate the various components within the account structure (i.e., 11000-000-0000). All dashes will be dealt with properly and removed as required in the export data that is generated.
Import Header File Sample
GJIM00067iMIS GL:01/31/2011-03/31/201105/31/201103/31/201100000DistUSDUSDIM00067005/31/2011
Import Data Sample
IM000671Dist110000000000110331-1: PAY, Cash ReceiptIM00067110331-1110331-1200.00200.00200.00USD1.01.0
IM000672Dist40000300HDWE110331-1: DIST, DEMO-AR-PRODAIM00067110331-1110331-1-200.00-200.00-200.00USD1.01.0
IM000673Dist110000000000110331-2: PAY, Cash ReceiptIM00067110331-2110331-2300.00300.00300.00USD1.01.0
IM000674Dist40000400HDWE110331-1: DIST, DEMO-AR-PRODBIM00067110331-2110331-2-300.00-300.00-300.00USD1.01.0