Example: Testing immediate authorization
This example tests SafePay connections using the command line test tool provided with the payment client. Check with your gateway provider for the latest testing tools and procedures.
- Ensure the service is running. Go to Start > Control Panel > Administrative Tools > Services.
- Look for Dialect PCService in the Service Console, and ensure that it is Started.
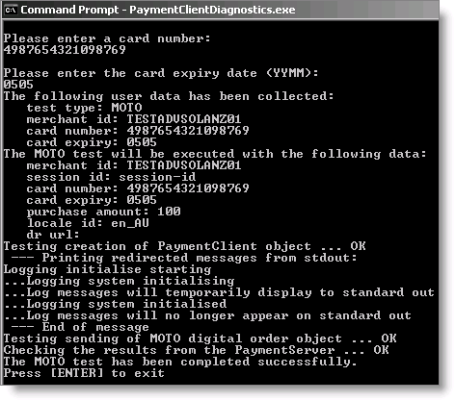
- Test connectivity by selecting Start > Programs > Dialect > PaymentClient > Test Payment Client. The Payment Client Diagnostics program retrieves and displays client configuration information and prompts you to enter transaction information.
- Select 1 for MOTO.
- Enter the Merchant ID provided with your account information.
- Select a credit card number or enter Z to enter another credit card number.
- Enter the credit card expiration date (format: YYMM). The diagnostic program tests the PaymentClient configuration and displays test results on the screen.

To set up a SafePay card authorization account
- In Desktop, go to AR/Cash > Set up module, and click Credit Card Auth. Click Credit Card Auth.
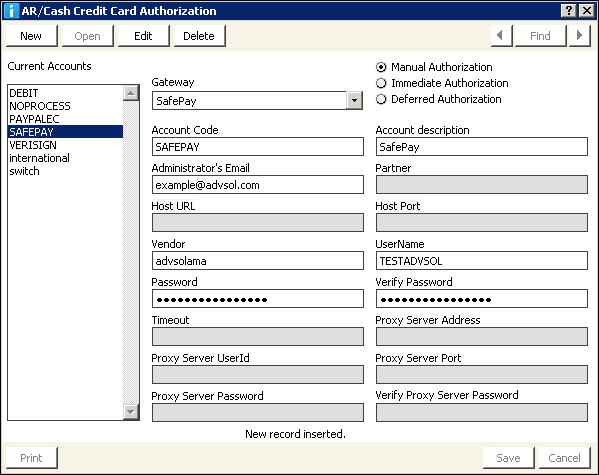
- Click New and select SafePay from the Gateway drop-down list.
- Enable the Manual Authorization, Immediate Authorization, or Deferred Authorization option.
- Enter an Account Code. This value displays in the Select a Value window that opens when you click the lookup icon on the CC Auth Account field on the Set up cash accounts window. This value cannot be changed once the record is saved.
- Enter a description for the account in the Account description field. If you enter a value in this field, it displays as read-only data under the CC Auth Account field on the Set up cash accounts window.
- Enter the Administrator’s Email.
- (optional) Enter the Merchant Administration login (username) you were given in the Vendor field.
- Enter the Merchant ID obtained during set up in the UserName field.
- Enter the Merchant Administration password you were given in the Password and Verify Password fields.
- Click Save.
- Restart iMIS.
Note: For Credit Card Auth to display, you need a relevant license, such as CCAuth or Service Central.
Note: When editing card authorization accounts, you cannot modify the values for the Gateway or Account Code field.
Note: When editing card authorization accounts, you cannot modify the values for the Gateway or Account Code field.

Note: If you do not restart iMIS after creating a new account, all transactions will have an authorize code of DEFER even if you enabled the Immediate Authorization option.
Note: You cannot delete a card authorization account that has been assigned a cash account.
Note: Transactions processed through QSI cannot be edited or deleted.
Note: If you change the CC Auth account for a cash account (from one gateway to another or to a different account on the same gateway) and attempt to edit or delete transactions that were created earlier in the day before the change of the CC Auth account, there may be undesirable results, particularly if the CC Auth account was changed to a VeriSign account.
To associate a card authorization account with a credit card cash account code
Before you can use card authorization you must set up credit card accounts on the Set up cash accounts window:
- In Desktop, go to AR/Cash > Set up tables > Cash accounts.
- Select a code to edit from the Current Cash Accounts list.
- Click Edit.
- Enter a CC Auth Account or click the lookup icon to select a value.
- Click Save.