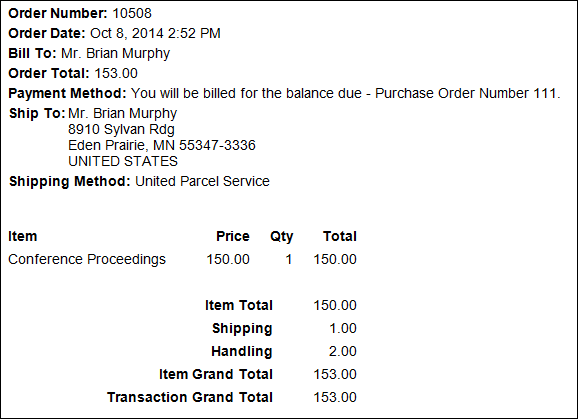
Set up the new Order confirmation template so that a tailored message is automatically delivered to the purchaser and other desired recipients.
To create a tailored Order confirmation template, you can choose either to start with a copy of the sample template or create a new template.
- Navigate to Marketing > Communication templates and select Templates > Samples in the Document Browser.
- Select the Order Confirmation template.
- Edit the template as needed, for example, insure that the From address is the correct email address.
- Click Save As and enter a Name for the template.
Note: Be sure to save your template to the Templates folder.
When copying the sample Order Confirmation template or creating a new template the following information must be configured in the template:
- The From address
- The To address defined as {#party.Email}
- Communication type = Billing
The body of the template can be comprised of an {orderdetailsblock} or an additional data source query that uses the {foreach} placeholder. See Composing the communication using the {foreach} placeholder for more information.
The {orderdetailsblock} is placed within the body. This placeholder will be replaced with a grid containing order details such as the order number, shipping address, item lines, and transaction totals.

Note: When previewing the Order Confirmation template on the Staff site, the {orderdetailsblock} will display an error. This error will not appear when an order confirmation sends.
Note: When resending an order confirmation, the CC and BCC addresses are ignored
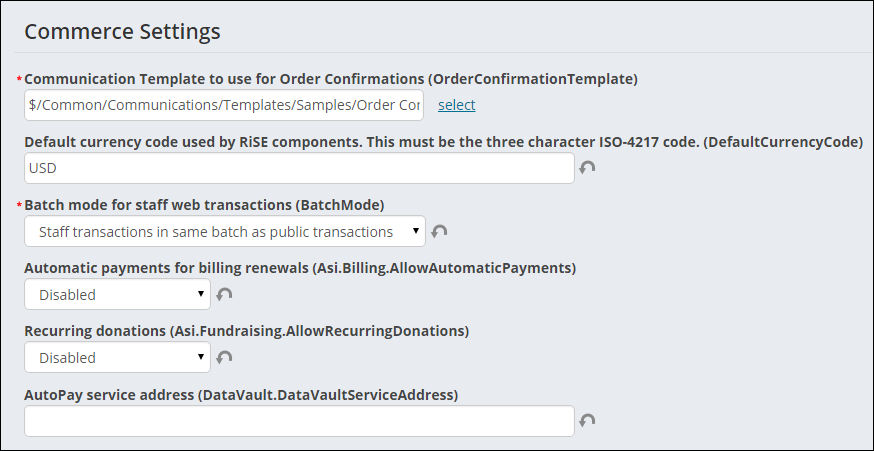
- On the Staff site, select Settings > Commerce > General.
- Specify the path for the communication template used for Order Confirmations, for example, $/Common/Communications/Templates/OrderConfirmation.

To modify the result of the {orderdetailsblock}, navigate to C:\AsiPlatform\Asi.Scheduler_website\Assets (or your default install drive) and locate the OrderConfirmationEmailTemplate.htm in the file system. If you alter this file, be sure to back up this file before upgrading in order to avoid the file being overwritten.
Note: If you are not self-hosted, you must contact your host for assistance.
You can use the following properties in your template:
General Order Information
- [OrderNumber]
- [OrderDate]
- [BillTo]
- [TransTotal]
- [PurchaseOrder]
- [PaymentMethod]
- [NameOnCard]
- [ShipTo]
- [ShipMethod]
Line Item Data
- [Quantity]
- [Item]
- [Price]
- [Total]
- [ItemTotal]
- [Shipping]
- [Handling]
- [TaxAmountsLabel]
- [TaxAmounts]
- [TaxTotal]
- [GrandTotal]
- [InvTotal]
- [TransTotal]
iMIS sends order confirmations to the email address that is specified in the Personal Details section of the contact’s account page (Name.Email).
If a contact does not receive a confirmation, check to make sure there is an email address listed.