Creating an export definition
The first step to export data with the Export Utility is to create the basic export definition. The export definition specifies and formats the data to be exported.
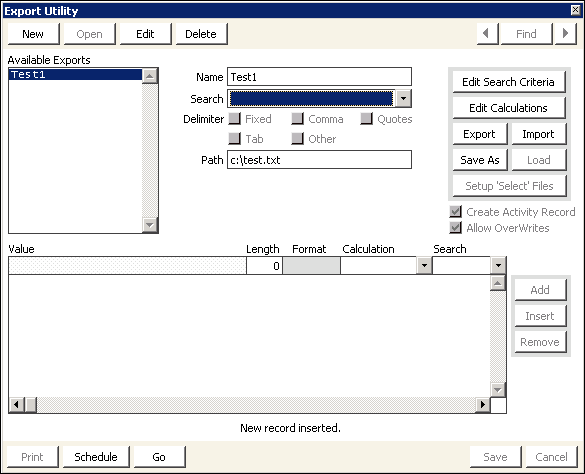
To create the export definition
- In the Advanced Accounting Console tool bar, go to Utilities > Data Transfer Utilities > Export Utility.
- Click New.
- Type a name for the export definition in the Name field.
- Select a Delimiter (character to be placed between fields):
- Fixed – no delimiter.
- Tab
- Comma
- Other – specifies other delimiter in a field that is displayed.
- Quotes – encloses text in double quotes. This is helpful if a comma delimiter is required and some text fields contain commas.
- (Optional) Select the Create Activity Record option to record each export record as a member activity in the iMIS database.
- Define the Path for the export file.
- (Optional) Select the Allow OverWrites option to allow the file to be overwritten each time the export is run.
- Click Save.
Note: The Quotes field displays only when a delimiter other than Fixed is selected.
Note: You can include an incremental sequence number in the name of the file by including a question mark in the name of the file. For example, if you enter c:\Temp\national?.txt, the file c:\Temp\national1.txt is created the first time you run the export, c:\Temp\national2.txt is created the second time you run the export, and so forth.
More:
Export Utility window