TNSPay
TNSPay (formerly SafePay) supports the following transactions:
- Credit card:
- single donation, membership, or product
Before you go live with card authorization, you must complete these implementation steps and checks. You will need a merchant account with TNSPay. As a developer, you will also need access to the TNSPay documentation and a test account with test card numbers. Make sure your test account credentials work properly.
A TNSPay Merchant account is configured for a specific payment processing model, either Authorization+Capture, or Purchase. You will need to know which payment model your Merchant account supports. iMIS supports the use of multiple TNSPay Merchant accounts in a single installation.
- Ensure you have set up card authorization in iMIS (see Setting up card authorization).
- Apply for a merchant bank account at a financial institution. The acquiring financial institution approves the application and notifies the TNSPay authorization gateway.
- Register with TNSPay and obtain a test account with a payment server URL, Merchant ID, Integration password, and login/password for the payment administration web interface.
- Verify your registration setup.
- Set up a TNSPay card authorization account.
- In Advanced Accounting Console, go to Finance > Options > Configure accounting options > Credit Card Auth.
- Click New and select a gateway from the Gateway drop-down list.
- Specify the authorization type: Manual Authorization (direct debits), Immediate Authorization (credit cards), or Deferred Authorization.
- Enter an Account Code. This value displays in the Select a Value window that is displayed when you use the lookup icon on the CC Auth Account field on the Cash accounts (Finance > Options > Set up tables > Cash accounts) setup page. This value cannot be changed once the record is saved.
- Enter an Account description, which will appear under the CC Auth Account field on the Set up cash accounts window.
- Enter a meaningful description for the authorization account in the Account description field. This information displays as read-only data on the CC Auth Account field on the Cash accounts setup page.
- Enter a Host URL. You will receive the Host URL from your gateway provider when you register.
You can use test Host URLs while testing your gateway to verify setup. This ensures a real financial transaction is not mistakenly processed during the testing. Some common live and test Host URLs include:
- Payflow Pro:
- Host URL (Test) -- pilot-payflowpro.paypal.com
- Host URL (Live) -- payflowpro.paypal.com
- iATS:
- North America (Test) -- www.iatspayments.com
- SecurePay:
- Credit card transactions:
- Host URL (Test) -- https://test.securepay.com.au/xmlapi/payment
- Host URL (Live) -- https://api.securepay.com.au/xmlapi/payment
- Direct debit transactions:
- Host URL (Test) -- http://test.securepay.com.au/xmlapi/directentry
- Host URL (Live) -- https://api.securepay.com.au/xmlapi/directentry
- Credit card transactions:
- Moneris:
- Host URL (Test) -- esqa.moneris.com
- Host URL (Live) -- www3.moneris.com
- TNSPay (Test) -- secure.na.tnspayments.com
Note: For the most up-to-date live and test Host URL information, contact your gateway provider or refer to your gateway provider documentation.
- Payflow Pro:
- (Moneris only) In the Vendor field, enter the Store ID you were provided by Moneris.
- Enter a UserName (this is the user name supplied by the gateway).
- Enter the Password you were given by the gateway provider during the sign-up process. Verify your password.
- Click Save.
- Recycle the AsiSchedulerPool:
- Open the IIS administrative utility. Go to Start > Administrative Tools > Internet Information Services (IIS) Manager.
- In the left navigation panel, go to Sites > Default Web Site. Select to view the Default Web Site Content by Content View.
- Select the Asi.Scheduler_ [your instance] application for the instance you installed.
- Do one of the following:
- Right-click and select Manage Application > Browse. An ASP.Net page will open.
- In the Actions pane, select Browse. An ASP.Net page will open.
- Close the browser. The Asi.Scheduler_ [your instance] service is now enabled.
- Associate a credit card cash account code.
- In the Advanced Accounting Console, go to Finance > Options > Set up tables > Cash accounts.
- Select a code to edit from the Current Cash Accounts list.
- Click Edit.
- Enter a CC Auth Account or click the lookup icon to select a value.
- Click Save.
- Manage TNSPay transactions.
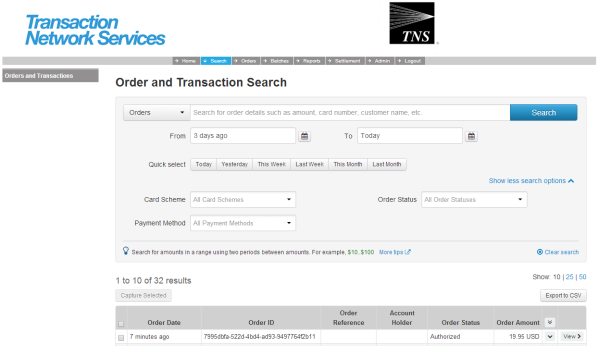
- Go to the merchant admin portal https://secure.na.tnspayments.com/ma.
- Enter your Merchant ID, Operator ID, and Password.
- Click Log In.
- Go to Search. A window similar to the following is displayed:
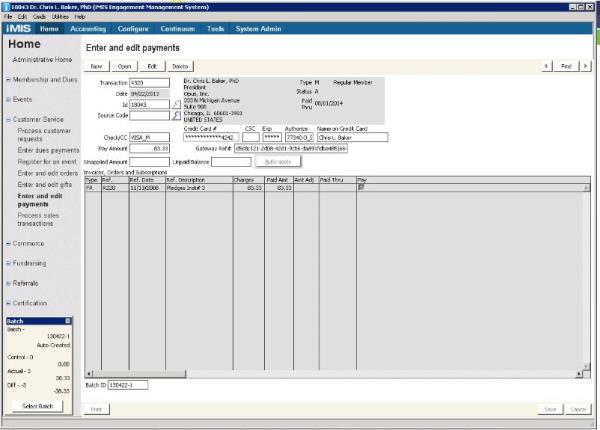
- TNSPay returns Authorization codes and Gateway Reference numbers as shown in the following image. The Gateway Reference can be used to match up against the Order Number on the TNSPay admin site.
- If TNSPay is not installed or is installed incorrectly (for example, if there is no CCAuthAcct row or Cash_Account row in the database), you will not see it as an available option in the Gateway drop-down.
- Other kinds of misconfigurations, such as using the wrong URL, will result in the following message:
- Create an ASITnsPayOCX.log file in the ASI/iMIS directory where the client is deployed. This log file will capture debugging information for TNSPay payment transactions.
- Process some additional transactions and reopen the log. Examine the log file for information about why the transactions failed.
- You cannot delete a card authorization account that has been assigned a cash account.
- If you change the CC Auth account for a cash account (from one gateway to another, or to a different account on the same gateway) and attempt to edit or delete transactions that were created earlier in the day before the change of the CC Auth account, there might be undesirable results, particularly if the CC Auth account was changed to a Payflow Pro account.
Enter gateway information through the Advanced Accounting Console. You can also set up multiple gateways in the Advanced Accounting Console. Do the following to set up a gateway authorization account:
Note: Once you save a card authorization account, you cannot change the Gateway field.
Note: When entering gateway information for iATS or SecurePay, you must use a pre-defined Account Code. For iATS, enter IATS. For SecurePay, enter SECUREPAY. These codes must match the entry in the web.config file. Read more information about modifying the web.config file for a gateway Account Code.
Note: Once you save a card authorization account, you cannot change the Account Code field.
For Moneris gateways, enter the API token (password) you were provided by Moneris.
Before you can use card authorization you must set up credit card cash accounts on the Set up cash accounts window:
Note: Regardless of the authorization/capture schema, iMIS creates all Trans entries for TNSPay-based transactions with the Trans.CC_Status column value C, in the same manner Payflow Pro.
Do the following to manage TNSPay transactions:
Click to view image
If TNSPay transactions are failing to process, it might be helpful for you to create a log file of them to test and debug:
Warning!
Once you’ve determined the reasons for the failure, remove the log file. If you don’t remove it, the log file will continue to grow in size with each transaction processed.


