Creating a subscription billing cycle
If you want members and website users to purchase subscription products, such as journals and magazines, separately from membership fees and subscriptions, you can create a billing cycle used exclusively for non-membership subscriptions. You can also use a subscription billing cycle to allow users to renew their existing subscriptions outside of the membership renewal process.
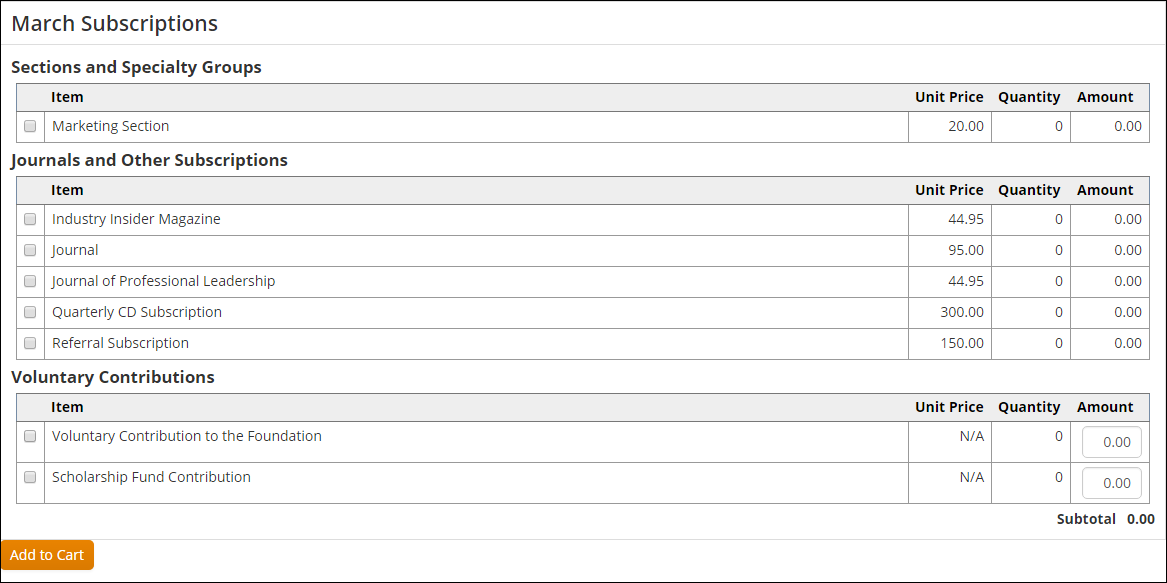
This billing cycle can be displayed as a multi-item product on your website. Users can select any included items in order to purchase or renew them. They can check out without altering any of their membership data and being billed for a membership join or renewal.
This billing cycle must not contain any primary dues product for any customer type or use the Add Member Type Items option.
- In the Staff site, go to Settings > Commerce > General.
- Select Enable non-dues subscription purchase and renewal (Asi.Billing.EnableNonDuesSubscription).
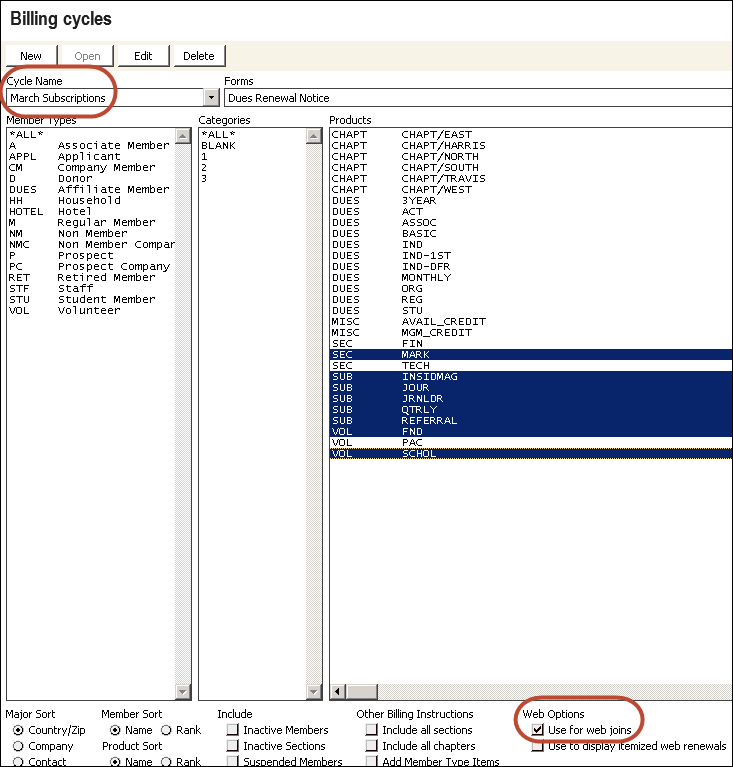
- In the Advanced Accounting Console, go to Settings > Billings > Billing cycles.
- Create a New cycle.
- Enter a Cycle Name.
- Select one or more customer types. Do not simply select All.
- In Web Options, select Use for web joins.
- Select the subscription Products that you want to include in the billing cycle. The products you select are not limited to subscription products. To select multiple products from the list, use [CTRL] + click for each selection.
- Select other options as needed.
- Save the billing cycle.
Note: Do not select Add Member Type Items and do not include a primary dues products (a product that is listed first in any customer type definition).
Note: See Setting up billing cycles for more information.
- In the Staff site, go to RiSE > Page Builder > Manage content.
- Create new content or open an existing content record.
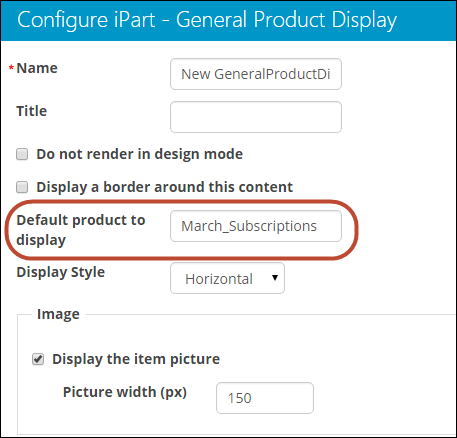
- Add a General Product Display content item (Offering folder) to the page.
- In the Default product to display field, enter the name of the subscription non-dues billing cycle (Cycle Name) created previously, replacing spaces with underscores. For more information about how the billing cycle is set up, see Creating a new billing cycle.
- Select other configuration options as needed.
- Click OK.
- Save and publish the page.
- To allow users to access the subscription non-dues billing cycle content, you can do one of the following:
- Create a new navigation item that links to the new content. See Using sitemaps for more information.
- Create a link within your site to the new content. For example, you can insert links to content in the Data Showcase and Content HTML content items.
- For renewals, send subscribers a link to the content in an email.
Note: If you also bill other members using a cash-based Membership dues billing cycle, you should not run a renewal billing for these subscription billings. Instead, simply provide members with a link to access the content, and let them add the item to their cart. Upon payment, their subscription records will be updated to extend the paid through date accordingly.


