Warning! Self-hosted DataVaults are no longer supported. See Purchasing an AutoPay license for details.
Providing a secure method for processing payments ensures confidence when your customers visit your website. The PCI Security Standards Council has established security standards called PCI DSS (Payment Card Industry Data Security Standards) or PCI Compliance. PCI Compliance increases customer confidence when entering credit card or bank account information on your website and has quickly become the industry standard for merchants. If you do not meet PCI Compliance standards and your customers’ payment data is compromised, the payment card brands can fine or penalize you or even revoke your right to accept their payment card.
Customers can choose to self-host the DataVault, or if ASI already hosts their iMIS application server, ASI can also host the DataVault.
The iMIS DataVault provides an effective solution for securing payment information. The DataVault is a tokenization engine that supports processing of credit card and bank account payments while maintaining PCI compliance. Since the payment information is not stored in iMIS, PCI Compliance responsibilities are mitigated, but not released. You are still responsible for ensuring your organization meets PCI Compliance requirements.
The DataVault is also used for iMIS installations licensed for AutoPay. After configuring iMIS for automatic payments, a member or donor can automatically renew their membership fees or setup recurring donations using a credit card or bank account that is securely stored in the DataVault.
Note: The DataVault is backward compatible. You can upgrade the DataVault when a new version becomes available.
However, when upgrading iMIS (including for Service Packs), the DataVault must be upgraded to the correct version of DataVault that corresponds to the new version of iMIS. Because the DataVault is backward compatible, upgrade the DataVault before upgrading iMIS.
Using the DataVault to process payments offers a variety of benefits for your organization:
- DataVault works seamlessly with iMIS AutoPay, making it easy for you to offer secure automatic payment options to your members and donors.
- Automatic payment processing within iMIS uses the token created by the DataVault as a surrogate for the payment information. The token cannot be associated with the credit card or bank account, ensuring the security of your members’ and donors’ financial information.
- The DataVault is PCI-compliant. Since the payment information is not stored in iMIS, your iMIS database is not required to be PCI-compliant, eliminating needless expense and complexity for your organization.
- Organization staff will save essential time as they will no longer need to manually enter credit card numbers for recurring payments each time the payment is due.
Note: Since the payment information is not stored in iMIS, PCI Compliance responsibilities are mitigated, but not released. You are still responsible for ensuring your organization meets PCI Compliance requirements.
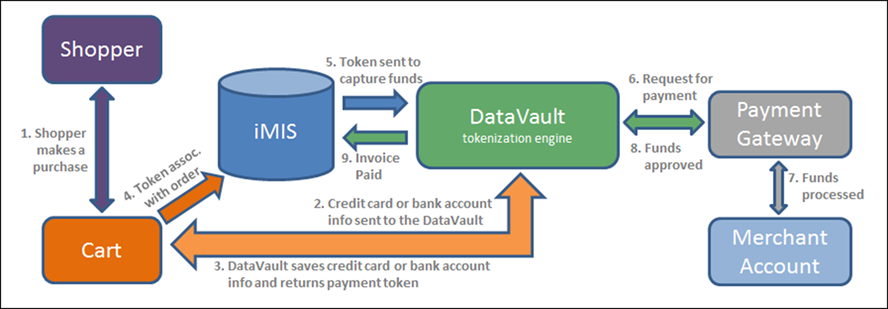
The DataVault acts as a secure pass-through between iMIS and the Payment Gateway (for example, Payflow Pro or iATS). When a user sets up an automatic payment, the DataVault generates a token to represent the user’s credit card number or bank account details. Sensitive payment information remains safely stored in the DataVault while iMIS uses the token to process the transaction.
If iMIS is licensed for AutoPay, a member or donor can set up their membership fee or donation to be automatically processed on a recurring basis. iMIS and the DataVault begin to interact when a member or donor chooses to use automatic membership renewals or recurring donations:
- The user adds the membership fee or donation item to their cart.
- When the user submits credit card or bank account information for payment in the cart, iMIS sends the encrypted payment information to the DataVault.
- The DataVault saves the payment information and sends a payment token to iMIS for use with future payments.
- The token now acts as a surrogate for the payment information within iMIS.
- The staff user sends the invoice, along with the token to be used to pay for the invoice, to the DataVault to be processed.
- The DataVault matches the token to the payment details and sends them along with the payment request to the gateway.
- The payment gateway interacts with the merchant account to determine if payment is approved or declined.
- The payment gateway sends the merchant account’s response to the DataVault.
- DataVault associates the response information with the token and sends the information to iMIS. If the transaction was approved, iMIS uses the token to process the payment and shows the invoice as paid.
iMIS 20-300 customers who self-host their iMIS application must host their own DataVault server.
iMIS 20-300 customers, whose iMIS application server is already hosted by ASI, can elect to do one of the following:
- Self-host their DataVault
- Have ASI host their DataVault
Note: ASI hosts the DataVault for all iMIS 20-100 and iMIS 20-200 customers.
Customers who self-host the DataVault will need to meet the system requirements and follow the installation instructions described in the iMIS DataVault installation section of this document. A number of reports are also available for self-hosted customers.
When customers choose to use the ASI-hosted DataVault, ASI provides the system requirements and installs the utility.
iMIS architecture is made up of a single database server, one or more application servers (appservers), and two types of clients (a Windows application and a web application), which run on typical workstations. These requirements apply across database servers, appservers, and workstations. Web clients only need to meet requirements for displays and browsers.
Note: The DataVault has all of the same requirements as iMIS and includes several additional requirements. For more information about iMIS system requirements, see the most up-to-date version of the iMIS Installation Guide.
Note: The DataVault is versioned. It is vital that you check to see if you need to update your DataVault any time you update iMIS.
Note: TCP port 1433 and TCP port 1434 must be open in order to communicate to the SQL server. If these ports are not open, the install will fail.
Do the following to install the DataVault:
- Contact ASI Tech Support for the most recent version of the ASI DataVault Installer.
- Run the Setup.exe file to initiate the installation. Follow the installation wizard.
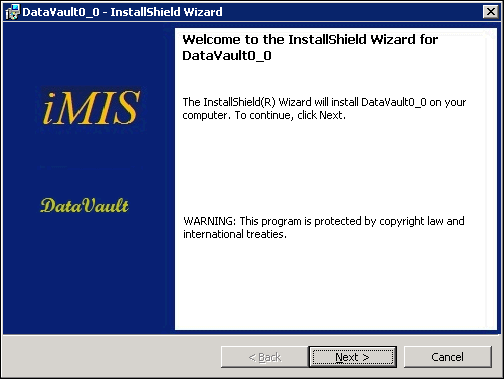
- At the InstallShield Welcome screen, click Next.
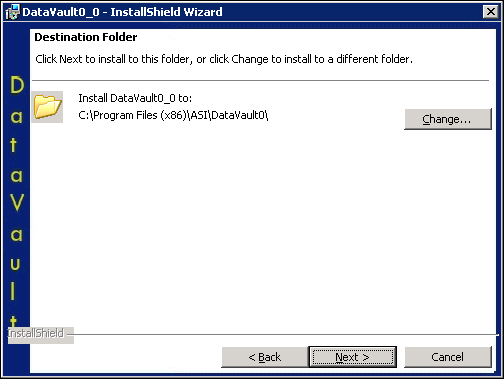
- Select your default installation folder.
- Click Next.
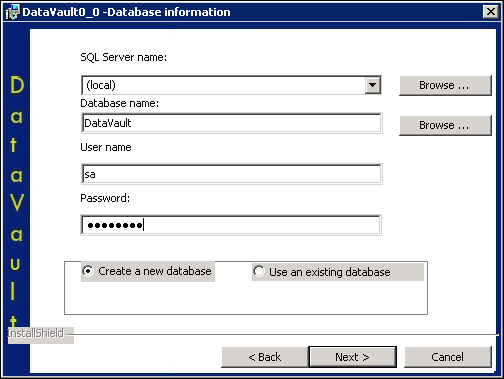
- Provide your database information.
- SQL Server name – To determine this information, open MS SQL Server and locate the server it is trying to connect to. Copy the server name into this field.
- Database name – Choose a name for your DataVault database.
- User name – Enter your SQL server login.
- Password – Enter your SQL server password.
- Select the Create a new database radio button.
Note: DataVault database names must not contain hyphens.
- Click Next.
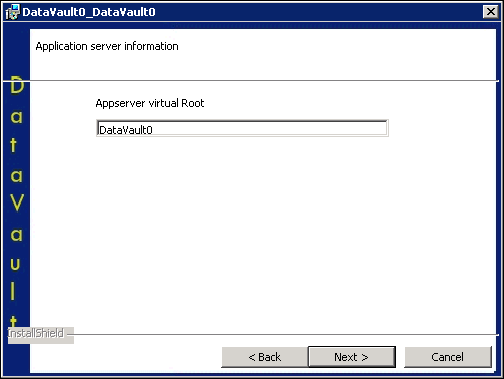
- Choose a location for your Appserver virtual Root.
- Click Next.
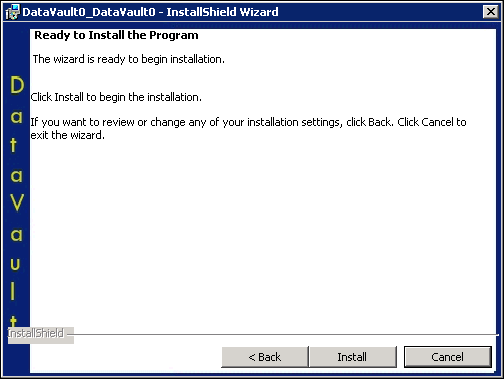
- Click Install.
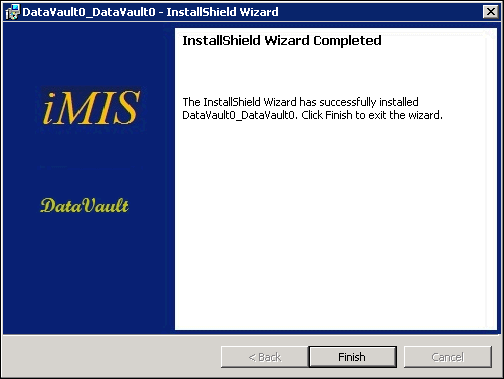
- When the DataVault is installed, you will see the following window:
- Click Finish.
Note: Each instance of DataVault is supported with a particular release of iMIS.
- Open Internet Information Services (IIS) Manager from your workstation’s administrative tools.
- Locate your newly installed [Your Site Name] website.
- In the Manage Application area, click Browse *:443 (https).
- Verify your new DataVault database was installed. Locate the new DataVault database in MS SQL Server Management Studio. By default, the database is located at ~/Databases/[Your_DataVault_Name].
Note: This website is located under ~/Sites/Default Web Site/[Your Site Name].
This takes you to the default [Your Site Name] DataVault web service home page.
Note: You must use the Browse *:443 (https) option to access the DataVault web service home page. DataVault requires a security certificate.
Note: Copy the DataVault Service URL. You will use this information to connect the DataVault to iMIS.
You can also verify the DataVault database was installed by reviewing https://datavault.asiops.com/DataVault1/api/status on your workstation.
Note: DataVault database names must not contain hyphens.
Depending on the browser used, a status message is shown:

Other browsers might ask you to download a file with the result.
In order to connect the DataVault to iMIS, you must enter the service address in the iMIS web configuration. Additionally, you must configure an automatic payment gateway in order to successfully complete the configuration of the DataVault.
- Locate the DataVault Service URL. For example, the address will look like the following:
- On the Staff site, go to Settings > Finance > General.
- Locate DataVault service address (DataVault.DataVaultServiceAddress) and paste the DataVault Service URL copied in step 1, edited to reference the machine where the DataVault is installed.
- Click Save.
https://localhost/DataVault0
Note: Important! You must edit the address to replace localhost with the name of the server on which you have installed the DataVault.
For example, if the machine where the DataVault is installed is named DVServer1, you would change the address to the following:https://DVServer1/DataVault0
Please follow the following installation-related requirements to ensure PCI Compliance.
- The DataVault database must not be installed on a server in the DMZ (Demilitarized Zone).
- If the DataVault’s SQL server is on the same server as the IMIS SQL server, they must be separate instances of SQL, so the System Administrator password of the iMIS SQL instance cannot access the DataVault SQL instance.
- Access to the DataVault database must not be through the System Administrator ID. Access should be granted to a different User ID with System Administrator privileges.
- The user ID and password with System Administrator privileges in SQL must not be in plain text in the web.config file. For more information about encrypting this portion of the web.config file, see How to: Secure Connection Strings When Using Data Source Controls.
Note: To ensure PCI compliance, a Staff site session must lock after 15 minutes of inactivity and require users to re-enter their username and password to re-access the site. To meet this requirement, staff users can set their computers to lock and to display the screen saver automatically after 15 minutes of inactivity and, when activity resumes, to display the Windows logon screen, requiring username and password re-entry.
Key management is the management of the secret keys iMIS uses to encrypt data.
Note: Event logs for DataVault are available in the Event Viewer under ASI-PCI-DataVault.
You can choose from the following key management processes to administer to the security of your encrypted data:
You can run the RotateKeyEncryptionKey process to rotate the key-encrypting keys and generate a new key-encrypting key file. This process can be run on-demand, or it can be run on a schedule. Enter the following command at a command prompt:
cd C:\Program Files (x86)\ASI\[DataVault_server_name]\net\bin
DataVault.KeyManagerConsoleService.exe RotateKeyEncryptionKey
This process rotates the key-encrypting keys and generates a new key-encrypting key file.
You can run the RotateGatewayKey process to rotate gateway encryption keys. This process can be run on-demand, or it can be run on a schedule. Enter the following command at a command prompt:
cd C:\Program Files (x86)\ASI\[DataVault_server_name]\net\bin
DataVault.KeyManagerConsoleService.exe RotateGatewayKey
This process rotates the gateway encryption key and re-encrypts existing gateway passwords.
You can run the RotateKey process to replace the secret key that is used to encrypt data. Enter the following command at a command prompt:
cd C:\Program Files (x86)\ASI\[DataVault_server_name]\net\bin
DataVault.KeyManagerConsoleService.exe RotateKey
This process sets the current CurrentKey to PreviousKey and creates a new CurrentKey.
You can run the ReEncrypt process to re-encrypt secret keys at any time if any of the keys are compromised. This process can be run on-demand, or it can be run on a schedule. Enter the following command at a command prompt:
cd C:\Program Files (x86)\ASI\[DataVault_server_name]\net\bin
DataVault.KeyManagerConsoleService.exe ReEncrypt
This process finds all payment methods and re-encrypts them. To ensure all payment methods are not encrypted using the same key, the ReEncrypt process iterates through and re-encrypts one encryption key at a time. The ReEncrypt process calls the RotateKey process, which generates a new CurrentKey before it re-encrypts each group of payment methods.
You can run the MaintainOldKeys process to delete old encryption keys. This process can be run on-demand, or it can be run on a schedule. Enter the following command at a command prompt:
cd C:\Program Files (x86)\ASI\[DataVault_server_name]\net\bin
DataVault.KeyManagerConsoleService.exe MaintainOldKeys
This process does the following:
- Disables encryption keys that have not been used for a specified period of time (default is 30 days), and sets their status to Inactive.
- Finds encryption keys that have been deactivated; encryption keys that have been deactivated for a specified period of time (default is 30 days) are deleted.
You can run the ResetAll process to reset all keys. This process calls all other key management processes. Enter the following command at a command prompt:
cd C:\Program Files (x86)\ASI\[DataVault_server_name]\net\bin
DataVault.KeyManagerConsoleService.exe ResetAll
This process will perform the following:
- Rotates the key-encrypting key and generates a new key-encrypting key file (calls RotateKeyEncryptionKey).
- Rotates the gateway encryption key and re-encrypts existing gateway passwords (calls RotateGatewayKey).
- Replaces the existing secret key used for encryption with a new secret key (calls RotateKey).
- Decrypts data with an old key, then re-encrypts the data with a new key (calls ReEncryptAll)
- Finds all secret keys that have not been used for a specified period of time (the current default is 30 days), then sets their status to Inactive (calls MaintainOldKeys). Also finds encryption keys that have been deactivated; encryption keys that have been deactivated for a specified period of time (default is 30 days) are deleted.
