Last updated on: May 26, 2026
After an upgrade from iMIS 2017 to iMIS EMS, you may notice your account pages do not conform to the layout of the new out-of-the-box account pages. For example, the updated account pages have the tabs aligned to the left, a large horizontal banner that contains an Actions button, and the image cropped to a circle.
The upgrade does not automatically change your custom account pages to resemble the new account page layouts.
In This Article
- Updating the account pages to use the new layout
Adding new tabs to account pages
Customizing the properties that display in the Account Page Summary (banner)
Using the out-of-the-box content records
Updating the account pages to use the new layout
To keep your custom content records but update the layout to match the new out-of-the-box layout for account pages, do the following:
- Navigate to an account page that you want to change the layout for.
- Enable Easy Edit, then select Open in Content Designer.
- Click the Properties tab:
- In the Page container CSS class field, remove any existing classes and add the following class: account-banner-bg-color-mps-1
 Click for details
Alternatively, the following classes are also available.
Note: Only one class can be used at a time.
Table 1: Class names and related colors Class to enter in the 'Page contain CSS class' field Hex code account-banner-bg-color-1 #ffffff account-banner-bg-color-2 #413d6b account-banner-bg-color-3 #6b458f account-banner-bg-color-4 #9b4c81 account-banner-bg-color-5 #ca4d48 account-banner-bg-color-red #d03528 account-banner-bg-color-orange #e98300 account-banner-bg-color-yellow #e8d92d account-banner-bg-color-green #68bd49 account-banner-bg-color-blue #00a9e0 account-banner-bg-color-purple #413d6b account-banner-bg-color-mps-1 #007fa8
- In the Page container CSS class field, remove any existing classes and add the following class: account-banner-bg-color-mps-1
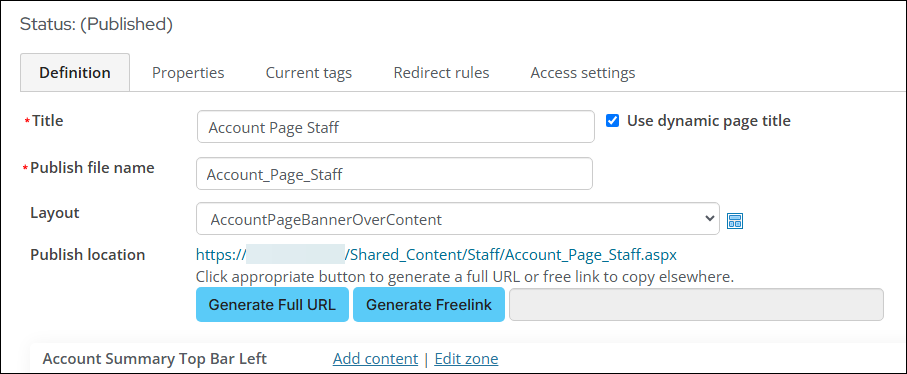
- Click the Definition tab:
- Update the page layout and other components:
- Layout drop-down: AccountPageBannerOverContent
- Move the Mini Profileto the Account Summary Bottom Left zone.
- Move the Alert Display to the Account Summary Bottom Right zone.
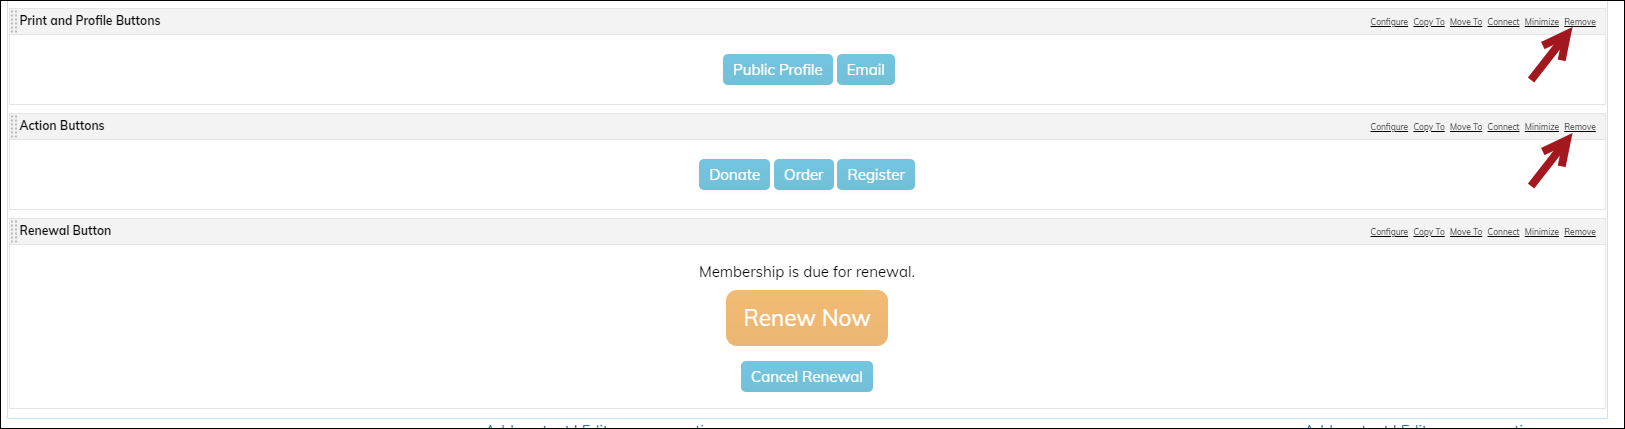
- Move the Renew Now button to the Account Summary Top Bar Left zone. The out-of-the-box account pages do not display the Cancel Renewal button from the account page banner. To copy this behavior, select Configure on the Renewal Button, then deselect Enable staff to cancel a renewal.
- If your account page has the Print and Profile and Action Buttons, select the Remove link to remove them from the page. You will add a new Action button to the page later in these steps.
- Configure the existing content:
- From the Mini Profile, select Configure and update the following:
- CSS class: Delete any defined classes
- Display style: Large banner
- Image size ratio: Crop to circle
- Disable all options under the Status section. These options are displayed using a customizable query on the new account pages.
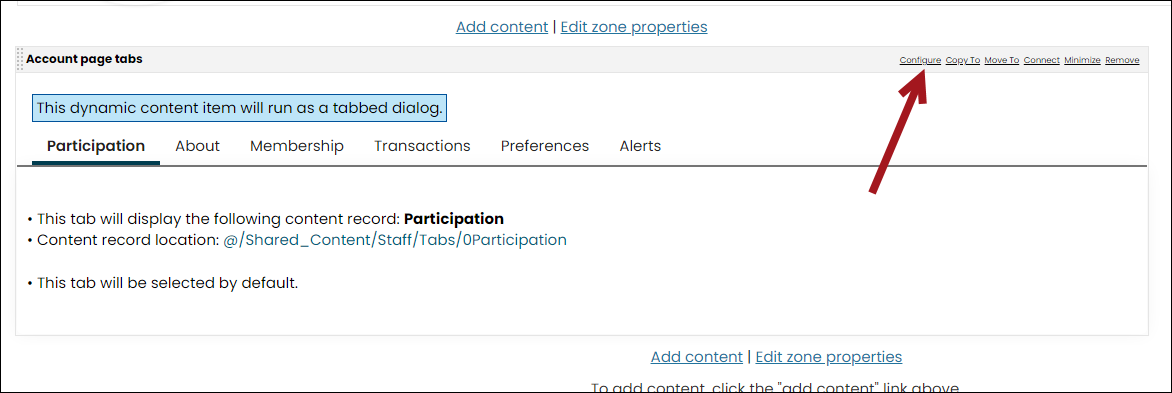
- From the Account page tabs, select Configure and update the Tab display style to Vertical left.
- Update the page layout and other components:
- Save all changes.
- Navigate to the following location: @/iCore/Contacts/ContactLayouts
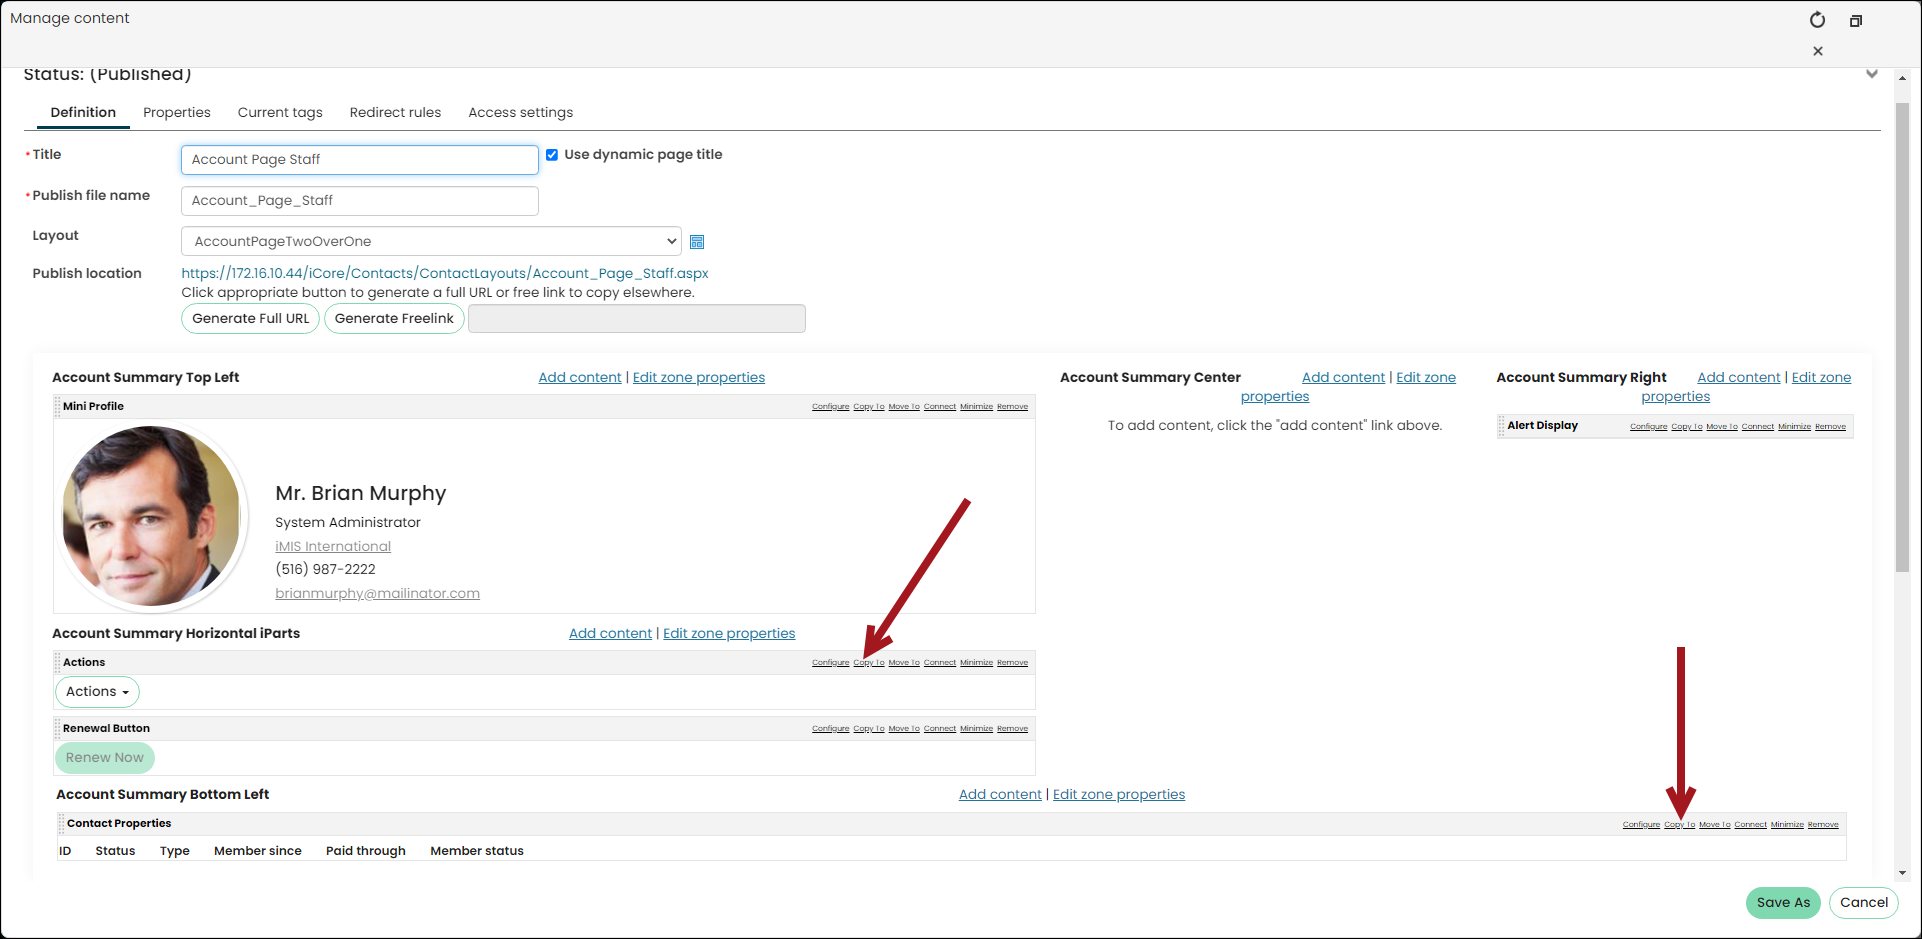
- Double-click the Account Page Staff content record:
- Locate the Actions content, and select the Copy To link.
- Locate your custom account page, then click OK. A display message appears, notifying you the web part was successfully copied.
- Locate the Contact Properties, then select the Copy To link.
- Locate your custom account page, then click OK. A display message appears, notifying you the web part was successfully copied.
- Navigate back to your custom account page.
- Move the Actions content to be at the top of the Account Summary Top Bar Left zone.
- Move the Contact Properties content to the Account Summary Top Bar Right zone.
- Click Save & Publish.
- (optional) The content items on the out-of-the-box account pages do not contain borders (Display a border around this content is disabled for each content item). To match the same styling, you must remove the border from each content item on the account page.
Adding new tabs to account pages
There are several new tabs included in the out-of-the-box account pages. It is recommended that these tabs are added, so you have access to the latest content. To add these tabs, do the following:
- Go to RiSE > Page Builder > Manage content.
- Navigate through the following folder path: @/iCore/Contacts/ContactLayouts/Staff/Tabs
- Copy the following content records:
- Membership
- Transactions
- Overview
- Security
- Paste the content records in the same location as your custom account page tabs. The recommended location is: @/Shared_Content/Staff/Tabs
- Publish the content records.
Customizing the properties that display in the Account Page Summary (banner)
The out-of-the-box account pages use a query to display the contact properties in the banner.

Do the following to customize the query to display different contact properties:
- Go to RiSE > Intelligent Query Architect.
- Navigate through the following path: $/ContactManagement/DefaultSystem/Queries/Advanced/Contact
- Copy the Account page banner query and Paste it in the desired location.
- Open the copied query and make the desired changes.
- Click Save.
- Open the Account Page Staff content record for edit.
- From the Contact Properties content, select Configure.
- From Select an IQA query, choose the query you modified.
- Click OK, then click Save & Publish.
Using the out-of-the-box content records
To use the out-of-the-box contact account pages, do the following:
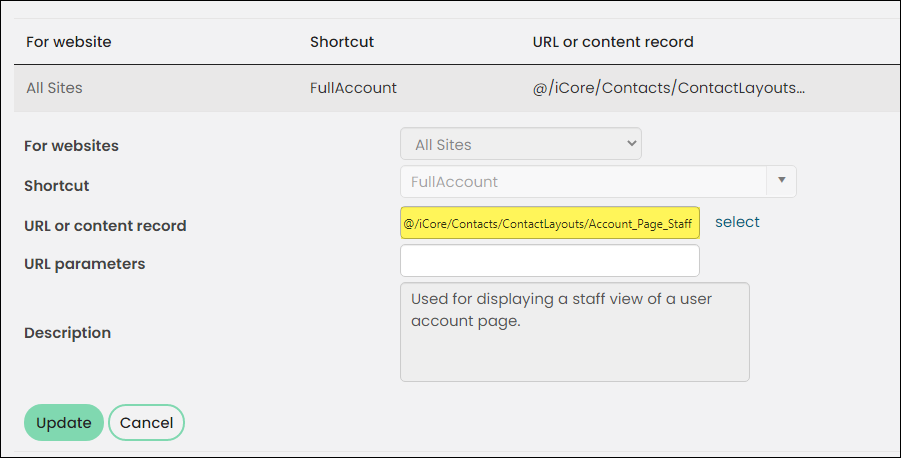
- Go to RiSE > Site Builder > Manage shortcuts.
- In the Shortcut contains field, enter FullAccount.
- Select the edit icon for the All Sites - FullAccount shortcut.
- In the URL or content record field, enter @/iCore/Contacts/ContactLayouts/Account_Page_Staff.
- Click Update.
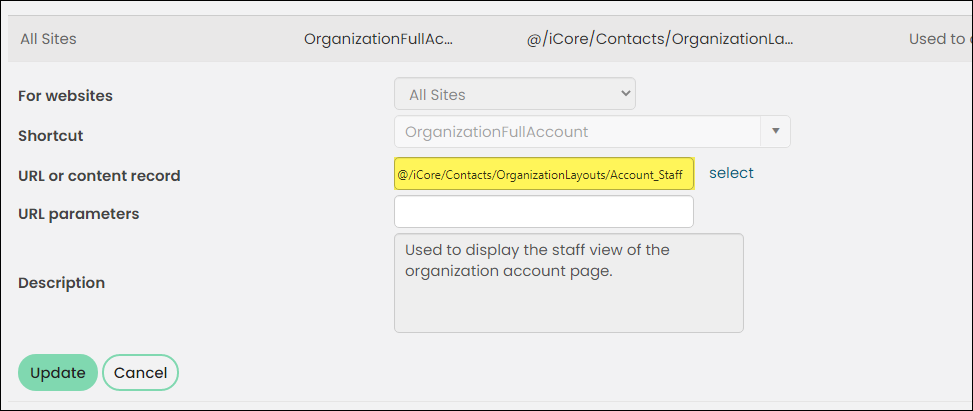
- (optional) If you are working with custom organization contact account pages, do the following:
- Select the edit icon for the All Sites - OrganizationFullAccount shortcut.
- In the URL or content record field, enter @/iCore/Contacts/OrganizationLayouts/Account_Staff.
- Click Update.
- Go to Settings > About iMIS, then click Purge System Cache.
- Navigate to a contact account page and confirm the updated layout.
To learn more about account pages, see Understanding and modifying account pages.