Last updated on: January 27, 2026
With the Workbook Converter, you can import standalone panels. This article details how to prepare the workbook data for standalone panels.
Example: You have a spreadsheet that contains past field trip history, such as the trip name, location, date, and notes. The field trip historical information needs to be imported into iMIS.
In This Article
Creating the standalone panel definition
Do the following to create the standalone panel definition worksheet:
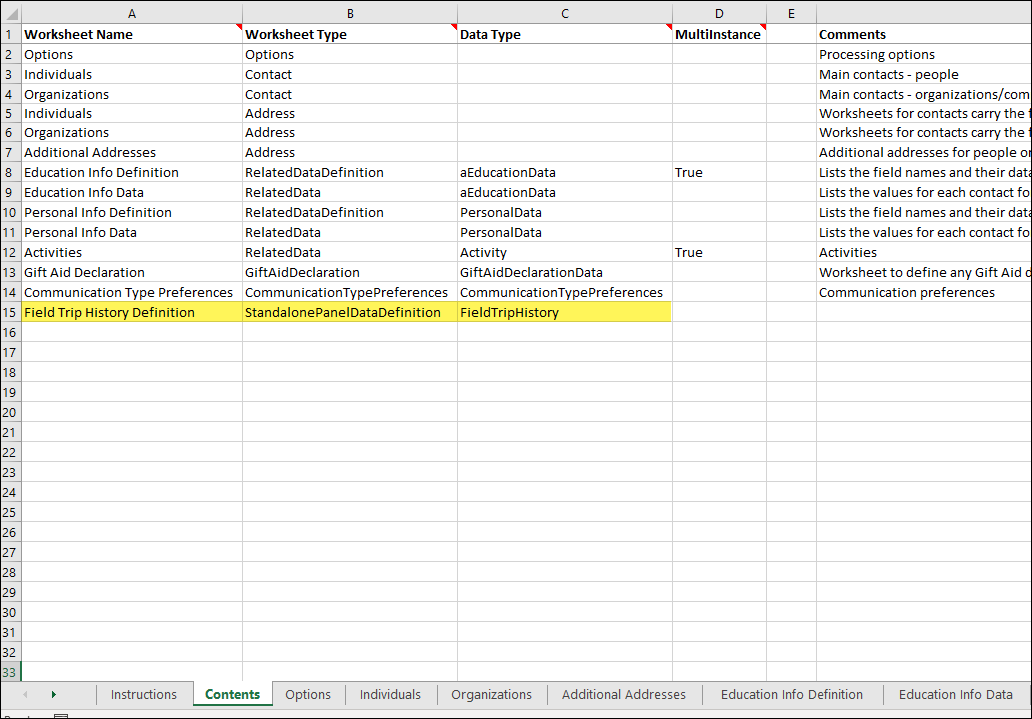
- From the Workbook Converter's Contents tab, enter the following:
- Worksheet Name: Name of the worksheet for the standalone source definition. For example, if you are importing field trip history, define the Worksheet Name as Field Trip History Definition.
- Worksheet Type: StandalonePanelDataDefinition.
- Data Type: Name of the table, business object, and panel source that will be created. For example, entering FieldTripHistory will create a new table, business object, and panel source named FieldTripHistory.

- Create a new sheet within the workbook for the standalone source definition:
- From the bottom of the workbook, click the + icon to add a new sheet.
- Label the sheet with the name you entered in the Worksheet Name field (Field Trip History Definition).
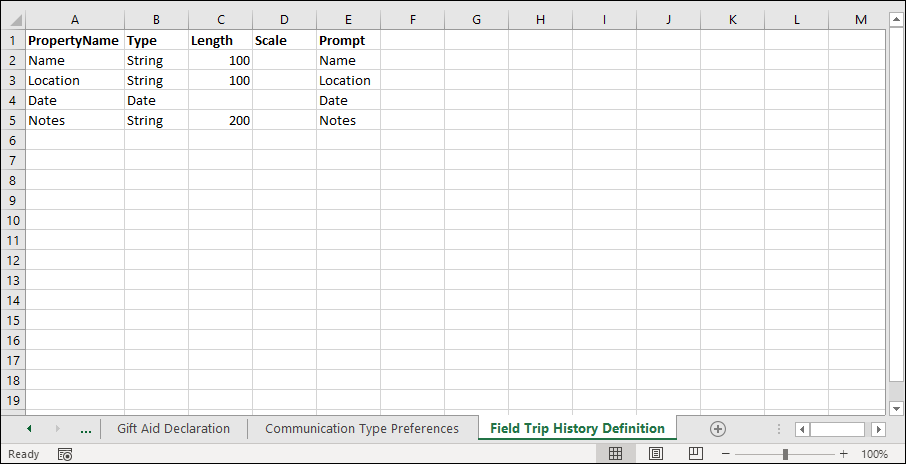
- The definition worksheet is where you define which fields are used in the associated data worksheet (to be created in the following steps). From the new definition worksheet, enter the following column header properties:
- PropertyName
- Type
- Length
- Scale
- Prompt
- Enter the data for the properties:
- PropertyName - Enter the properties that will define the new standalone panel. For example, if the standalone panel you are importing has a column header of Name, Location, Date, and Notes, enter those four properties in the PropertyName row.
- Type - Valid values include: Int, Checkbox, Date, DateTime, Money, Number, or String.
- Length - Only used when the Type is String. Enter the maximum allowed string length.
- Scale - Enter the number of decimal places for any data types where applicable. The maximum value is 12.
- Prompt - Enter the text to be used as a label or prompt for this property.

Creating the standalone panel data
Do the following to create the standalone panel data worksheet:
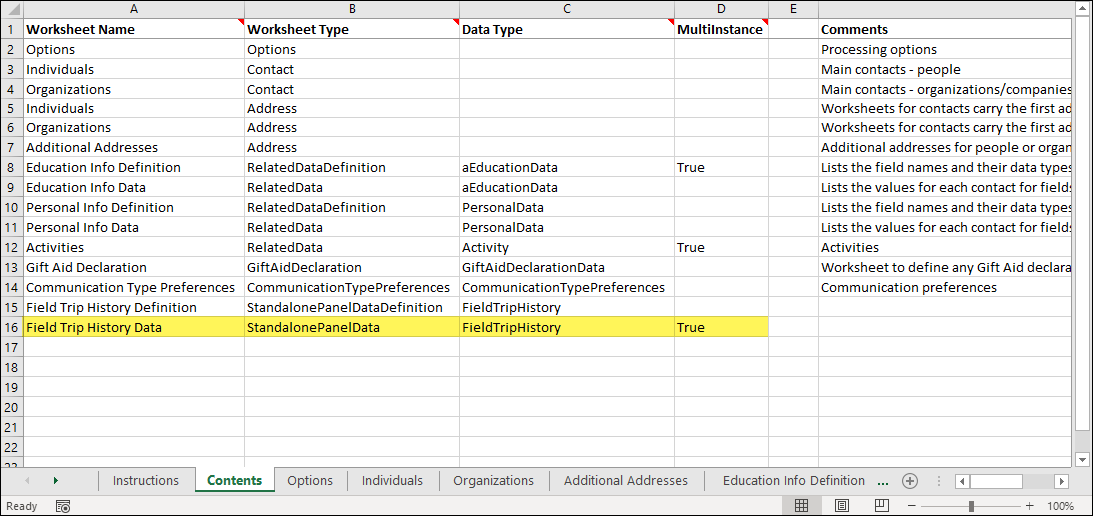
- From the Workbook Converter's Contents tab, enter the following:
- Worksheet Name: Name of the worksheet for the standalone source data. For example, if you are importing field trip history, define the Worksheet Name as Field Trip History Data.
- Worksheet Type: StandalonePanelData.
- Data Type: Name of the table, business object, and panel source that will be created. For example, entering FieldTripHistory will create a new table, business object, and panel source named FieldTripHistory.
- MultiInstance: True.

- Create a new sheet within the workbook for the standalone panel data:
- From the bottom of the workbook, click the + icon to add a new sheet.
- Label the sheet with the name you entered in the Worksheet Name field (Field Trip History Data). The data worksheet is where you define which data is to be imported into the standalone panel.
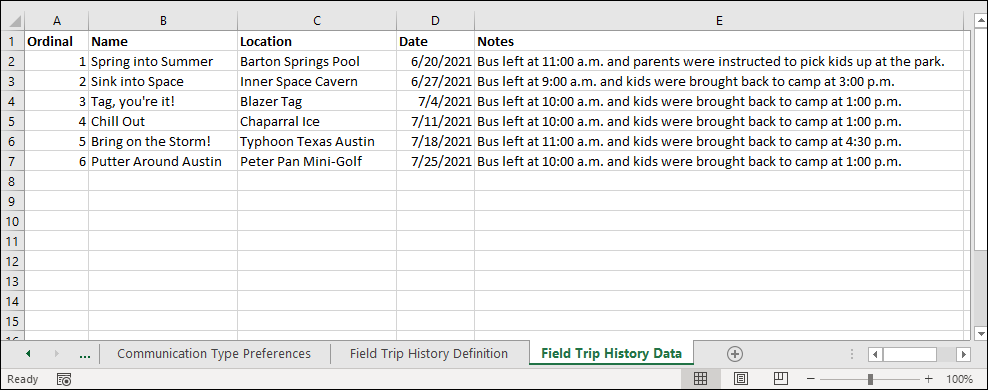
- (required) From the new data worksheet, enter Ordinal for the first (A) column. It is required that Ordinal is the first property in the data worksheet.
- The remaining column headers must match the properties you entered in the definition worksheet's PropertyName row. For example, Name, Location, Date, and Notes.

- Continue creating standalone definition and data worksheets as needed.
- See Importing the workbook data for the next steps on importing the standalone panel information into iMIS.