Last updated on: January 27, 2026
The following are frequently asked questions and recommendations regarding the Workbook Converter:
Can I run the Workbook Converter in a production environment?
Yes, please review Using the Workbook Converter before running a conversion in a production environment. Consider the following before running the Workbook Converter in a production environment:
- Schedule imports during off-peak times for more efficiency. Imports must be performed after business hours or during the weekend.
- In order to minimize the impact to production sites, limit contact and data imports to around 1,000 contacts at a time. Importing larger batches of contacts to a production system will adversely affect performance and reliability.
- Before running the Workbook Converter, make sure you note the date and time. If the import fails when running in Live mode, the database will need to be restored by hosting. Having the date and time will help hosting know how far back the database needs to be restored.
- When importing, be sure you know the website (URL) and enter https:// before the website name.
The following are recommended to improve performance:
- Enable the UseMultitasking option when running an import. If it is not defined in the Workbooks > Option sheet, then it is set to FALSE by default. For best performance it should be set to TRUE when importing.
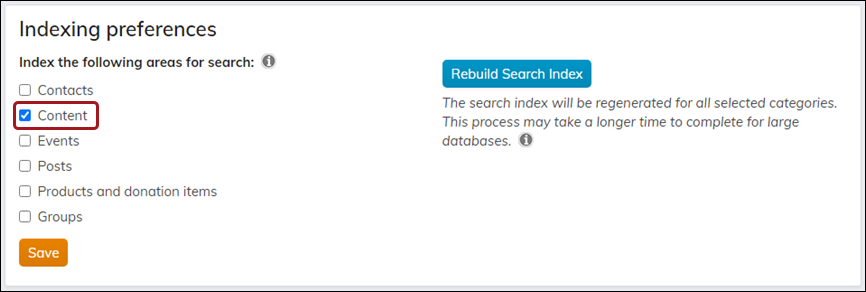
- Before starting a live import, disable all available index areas in Indexing preferences (Settings > RiSE > Indexing). Click Save.
- Refer to the following for approximate Workbook Conversion import processing times:


| Contacts | Groups | GroupPanelData rows | GroupPanelData (multi-instance) rows | Time |
|---|---|---|---|---|
| 1500 | 1000 | 1000 | 1000 | ~10 minutes |
| 5500 | 5000 | 5000 | 5000 | ~ 30 minutes |
| 10500 | 10000 | 10000 | 10000 | ~ 1 hour |
Important! In order to minimize the impact to production sites, limit contact and data imports to around 1,000 contacts at a time. Importing larger batches of contacts to a production system will adversely affect performance and reliability.
What should I do if I have a problem with the conversion data?
The initial conversion should occur with the Test only checkbox selected to ensure that the basic workbook structure and definitions are correct. Once any errors or warnings are addressed, run the Workbook Converter again with the Test only option deselected.
There might still be problems that can only be detected during the actual conversion. If problems arise, do the following:
- Restore the database backup.
- Analyze and correct errors reported by the Workbook Converter.
- Run the application again.
If you are working on a conversion with tens or hundreds of thousands of contacts and related records, you can define a set of Excel workbooks. Meaning, you will have a main workbook and a number of child CSV (comma separated value) text files.
When verifying data, if you see some values that are surrounded by braces ({ }), you should modify the worksheet column to have a General number format and run the conversion again.
Note: Numeric columns must use either a General or Number number format. If Number is selected, make sure the option Use 1000 Separator (,) is not selected, and the Negative numbers format should be -1234.10.
What is the procedure if there is a failure mid-conversion?
If there is a failure mid-conversion, do the following:
- Analyze and correct errors reported by the Workbook Converter.
- Restore the target database to a known good pre-conversion version.
- Recycle the iMISService associated with the database.
- Run the application again.
Contact ASI Hosting for assistance recycling the iMISService instance associated with the database.
Does the importer use the ID column as the iMIS ID?
When UseiMISId is set to TRUE, the ID defined in the workbook will be saved as the iMIS ID. When UseiMISId is set to FALSE, the ID defined in the workbook will be saved to Name.MAJOR_KEY.
Some ID numbers should also be avoided, as those ID numbers are reserved system account IDs. The Workbook Converter will show an error message if individual records have IDs that match the following ID numbers:
- 1
- 2
- 3
- 4
- 5
- 6
- 7
- 8
- 9
- 194
What should I do if I do not see the expected results when updating a single-instance related-data item?
If you are updating a single-instance related-data item and do not see the results you are expecting, search the workbook on the ID that was used. It is possible there were multiple rows updating the same single-instance data item.
The Workbook Converter modifies existing single-instance user-defined table data. If you have more than one row of single-instance data for the same data item with the same ID, the last row of single-instance data processed will overwrite any previously entered data.
Can I update contact information without any address updates?
If you are updating contact information but there are no address updates, make sure that you do not define the worksheet in which the contact information is found as an Address worksheet type . Specify the worksheet as a Contact worksheet type only in the Contents worksheet.
For example, if you have a worksheet called Individual that is both an Address and Contact worksheet type but do not provide the Address information on the worksheet (specifically, the AddressPurpose value, which the Workbook Converter is expecting), that will cause a warning to be displayed.
Why are the options I’ve specified not being honored?
If you are adding a worksheet that sets the various available options, this worksheet must be identified in the Contents worksheet as an Options worksheet type.
If this worksheet is not specifically added to the Contents worksheet, the Workbook Converter will proceed with all options being defaulted, for example, CreateAccounts will default to FALSE.
If I only want to convert a RelatedData single or multi-instance table, do I need any other worksheets?
No. If you are only converting a RelatedData single or multi-instance table, you only need the Contents worksheet and the desired RelatedData-type worksheets in your workbook.
When deleting unneeded worksheets to also remove them from the Contents worksheet. The Contents worksheet should only list those worksheets containing data being added or updated.
Do I need a Contact worksheet if I’ve already imported records previously?
A Contact worksheet type is only required if:
- The ID being used to reference the associated data is not in the Name.MAJOR_KEY column in the database.
- There might be some ID values in the data that are not being treated as workbook IDs, that is, not treated as values from the Name.MAJOR_KEY column. Activity rows can be converted for existing contacts if the CO_ID and SOLICITOR_ID columns are not set.
- You want to create a contact with the given ID, the value of which is set into Name.MAJOR_KEY.
- You want to update address information for a given contact. In this case, you must have the following:
- A Contact worksheet type, referenced in the Contents worksheet.
- The first row of the Contact worksheet type, specifying all the columns necessary for Contact processing.
- Only the ID and PartyType columns need to be used.
For Panel Editor tables, do I need to create the workbook for the RelatedTable definition if I’ve already created the source and fields in the database?
If the Panel Editor data sources already exist, you can specify RelatedData worksheet types in the Contents worksheet, making sure to specify the existing data source name in the Data Type column.
If you have already defined the Panel Editor data source and you are converting the actual data (where the data source is multi-instance), then you must specify True in the MultiInstance column of that data source's row in the Contents worksheet:

Otherwise, you will see an error similar to the following:
Warning: For Related Data: Education Info Data, Row: 2, Error adding data: Error: An item with the requested identity can't be found.
Which manager credentials are needed to run the Workbook Converter?
Clients need to be a Full User with the Sysadmin role and Staff Access Module Authorization Levels set to 8 -System Setup for each module.
How does the cardholder name get populated after AutoPay enrollments are imported through the Workbook Converter?
The contact Name is used to populate the card holder name for AutoPay enrollments. For clients using Global Payments, the name is truncated if the total characters exceed 26.
How do I assign user accounts and passwords to newly imported contacts?
For security purposes and to ensure only the member has access to their account, it is best practice to instruct the new members to initiate their own accounts. You should set the username to the imported email address, then the user can choose the Forgot password option when they login for the first time.
To ensure this process is configured correctly, make sure the following are set in the Workbook Converter:
- CreateAccounts = TRUE
- Contact rows contain an email address (if there is not email address, no username is created for them)
Instructing public users on how to reset their password when logging in for the first time
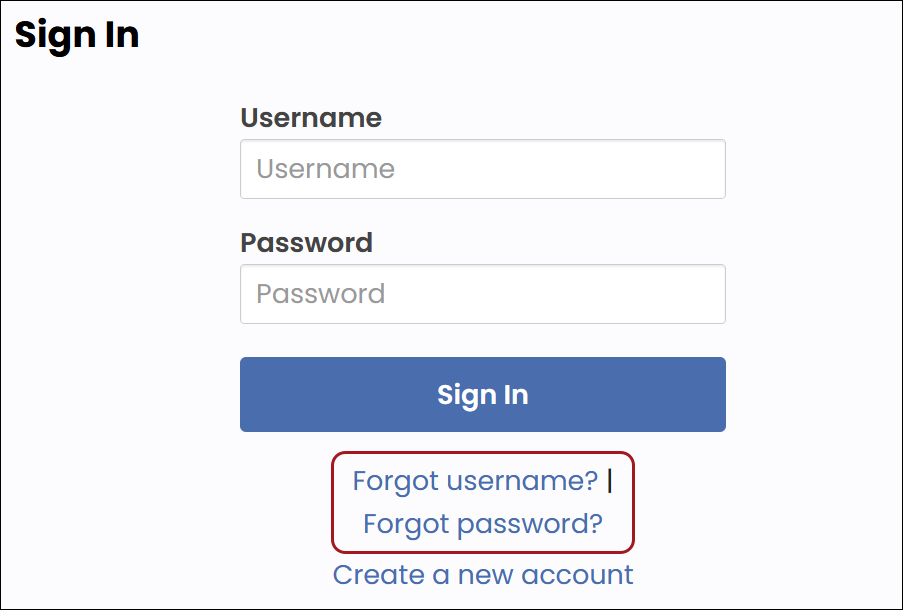
Public users can reset their username and password from the Sign In page:
- From the public website, click the Sign in link.
- Select Forgot username? or Forgot password?
- Enter the Email address associated with the account.
- Click Submit.
- The user is sent an email with the remaining steps to perform.

