Last updated on: May 26, 2026
Radius Search
The Radius Search content item uses geolocation to return iMIS records with addresses located within a specified distance of a given point. You can configure the content item to include or exclude filters, allowing you to tailor the results to your organization’s needs.
To use the Radius Search content item, the following requirements must be met:
- iMIS version 20.2.26 or later (iMIS EMS not supported).
- iMap installed and running, or another solution that generates latitude and longitude values for addresses.
Note: This documentation assumes that you have already downloaded the Radius Search content item and have access to the required ZIP file, along with the associated Business Object XML file and query XML file.
Radius Search configuration options
This content item uses the Common content item configuration options in addition to the following:
- Query - This is the path of the query the content item depends on to pull back results.
- Link Url - This URL allows a link to be displayed in the results (based on iMIS ID). Usually the profile page of the member.
- Distance Gen Table Name - Allows configuration for the Distance drop-down in Search. (5 miles, 10 miles, 50 miles). You set the increments.
- Page Size - Allows configuration the number of results displayed per page when using the Radius Search content item.
- Show Distance Column - Show/Hide Distance column.
- Add Horizontal Scrollbar for Results - Allows for horizontal scrolling if too many columns.
- Add Custom Filters - Allows you to add additional filters (besides the mandatory Zipcode and Distance)
- The Filter Name must be a filter in the query.
- The Filter Name must match the query Filter Name.
- You can make it required or not required entry.
Note: When adding custom filters, Optional and/or Required in the query does not have an effect. Only the checkbox within the content item configuration will make the field Required or Optional.
Importing the Radius Search business object
Do the following to import the business object:
- Go to RiSE > Business Object Designer.
- Click Import.
- Click Select and navigate to the CSI_Radius_Search (Business Object).xml file.
- Click Upload.
- Click Import.
Importing the Radius Search query
Do the following the Radius Search query:
- Go to RiSE > Intelligent Query Architect.
- Navigate to the folder you want the query to reside.
- Click Import.
- Click Select and navigate to the Radius-Search (query)..xml file.
- Click Upload.
- Click Import.
- Once the query is imported, open it and click Edit. There will be a CSI_Radius_Search business object on the Sources tab.
- (Filters tab) Add any additional filters to the query.
- (Display tab) Add, edit, or remove any desired properties except for Longitude and Latitude. These must remain untouched for the content item to work correctly.
Note: Remember this path, you will need this information in the content item Configuration later on.
Warning! Do not delete or edit any of the existing filters. They are required for the Radius Search content item to function.
Note: Once these new filters have been added to the query, you will still need to add them to the content item, within the configuration section on the Content Page. Make sure you list the parameters in the same order as they appear in the query. The parameters are filled in positionally and not by name. So, if the order is incorrect, the content item will return unexpected results.
Installing the Radius Search content item
Do the following to install the content item:
- Go to the RiSE > Document System.
- Go to the ContentItems folder.
- Click New > Zip file.
- Click Select.
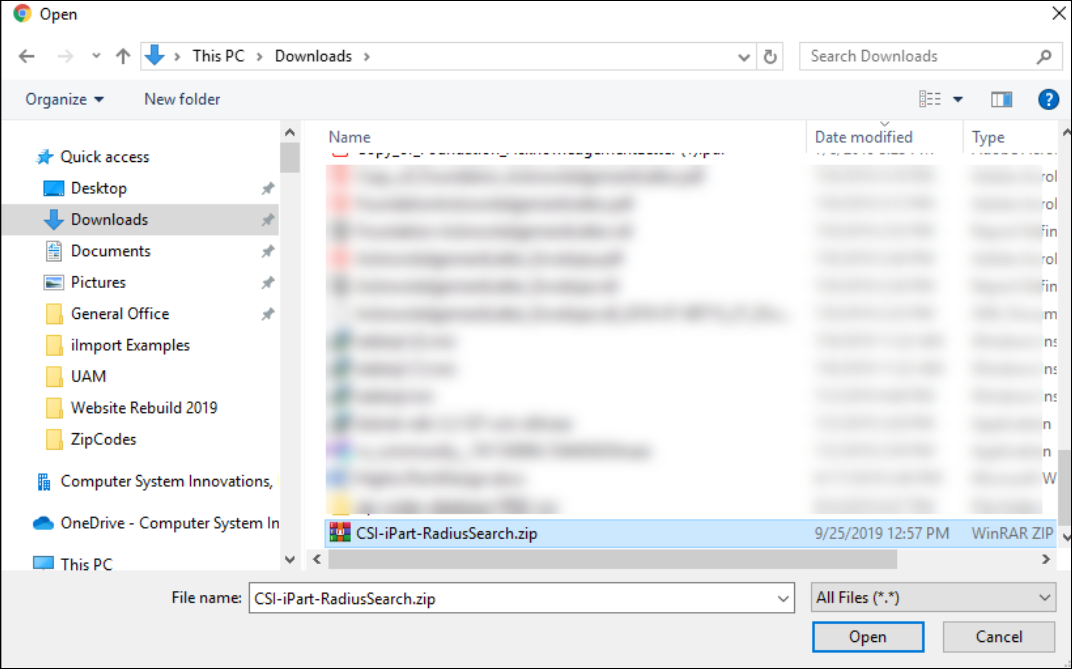
- Browse to and select the content item ZIP file to upload.
- Click Upload to upload the content item ZIP file.
- Confirm the ContentItems folder now contains the uploaded content item ZIP file.
Deploy the content item
Do the following to deploy the content item:
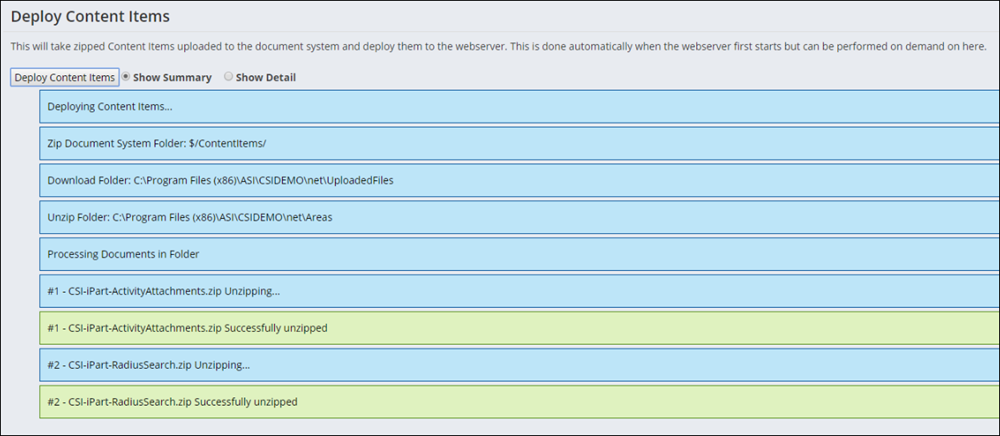
- Go to RiSE > Maintenance > Deploy Content Items.
- Click Deploy Content Items .
- Review the output messages and validate the content item has been successfully unzipped. Note where the folder where the files were unzipped.
- Go to RiSE > Maintenance > Content types.
- Browse to and select a destination folder, for example ContentTypes > Custom.
- Click New > Content Type.
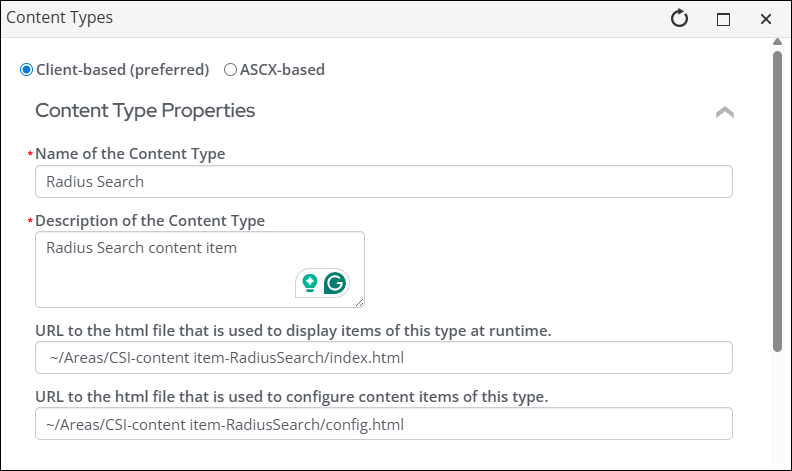
- Click Client-based (preferred).
- Fill out the following:
- Give the content type a Name.
- Add a Description.
- Enter a URL to the html file that is used to display items of this type at runtime. For example, ~/Areas/CSI-content item-RadiusSearch/index.html.
- Enter a URL to the html file that is used to configure content items of this type. For example, ~/Areas/CSI-content item-RadiusSearch/config.html. This is where the file was unzipped.
- Click Save.
Note: If the Deploy Content Items link is not in your navigation, go to RiSE > Site Builder > Manage Sitemaps and enable the menu item. You will find this in the default staff site listed under RiSE > Maintenance > Deploy Content Items.
Configuring the content item
The content item is now ready to be added to a content record. Do the following to add the content item to a content record:
- Open the content record to edit. See Configuring content items.
- Click Add content and search for the content item.
- Click OK.
- Configure the content item as needed.
- Click OK.
- Then Save and Publish.
Distance general look up table
The following shows a sample GEN_TABLE for custom search distances:
- Code - the number of miles.
- Description - the corresponding number of miles described. For example, 10 Miles.

Exporting as a CSV file
The following shows the results of a Radius Search content item query which includes the Export to Excel button.

Do the following to export the query results:
- Click Export to Excel. The full results set is downloaded as a CSV file, not just the records shown on the current page. The following is an example:
- Open the CSV using one of the following methods:
- Double-click the CSV file to open it in Excel. Excel automatically assigns data types to each column, which may cause some values to display incorrectly. If this happens, try opening a new blank Excel worksheet.
- Opening a black Excel worksheet - Do the following to open the file from a blank worksheet:
- Click the Data tab.
- Click From Text/CSV.
- Browse to and select the file from the correct file location.
- Click Load in the import window. Using the recommended method provides more consistent data types and creates a well-formatted table that is filterable and sortable by default.
