Last updated on: June 23, 2026
Installation and configuration
This guide outlines the steps required to configure the Cvent integration with the Cloud Dashboard. It ensures all necessary setup tasks are completed so the integration operates seamlessly. The process includes actions to be completed in both, some of which can be performed in parallel.
Working in Cvent
You only need to set this up once. It is account wide.
Do the following to set up a webhook:
- Log in to the Cvent app.
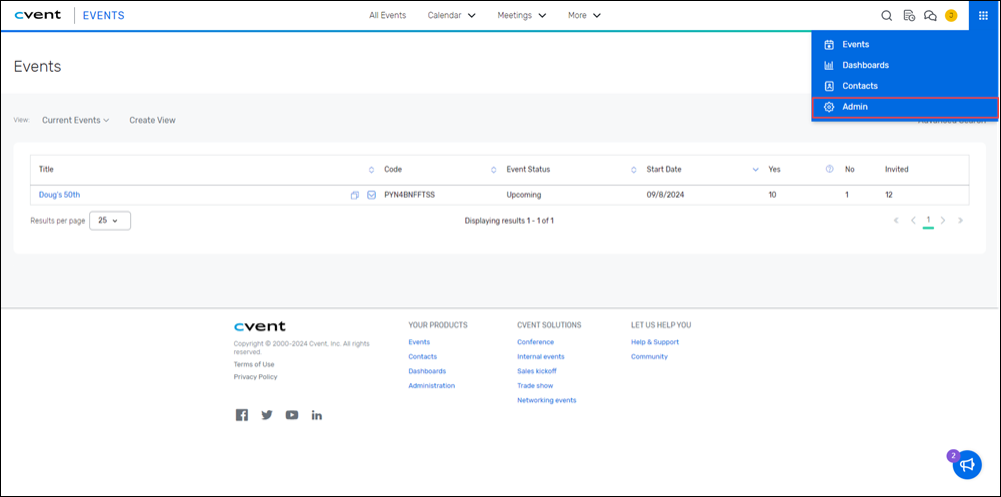
- Make sure at least one event is created.
- Select Admin from the nine squares in the top right.
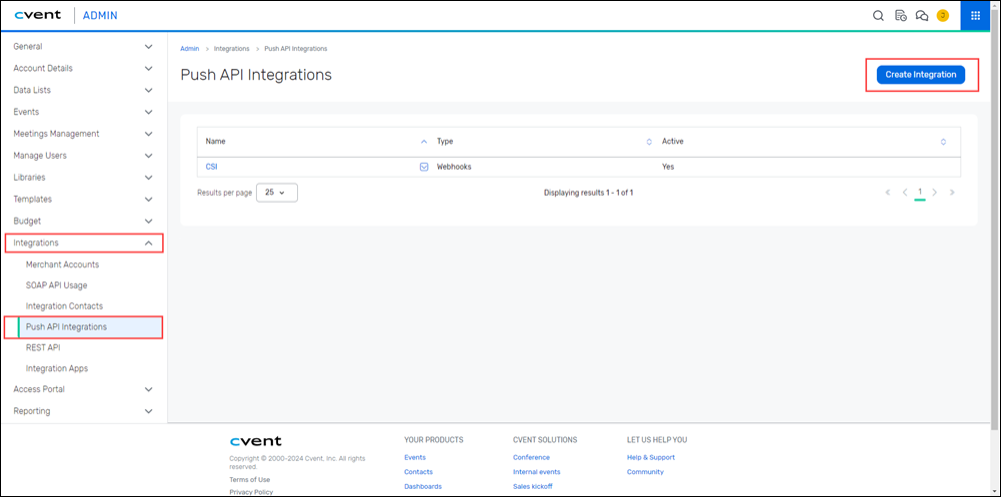
- Go to Integrations > Push API Integrations.
- Click Create Integration:
- Name - ASI
- Type - Webhooks
- Default Endpoint - https://cvent.cloud.csiinc.com/api/webhooks
- Connection Type - Token based
- Authentication Token - Found on the Cloud Dashboard under Account
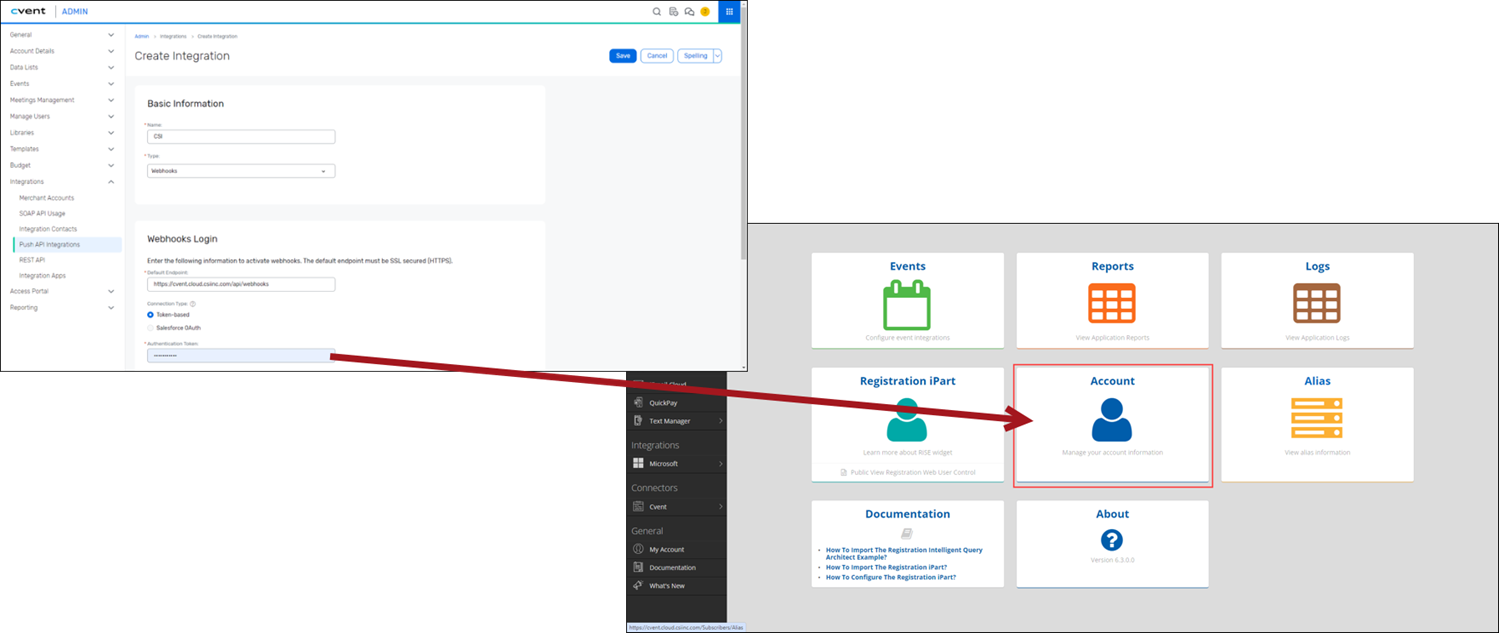
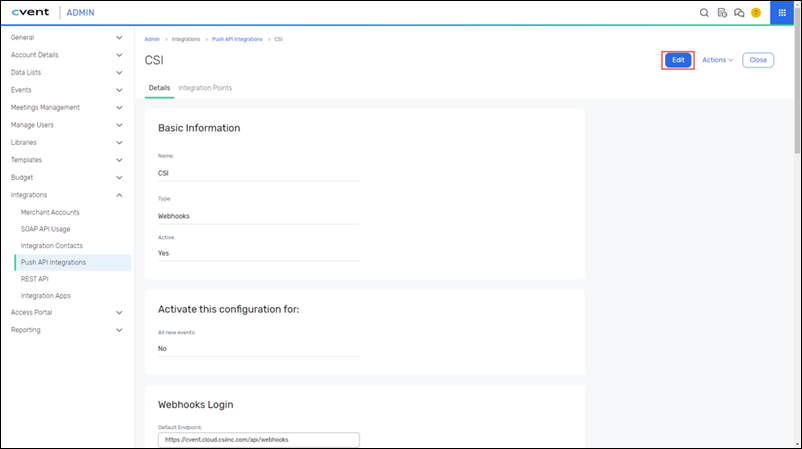
- Click Save.
- Click Edit.
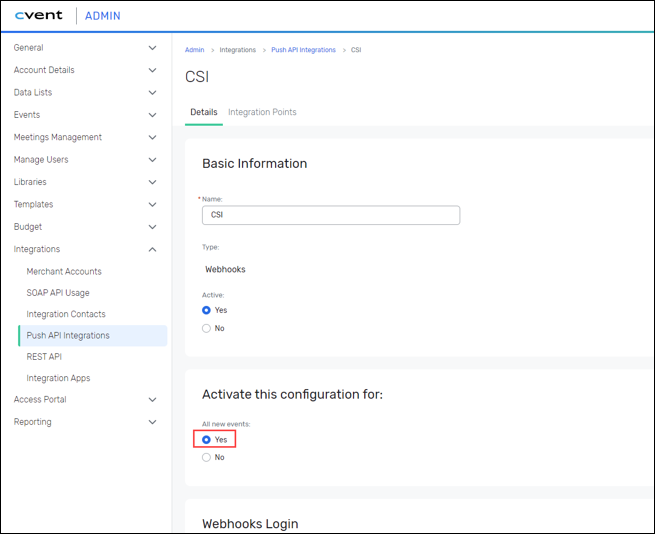
- Update the Activate the configuration for setting to Yes.
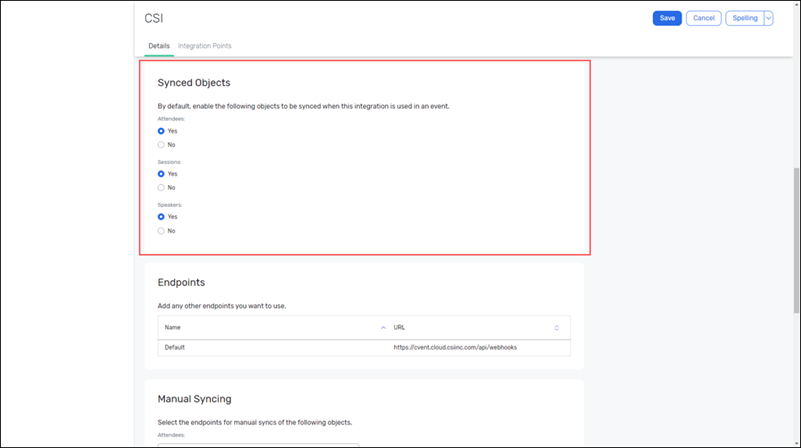
- Check the Synced Objects.
- Click Save.
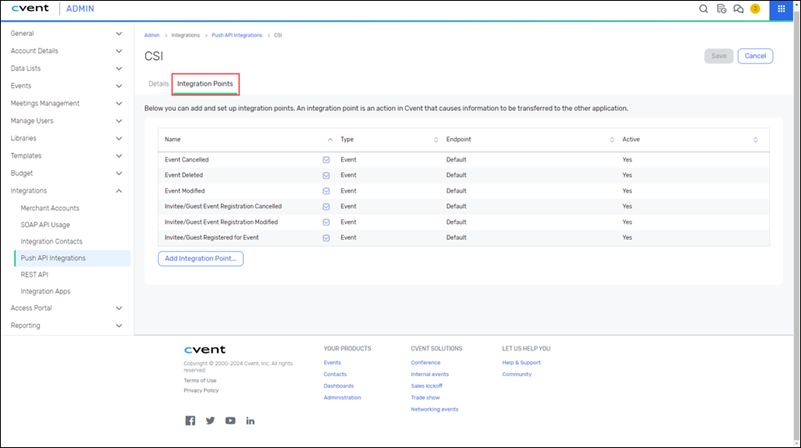
- Check the Integration Points.
- Add at least the following integration points:
- Invitee/Guest Registered for Event
- Invitee/Guest Event Registration Cancelled
- Invitee/Guest Event RegistrationModified
- InviteeSubstitutedInAnEvent (if you plan on substituting registrants)
- Click Save.
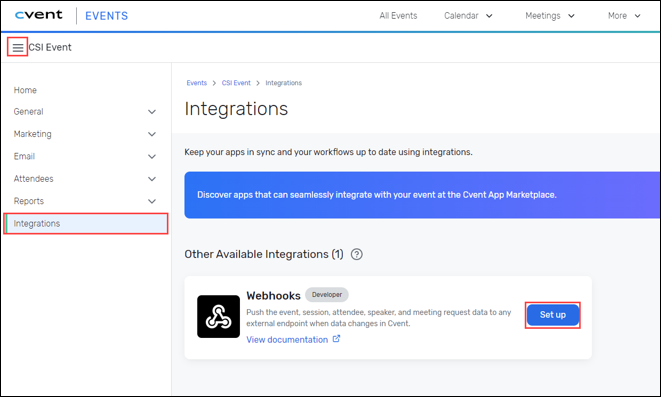
- All new events will now have the integration upon creation. Any existing events must be updated:
- Go to Events > [your event] > Integrations.
- Click Setup for Webhooks.
- Click Add Webhook.
- Select the previously created integration/configuration from the drop down.
- Click Save.
Enabling Custom IDs for Each Event
Do the following to enable custom IDs for each event:
- In an event, navigate to Registration > Registration Process > Open Site Designer.
- From the Registration Page drop-down, click the gear icon next to the Registration Path(s).
- Scroll to the External Data Source section and select Cvent in the drop-down.
Working on the Cloud Dashboard
Do the following on the Cloud Dashboard:
- Go to the Cloud Dashboard.
- Username: Your iMIS username.
- Password: Your iMIS password.
- Cloud ID: See Getting Started Guide: iMIS Power Suite.
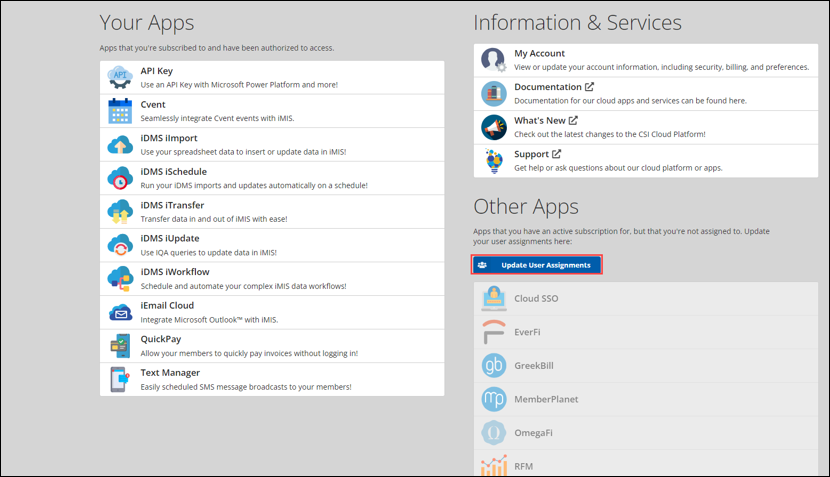
- Select Cvent from either Your Apps or from the left banner under Connectors.
- If you do not see Cvent, then you may need User Assignments to be updated.
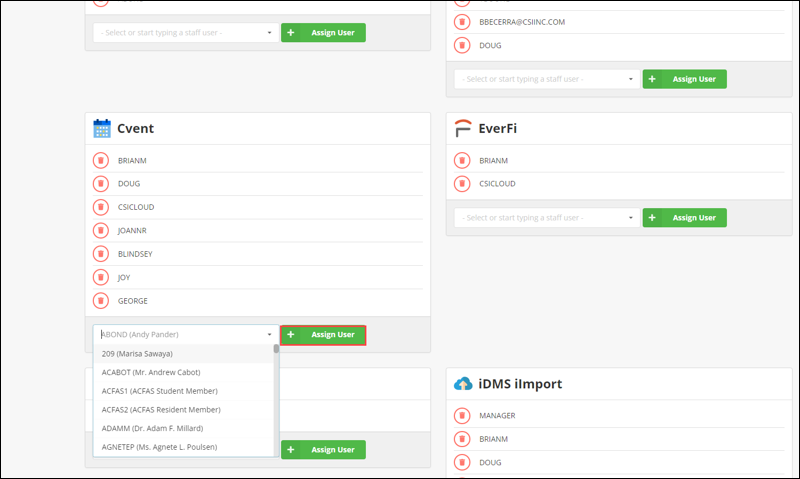
- Select Update User Assignments.
- Under Cvent, add the desired user and select Assign User.
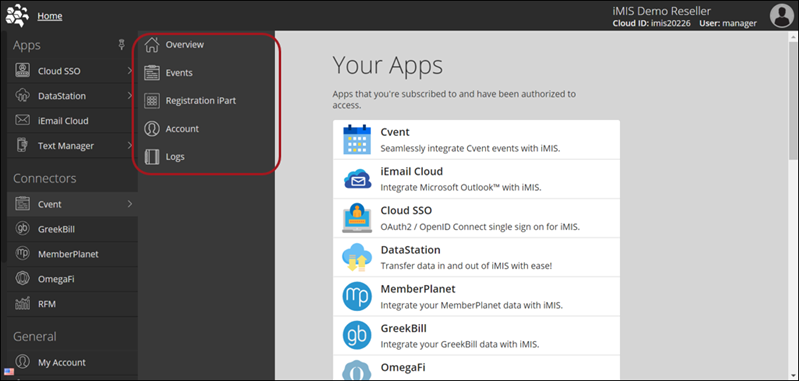
- If you click on Cvent via the side banner, you will be presented with a sub-menu (Overview, Events, Registration iPart, Account, Logs). Overview is most common. If you are setting up your account, click Account.
Setting Up Your Cvent Account
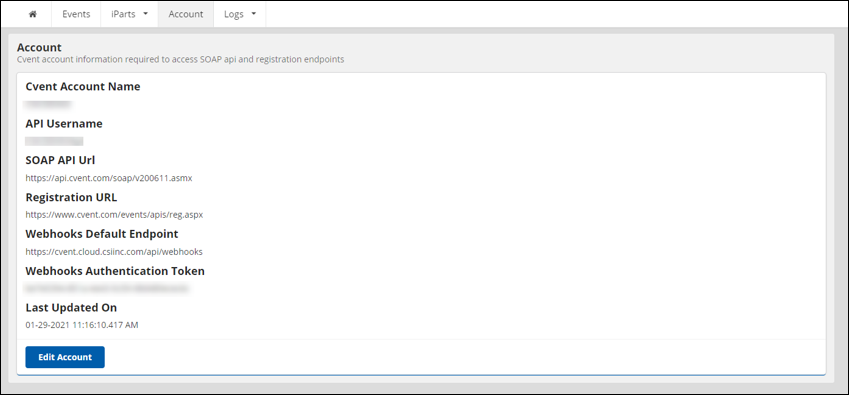
After navigating to the Cvent Account information you will see the following data points:
- Cvent Account Name: This is supplied to you by Cvent.
- API Username: This is supplied to you by Cvent (or created by you through their site)
- SOAP API URL: This is Cvent’s API URL. Supplied to you by Cvent. This should remain fairly static.
- Registration URL: This is Cvent’s Registration URL. Again, this should be static.
- Webhooks Authentication Token: This will be created for you automatically. This allows Cvent to authenticate with your iMIS data.
- Last Updated On: The date/time account information was last updated.
Important! These fields must be filled in order for the Cloud application to work properly.
Cvent Events
The Events page allows you to add or edit events, provided they are setup in Cvent.

Adding an Event
Do the following to add an event:
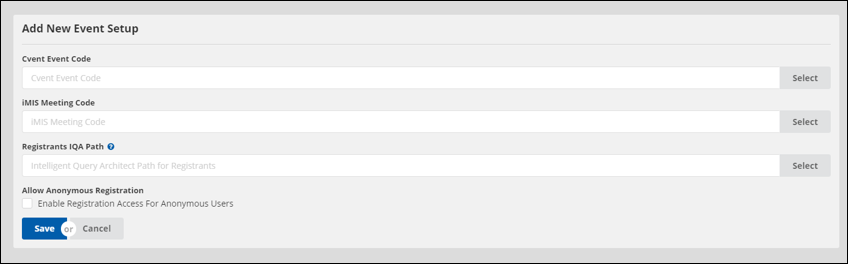
- Click Add New.
- Multiple fields will appear:
- Cvent Event Code: This will be the event code created by Cvent for the specific event. Based on your account setup, you can use the SELECT button to select the event from Cvent that you want to setup. You are also able to manually enter your Cvent Event Code.
- iMIS Meeting Code: This is the meeting/event code from your iMIS event that has been setup that you want to link with Cvent. You will be able to use the SELECT button select your iMIS event. You are also able to manually enter your iMIS Event Code.
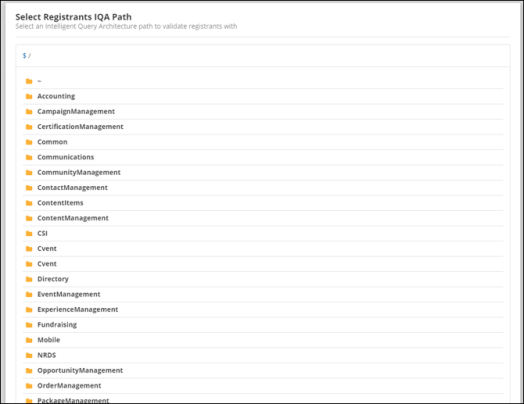
- Registrants IQA Path: This allows you to specify the iMIS query for the list of registrants allowed to register for this meeting. You must have a query that matches the result set for Cvent Standard Service. A SELECT button is also active for this data point and is recommended.
- The select button will open the IQA screen.
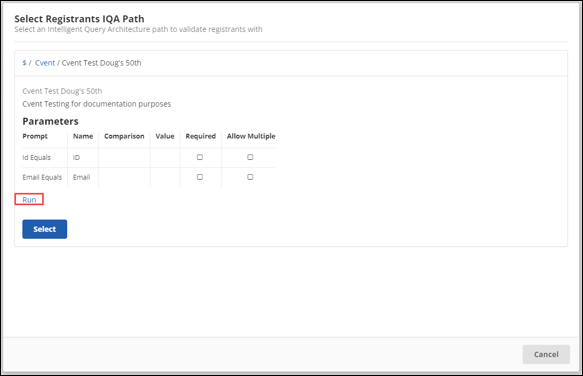
- Go to the desired Cvent query.
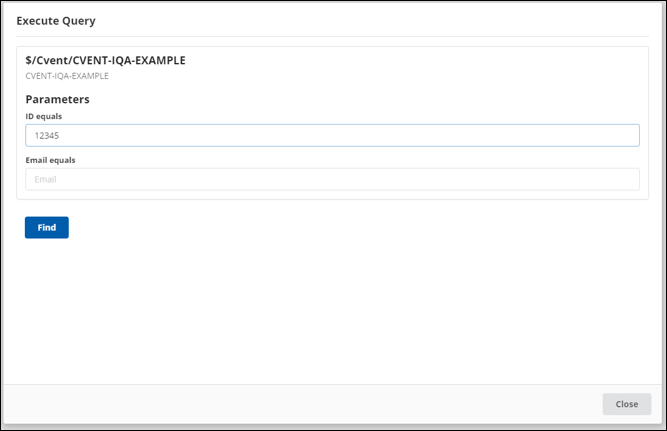
- It is recommended to run the query to make sure it works before selecting it.
- As a reminder, after clicking Find, the query should return one result if the person is allowed to register and no results if they are not allowed to register.
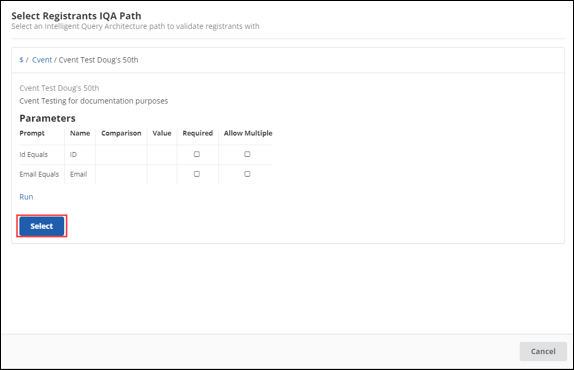
- Once tested, click Close then Select.
- Allow Anonymous Registration: This will allow the user to register for the event from within the Cvent application without regard for who they are or whether they are allowed to register or not.
Note: If the event is Pending, then click Include inactive events after clicking Select to have it appear in the search.
Note: You do not need to setup an Event in iMIS for this integration to work, but you need to enter a distinct meeting code.
Note: For information on creating or importing a sample Cvent query, see Registration IQA query.

Viewing the event in iMIS
After the user registers with Cvent, the registration will appear as an activity of type meeting. This may be able to be viewed from a contact’s Participation tab. If it is not visible on the Participation tab, an IQA query will have to be created.
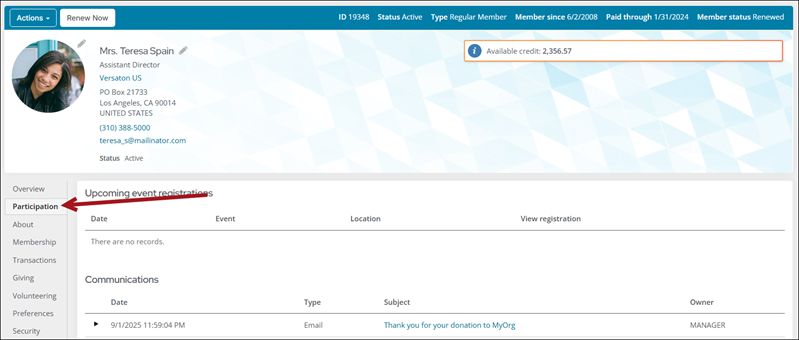
Note: Participation tabs may be set up differently depending on the panel(s) that create the page. Therefore, even if the activity was successfully imported to the account, it may not appear on this page and a query may need to be made.
Creating the query
Do the following to create the query:
- From iMIS, go to RiSE > Intelligent Query Architect
- Select the folder the IQA query will reside in.
- Select New > Query.
- (Summary tab) Enter a Name.
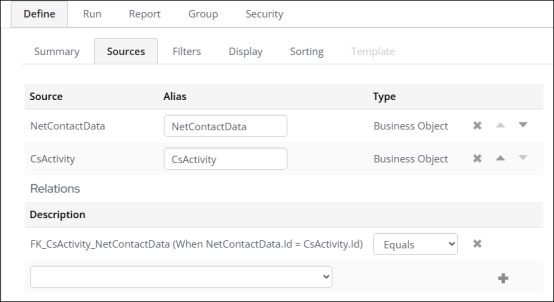
- (Sources tab) Add the NetContactData and CsActivity sources with the following join: NetContactData.Id = CsActivity.Id
- (Filters tab) Add the following filters, all with In Search? set to Optional:
- [NetContactData] Id
- [NetContactData] First Name
- [NetContactData] Last Name
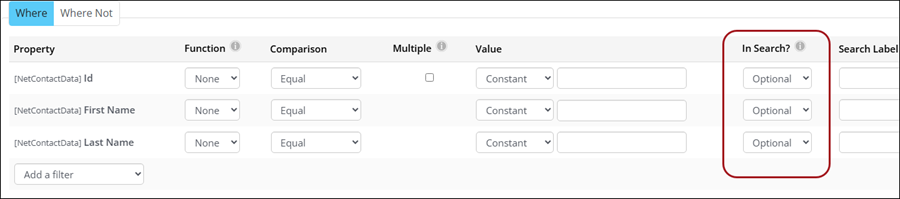
Tip: Continue adding search filters that will enable you to search for the desired contacts.
- (Display tab) Add in the following display properties:
- (required) [CsActivity] Activity Type
- (required) [CsActivity] Description
- (optional) [NetContactData] Id
- (optional) [NetContactData] Full Name
- (optional) [CsActivity] Transaction Date
- Click Apply.
- Click Save.
When running the query, enter in the information of the registrant. If they are registered in Cvent and the Cloud Cvent integration product is properly set up, the activity should appear in the query.
Troubleshooting
If issues come up, review the following to troubleshoot:
Member Unable to Register via RiSE content item
If a member receives a message stating “Could not confirm registration information for iMIS ID: [iMIS ID]”, then the Registrant query path does not allow them to register.
This query path can be checked by navigating to Cloud Cvent application > Events > [specific event] > Registrant IQA Path. If the member is allowed to register, the IQA query should return one result when the member’s information is entered into it.
Registrations Not Appearing in iMIS
Checking the Cloud Logs will show whether or not the webhook is being called, and if so, with what information.
In the Cloud Cvent application, navigate to Overview > Logs, then use the banner to select Webhook.
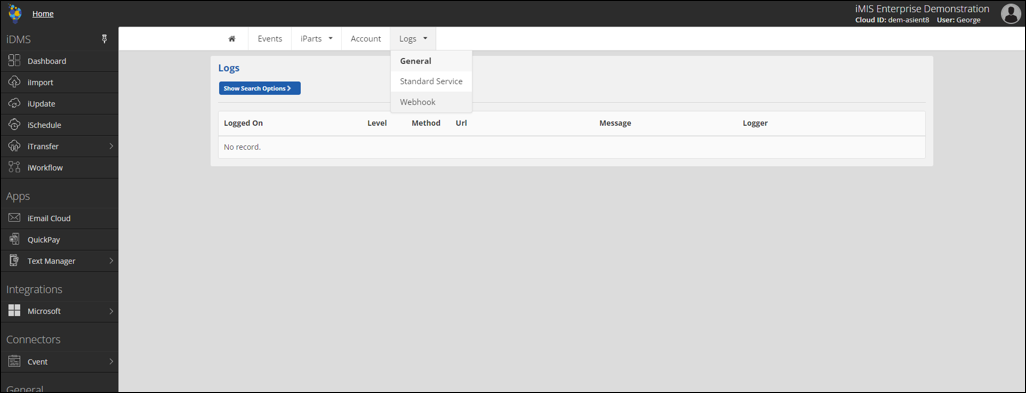
Here, you will be able to determine whether the webhooks from Cvent to Cloud are being activated. If there are no webhooks on the logs, double check the Cvent Event’s Webhook Integration as well as the Cloud Cvent application’s Cvent code.
Whitelist the Cvent App IP Addresses
In the remote event that your webhooks may not be working, Cvent may have to Whitelist the following IP addresses in your Cvent account settings in order for the Cvent app to successfully communicate with the Cvent APIs:
|
IP Address |
Description |
|---|---|
|
23.96.247.82 |
Cloud API Router |
|
50.236.23.134 |
Office (for troubleshooting and debugging) |
|
173.161.104.49 |
|
|
23.96.220.94 |
Cvent App - Outbound IP See more from Full List below |
|
23.96.219.103 |
|
|
23.96.221.106 |
|
|
23.96.219.121 |
|
|
23.96.220.116 |
Cvent App - Inbound IP |
|
23.96.189.6 |
Load Balancer for Data Processor |
Full List Of Cvent App - Outbound IP: 23.96.220.94,23.96.219.103,23.96.221.106,23.96.219.121,23.96.227.203,157.55.166.62,157.55.166.169,157.55.170.179,157.55.171.196,23.96.220.116,52.162.107.25
Finding SOAP API credentials
Call Cvent to provide you with your SOAP API Credentials. This will allow us to access your Cvent information using the SOAP endpoint (North America Only): https://api.cvent.com/soap/v200611.asmx
If you are not in North America, find the API URL here: SOAP API Archives - Cvent | Developer Hub. Contact ASI Technical Support, so they can change this in the configuration.
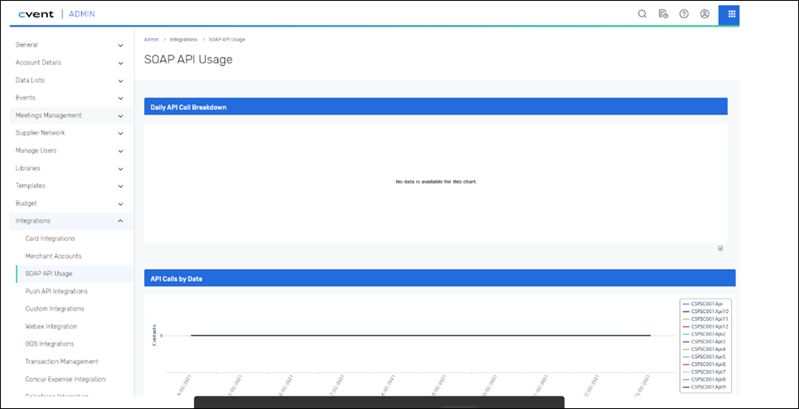
Reviewing SOAP API usage
Do the following to review SOAP API Usage and configuration.
- Go to Admin > Integrations > SOAP API Usage.
- Ensure the Clout Router server IP addresses are whitelisted to the SOAP API. Click on the dropdown next to the API username to validate the Allowed IP Addresses.
- Confirm Your Standard Service Support.

Note: Call Cvent to confirm they have enabled this feature for you. It is also known as HTTP POST Process for Events which allows us to provide you with a Single Sign On experience. A form is submitted via HTTP Post on your behalf at https://www.cvent.com/events/apis/reg.aspx. This is used by the registration content item (and custom Web User Control) to authenticate members for the Cvent meeting.