Last updated on: June 23, 2026
Updating existing contacts using an IQA query with iUpdate
Using iUpdate and an IQA query, easily update existing contacts in just one process. The query acts as the filter that tells iUpdate which records to edit. After building an IQA query with filters and columns, map the columns to an iDMS source.
Example: The company Versaton US wants to spin off their regular members into a new company called Versaton USA. A staff user creates a query to find all regular members belonging to Versaton US, then, in iDMS, uses iUpdate to update all the members defined in the query to be part of Versaton USA.
Building the query
First, build the query that the iUpdate job will use. The following example shows how to build an IQA query that retrieves all regular members belonging to the company Versaton US.
Do the following:
- Go to RiSE > Intelligent Query Architect.
- Select or create a folder for the query.
- Click New > Query.
- Name the query.
- (Sources tab) From the Common sources area, select Contacts to add the NetContactData business object.
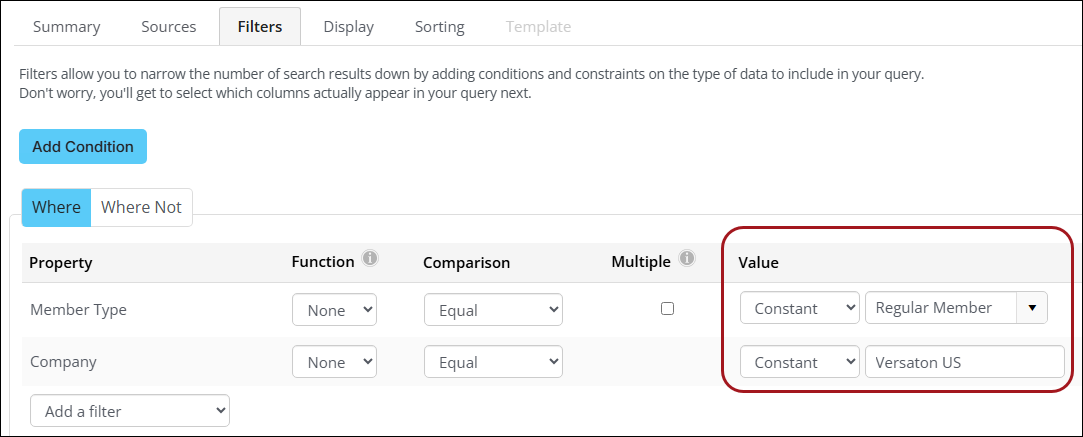
- (Filters tab) Configure filters:
- From the Add a filter drop-down, select Member Type.
- From the Value drop-down for Member Type, select Regular Member.
- From the Add a filter drop-down, select State Province.
- From the Value drop-down for Member Type, enter Versaton US.
- (Display tab) Configure the columns:
- From the Available pane, select Company.
- Click Apply.
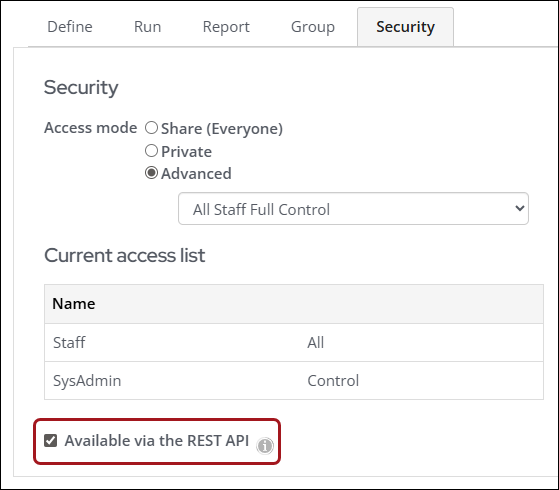
- (Security tab) Enable Available via the REST API.
- Save the query.
When the query is created, click Run to review the query's results.
Configuring the iUpdate task
After the query has been configured, set up the iUpdate task in the Power Suite Cloud Dashboard. The example procedure uses the Contact Details source to map columns.
Important! Be sure to review the Source guides to determine which sources to use for iUpdate tasks.
Do the following:
- Log in to the Cloud Dashboard.
- Go to iDMS > iUpdate.
- In the Intelligent Query Architect Path field, select the created query.
- From the Select an Action area, click Update.
- Configure the mappings:
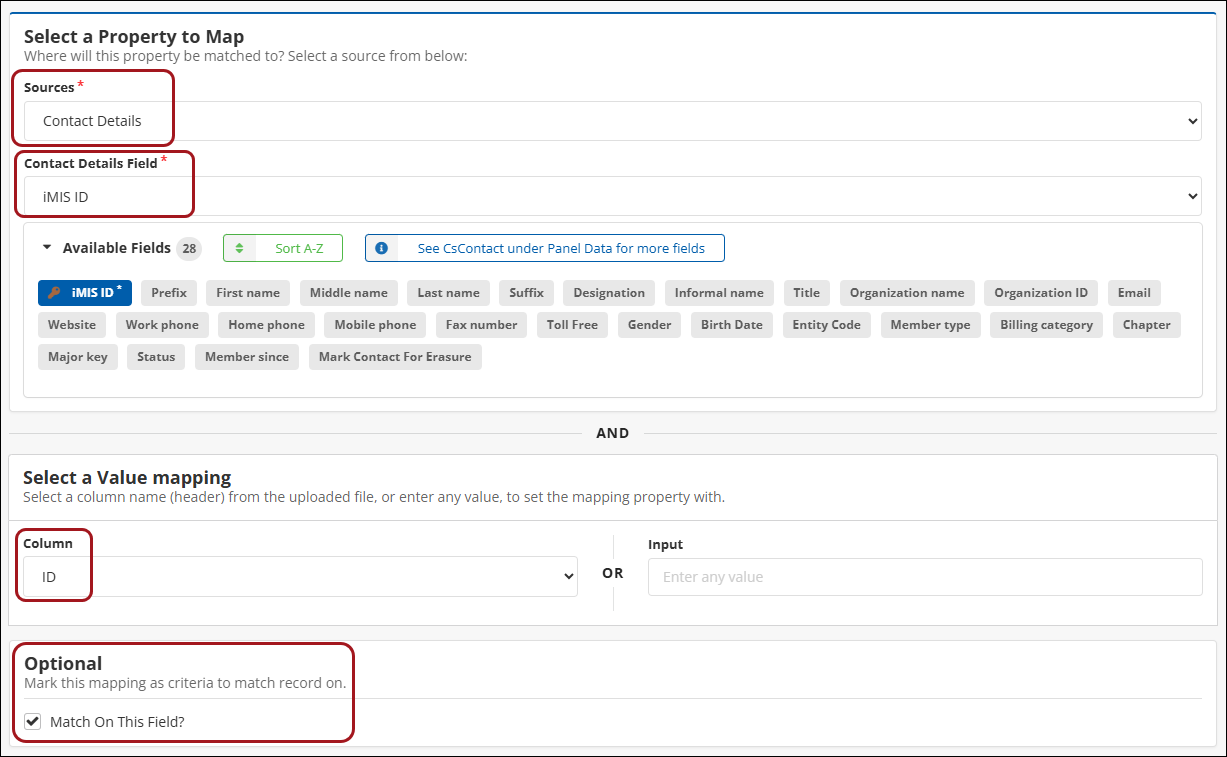
- Configure iMIS ID mapping:
- Click Add Mapping.
- From the Sources drop-down, select Contact Details.
- From the Contact Details drop-down, select iMIS ID.
- From the Select a Value mapping area, in the Column drop-down, select ID.
- Toggle on Match On This Field?
- Click Save.
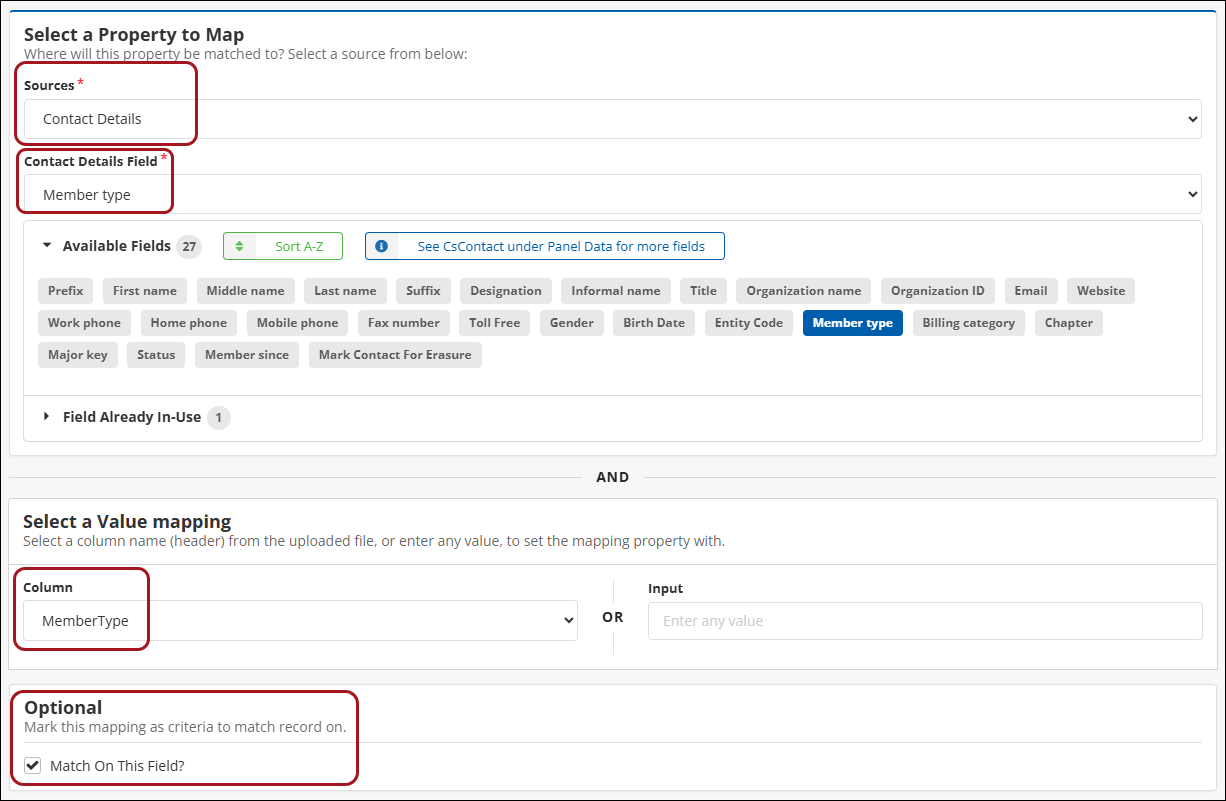
- Configure Member Type mapping:
- Click Add Mapping.
- From the Sources drop-down, select Contact Details.
- From the Contact Details drop-down, select Member type.
- From the Select a Value mapping area, in the Column drop-down, select MemberType.
- Toggle on Match On This Field?
- Click Save.
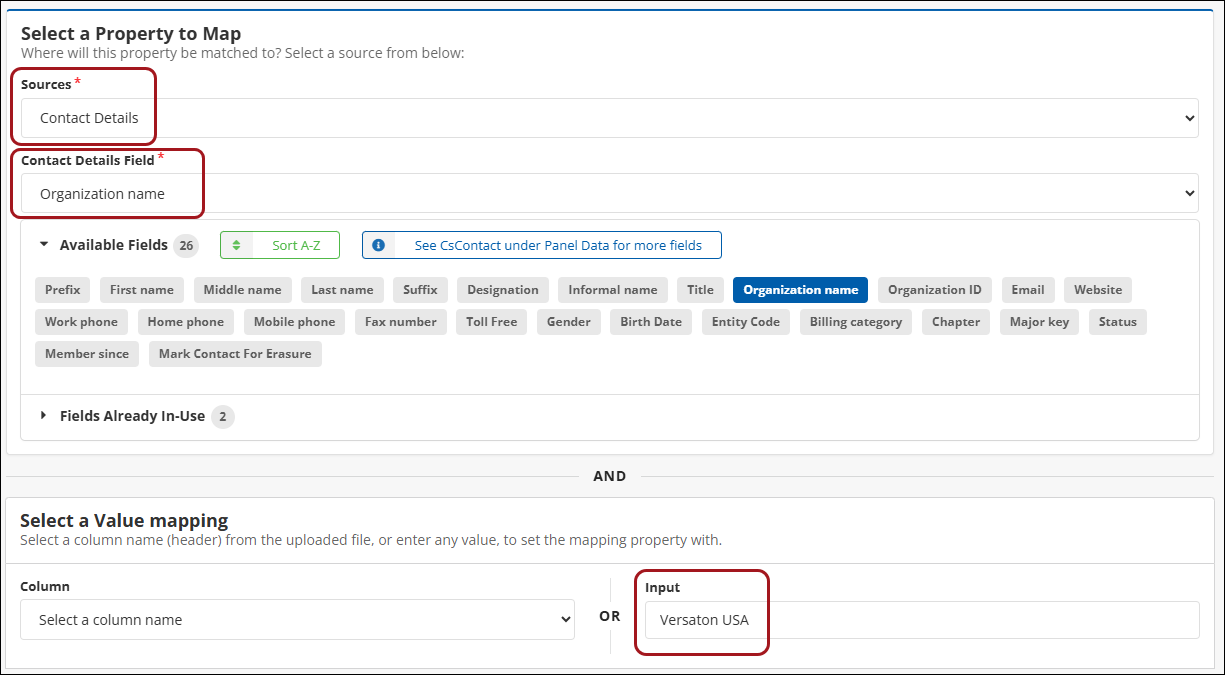
- Configure Organization name mapping:
- Click Add Mapping.
- From the Sources drop-down, select Contact Details.
- From the Contact Details drop-down, select Organization name.
- From the Select a Value mapping area, in the Input field, enter Versaton USA.
- Click Save.
- Configure iMIS ID mapping:
- In the Submit Task field, click Submit.
- Review the Summary.
- Note: The Summary contains the field that will be updated and what contact records match on the columns specified as Match On This Field.
- Click Continue with Update.
The Logs show a record of what contacts are being updated in real-time.
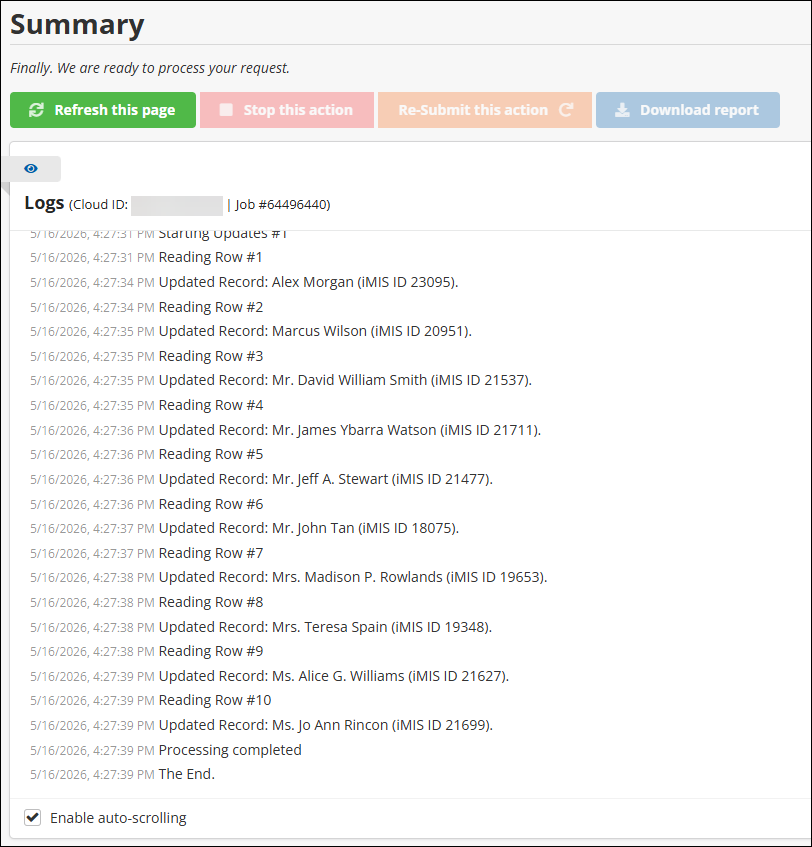
Reviewing results
After the task is complete, review the Logs to see what records have been updated. If you matched on iMIS ID, the logs contain the iMIS ID of the contacts that were updated.
In the example procedure, Alex Morgan was one of the contacts updated by the iUpdate task. By using his iMIS ID, verify the result by visiting his profile. His company is now listed as Versaton USA, confirming the update was successful.

Alternatively, if you used Schedule Task and scheduled the task to run at a certain time, find the completed task in the iDMS Dashboard (iDMS > Dashboard), under the History tab. Click on the Completed status to review the log.

If a task’s status is listed as Partial, the job completed but had errors with one or more contacts. If a task’s status is Failed, the job encountered errors and did not complete successfully. For more information, see iDMS Dashboard.
Knowing when to use iImport or iUpdate
Both iImport and iUpdate can update contacts in iMIS, and both can be automated with iSchedule. The key factor in determining which tool to use is what form the source data currently is.
Use iImport when the data is a spreadsheet
iImport brings data into iMIS from a spreadsheet (Excel or CSV). The spreadsheet could be a vendor export, a registration list, a migration file, or any other external spreadsheet. iImport handles matching (identifying whether a contact already exists) and then allows the insertion of new contacts, updating of existing contacts, or both.
Use iImport when you need to do one of the following:
- Conduct a migration into iMIS
- Import spreadsheets received from external systems
- Bulk update contact information, such as names, addresses, or demographics
- Import event activities or attendance data
Use iUpdate when the data is already in iMIS
iUpdate uses an IQA query as the data source, using the result set from the query as the contacts to update. This makes iUpdate a suitable tool for finding contacts and information already in iMIS and updating them.
Use iUpdate when you need to do one of the following:
- Mark everyone attached to a company as a member when the company renews, or as a non-member when the company expires
- Automatically set or remove communication preferences
- Remove contacts from a committee if they are no longer members
- Erase a field across every contact
| iImport | iUpdate | |
|---|---|---|
| Source | Spreadsheet (Excel or CSV) | IQA query |
| Data origin | External (outside iMIS) | Internal (inside iMIS) |
| Can insert new contacts | Yes | Yes |
| Can update existing contacts | Yes | Yes |
| Best for | Migrations, bulk loads, external data | Rules-based updates, conditional logic |