Last updated on: June 23, 2026
Registration content item
The Registration content item in iMIS allows you to integrate Cvent event registration directly within your iMIS website. Once installed and configured, this content item provides members with a seamless way to register for Cvent events while maintaining authentication through iMIS.
Installing the Registration content item
Do the following to install the content item:
- In Download the Registration content item.
- From iMIS, go to RiSE > Document system.
- Do one of the following, depending on the version of iMIS:
- iMIS 2017 - Select the ContentItems folder.
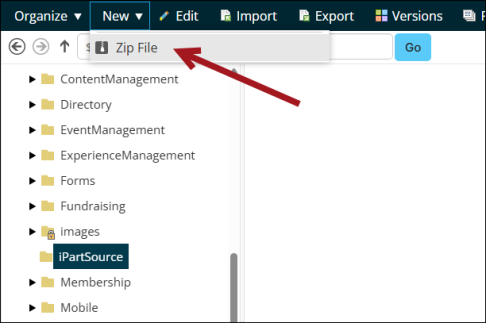
- iMIS EMS - Select the content itemSource folder. If the folder does not exist, you must create it:
- Select New > Folder.
- In the Folder name field, enter content itemSource.
- Select the Allow only the following types of objects in this folder (select all that apply) radio button.
- Choose Zip File.
- Click Save.
- Select New > Zip File.
- Select the content item Zip file.
- Click Upload.
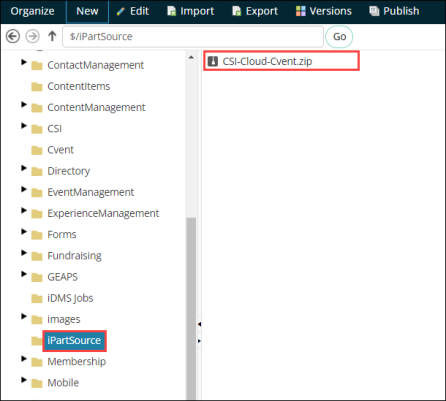
- Confirm the ContentItems/content itemSource folder now contains the uploaded content item zip file.
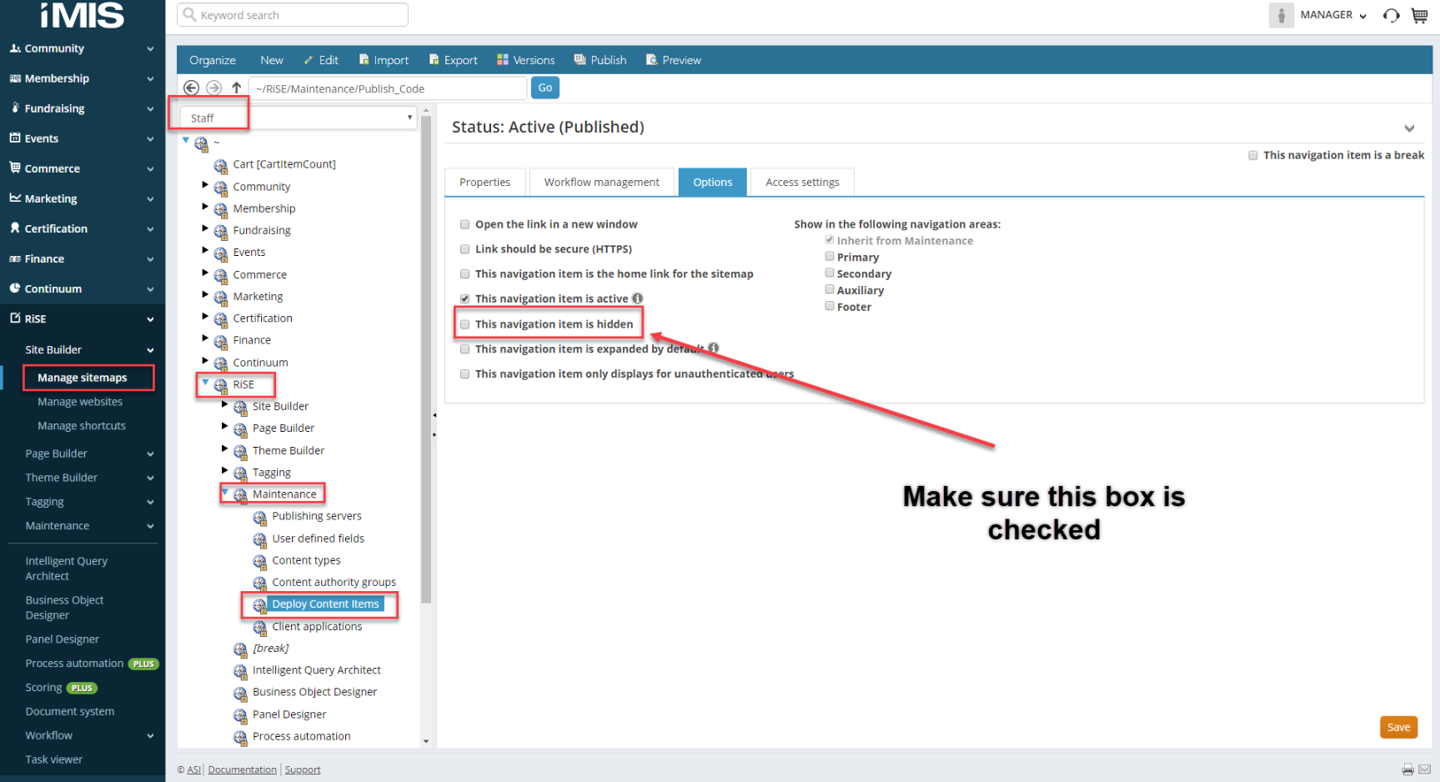
- (iMIS 2017 only) Navigate to the menu item RiSE > Maintenance > Deploy Content Items:
- If the Deploy Content Items menu item is not available, edit the sitemap and allow the menu to be visible.
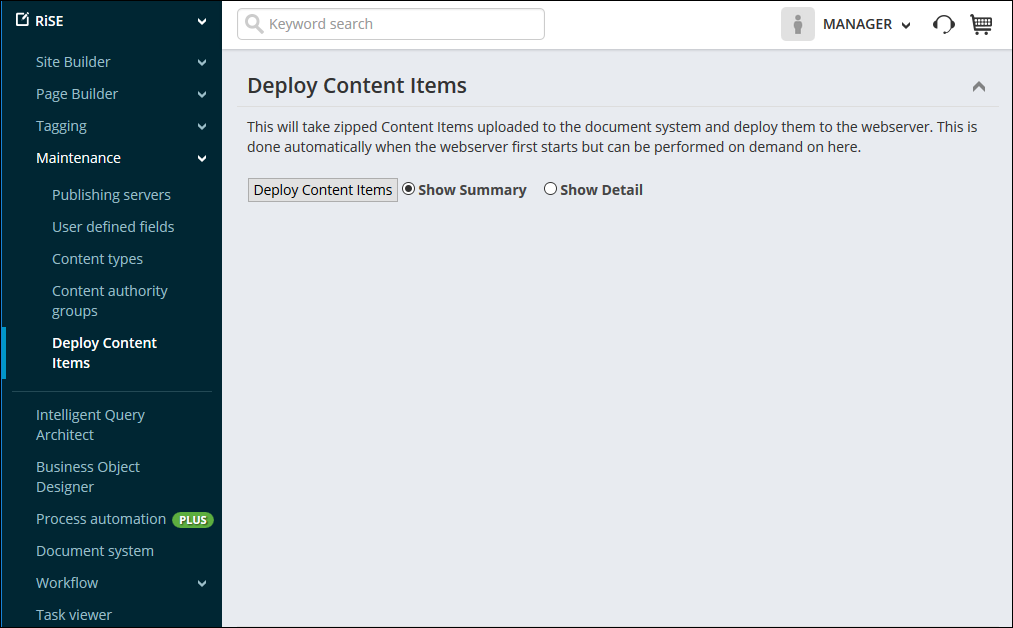
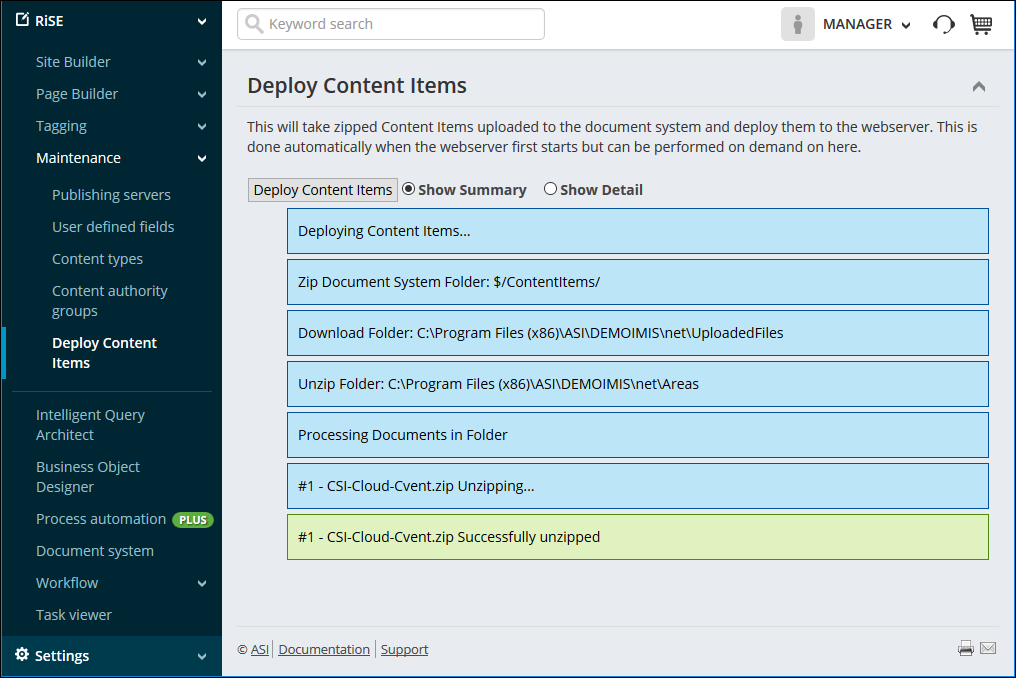
- Go to Maintenance > Deploy Content Items and deploy the content items and confirm the deployment.
- Review the output messages and validate the content item has been successfully unzipped. Make note of where the files were unzipped.
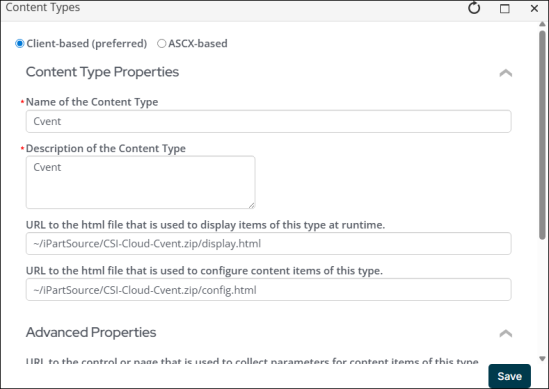
- Go to RiSE > Maintenance > Content types.
- Select the Events folder.
- Select New > Content Type.
- Choose Client-based (preferred):
- Name of the Content Type - Cvent
- Description of the Content Type - Cvent
- iMIS EMS:
- URL to the html file that is used to display items of this type at runtime - ~/content itemSource/CSI-Cloud-Cvent.zip/display.html
- URL to the html file that is used to configure content items of this type - ~/content itemSource/CSI-Cloud-Cvent.zip/config.html
Note: In iMIS EMS, this URL is where the zip file can be found. This is likely the listed link, as an content itemSource folder should have been created.
- iMIS 2017:
- URL to the html file that is used to display items of this type at runtime - ~/areas/CSI-Cloud-Cvent/display.html *URL to the html file that is used to configure content items of this type.**
- URL to the html file that is used to configure content items of this type - ~/areas/CSI-Cloud-Cvent/config.html
Note: In iMIS 2017, this URL is where the zip file was unzipped. It should also likely be the listed URL.
- Click Save.
Note: You must be signed in to the Cloud Dashboard to download the content item.
Configuring the content item
The content item must first be on a page to be configured.
Do the following to configure the content item:
- Go to RiSE > Page Builder > Manage content.
- Open the content record that the link to the Cvent registration page should be on.
- Select Add content.
- Open the Event folder, then double-click the Registration content item:
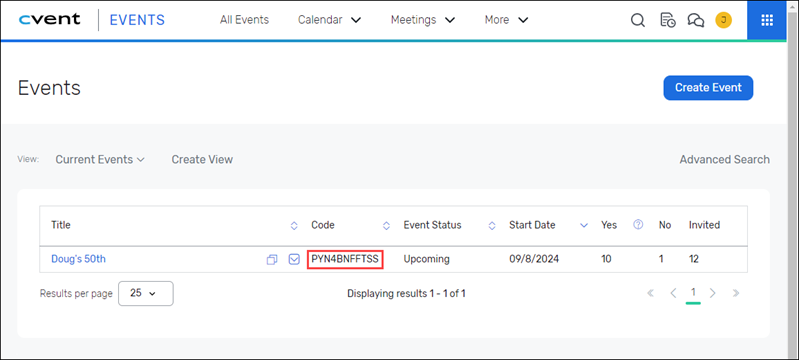
- Event Code - The specific code for a Cvent Event, for example: 2GNQVNC5PWB
- Authentication Method - How the potential registrants will be authenticated using the query.
- Credentials - Requires users to authenticate with their iMIS web login and password (preferred method).
- Email Address - Allow users to authenticate by entering their email address.
- Target Page - This will set the landing page in when redirected to Cvent (Summary, Invitation, Registration).
- Automatic Redirect to Cvent - This will redirect the user to Cvent (they will not have to click Register).
- There are two properties used for the Registration Prompt:
- Button Text - Text value to display for the registration button. The default value is Register Here.
- Button CSS Class - Cascading Style Sheets class value set on the registration button. The default value is TextButton.
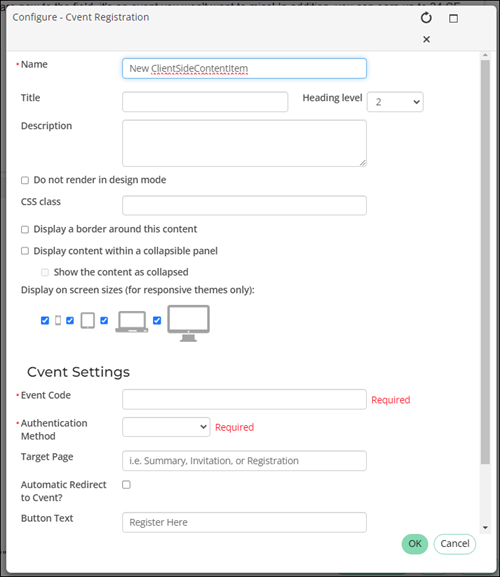
Note: If you have already integrated Cvent and iMIS via cloud, this link will display the possible event codes.
Note: The content item will yield a 404 error if the event it is being used with is not set to Active.