Last updated on: June 23, 2026
One-Time Campaigns
One-Time Text Campaigns can be either of the following:
- Campaigns that are sent immediately upon completing the setup
- Campaigns that are scheduled for one-time execution in the future
Status definitions
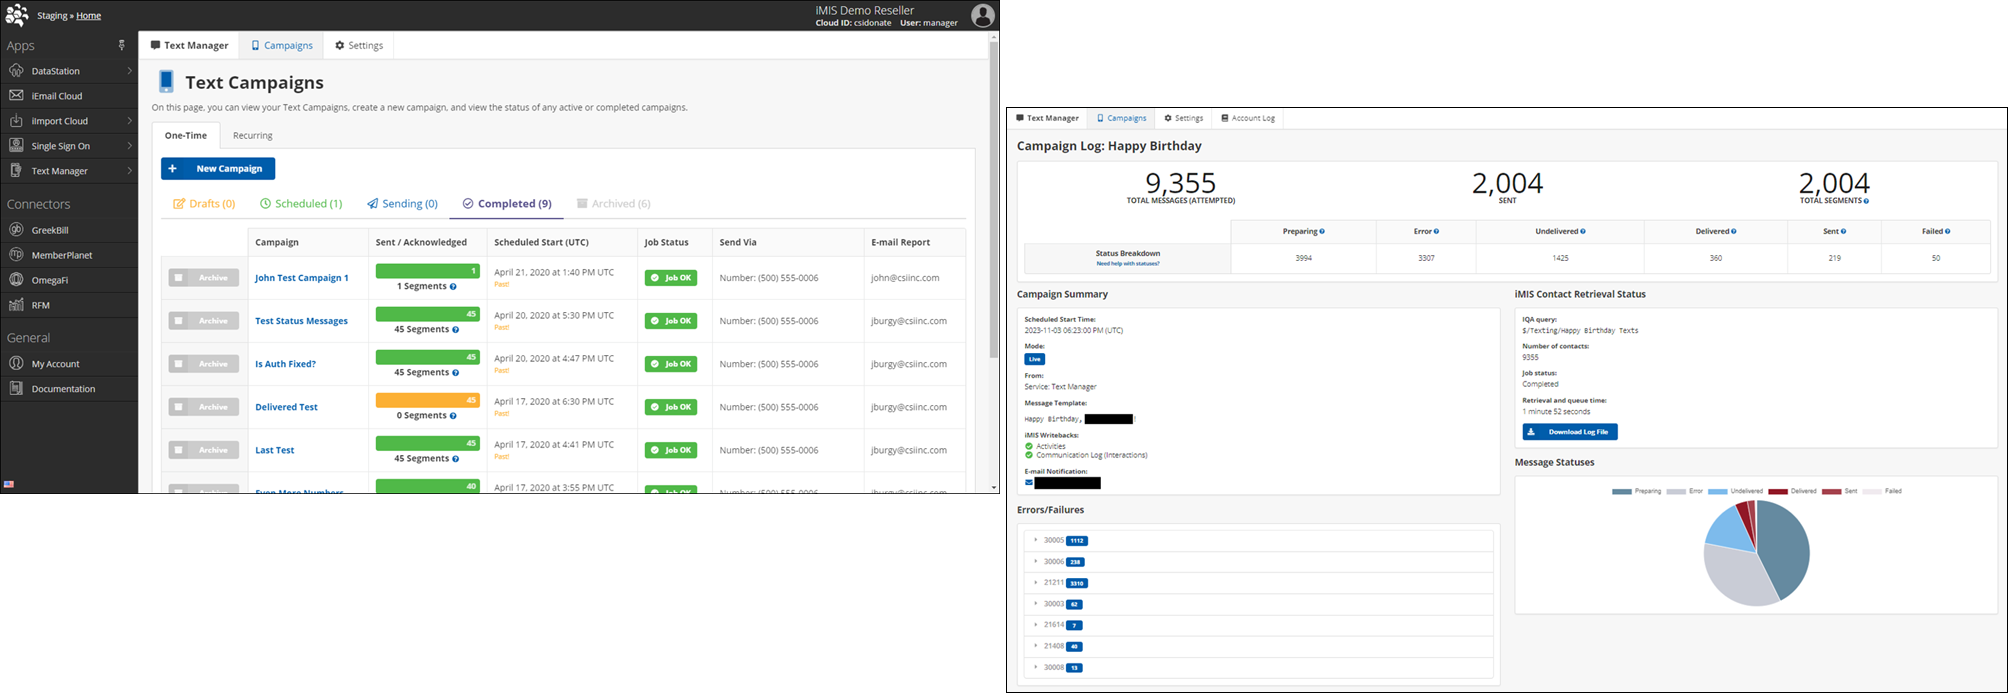
A campaign will have a specific status depending on the stage of the campaign. To review the status of a specific campaign, do the following:
- From the Cloud Dashboard, go to Text Manager > Campaigns.
- From the One-Time tab, select the Campaign name.
- The following Status Breakdown appears:
- Preparing: iMIS Text Messenger is generating the message and preparing it for delivery.
- Error: The To number is not a valid phone number.
- Undelivered: Twilio received a delivery receipt indicating the message was not delivered. Common reasons include carrier content filtering, issues with the recipient’s device, or temporary network problems.
- Delivered: Twilio has confirmed delivery through the carrier and, when available, from the recipient’s device.
- Sent: Twilio has sent the message but has not yet received a delivery update. This status is usually replaced with Delivered or Undelivered within a few seconds or minutes. Review the following additional notes:
- For US/Canada long-code MMS, the status often remains Sent due to limited delivery reporting from carriers.
- After 72 hours, it is unlikely that the status will update further, though Twilio will update it if a receipt is received.
- Messages sent using the deprecated /SMS/Message REST API Resource will remain in Sent permanently because that API does not support delivery status reporting.
- Failed: The message could not be sent. Possible causes include queue overflows, account issues, or media errors (for MMS). Twilio applies a Failed Message Processing Fee of $0.001 per failed message. See Twilio pass-along charges.
Creating the TEXTMSG required activity type
When text messages are successfully sent to members, an activity is written to Activities or to the Communications Log (Interactions). Before the activity can be recorded, the TEXTMSG activity type must be defined in iMIS.
Do the following to add the TEXTMSG activity type:
- From the Staff site, go to Settings > Contacts > Activity types.
- Select Add new activity type:
- Type - TEXTMSG
- Description - SMS Text Message
- Note - Message
- CEU type - Category
- Description - Sent To
- Click Save & Exit.
When text messages are successfully sent, activities are created:
- Activity Type: TEXTMSG
- TransactionDate: the UTC date/time the SMS was sent
- Id: the iMIS ID of the individual
- Description: the "To" phone number
- Note: the actual SMS message
- CEU Type: "iMIS Text Messenger" (hard coded to identify the source application)
Creating a new one-time campaign
To create a new one-time campaign, do the following:
- From the Cloud Dashboard, go to Text Manager > Campaigns.
- Click New One-Time Campaign.
- Enter a Campaign Name.
- Enter an email address in the Status Report emails(s) field. This email address will receive a full status report of the campaign results.
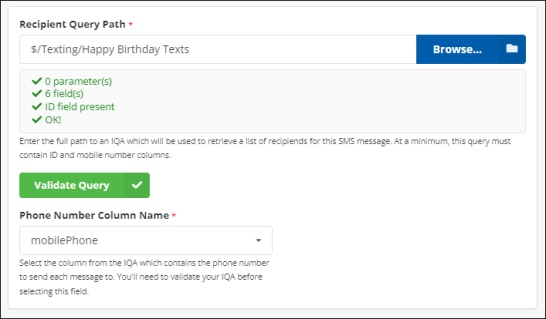
- From the Recipient Query Path field, click Browse. Retrieve the result set for the SMS Campaign.
- This field is then selected for Phone Number Column Name.
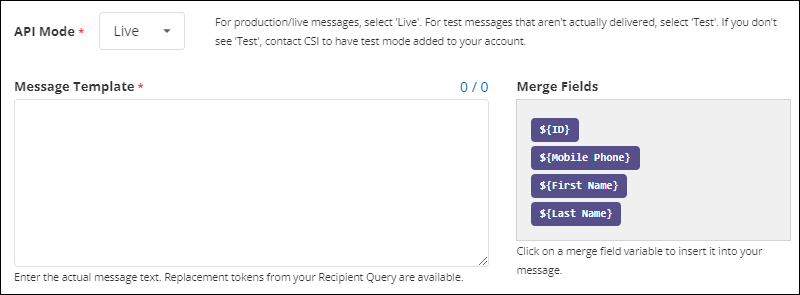
- From the API Mode field, select Live or Test. Test mode allows campaigns to be conducted but texts are not sent. Live mode does send texts.
- From the Message Template field, construct the text message that will be sent to members. The Merge Fields are the available fields from the selected query and can be used in the message. For example, addressing your members by name. "Hello ${FullName},"
- Enable Write to Activities to ensure the TEXTMSG activity is saved to the member's account upon successfully receiving the text message.
- Enable Write to Communication Log (Interactions) to have a communication log item saved to the member's account upon successfully receiving the text message. You will need to create the TEXTMSG activity type if it does not exist in iMIS.
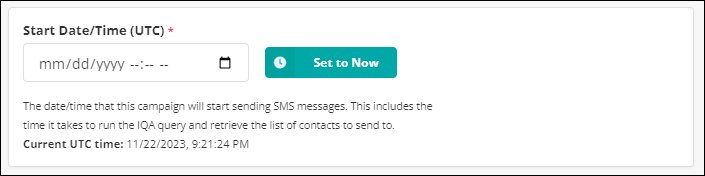
- From the Start Date/Time (UTC) field, choose the start date and time for the campaign. This includes the time it takes to run the query and retrieve the list of contacts.
- Review the campaign summary to determine how many contacts are returned in the query and how many people you will be sending the text message to:
- Estimate Segments show and estimation of how many text messages will be sent. A text message might be longer than 160 characters (standard max length for 1 text message) depending on your merge fields from your IQA.
- Max Segments/Day will show you current amount of segments(messages) you have left to send.
- Estimated Send Time allows you to know when it will be sent.
- Click one of the following:
- Save and Schedule Campaign - This will set the text campaign in motion by scheduling for execution
- Save Draft Campaign - This will allow you to edit the campaign until it is ready to be sent.
Important! The query must have at least two fields (iMIS ID and Mobile Phone number). All query display columns must have the Alias field populated.
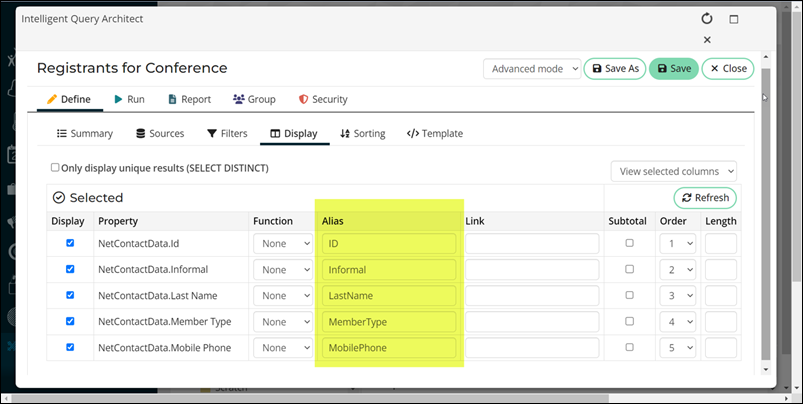
Note: Other columns can be included in the query for use in the SMS Message using the Merge Fields.
Important! If you did not Alias all of the query display columns, these Merge Fields do not work correctly.