Last updated on: June 23, 2026
QuickPay Receipts
To provide a custom receipt for customers who pay an invoice through QuickPay, the receipt process must be configured within iMIS.
Important! QuickPay does not generate or send receipts as part of its functionality.
Creating a Custom Receipt
The primary steps to creating a receipt are:
- Create an IQA query of individuals who have paid using QuickPay.
- Create the communication template.
- Create the process automation task to deliver the emails.
Step 1. Create an IQA Query
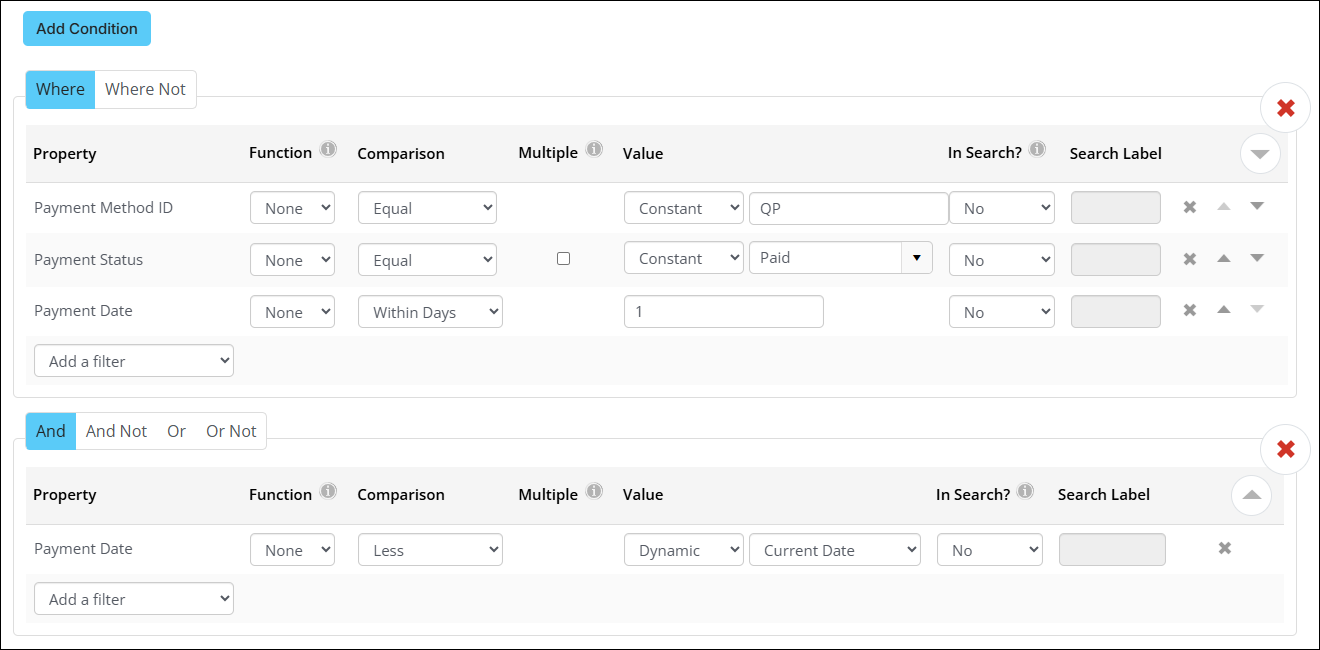
First create an IQA query using the PaymentSummary source and configure as shown below.
Example:
The sample query and task below demonstrate how to send receipts the day after an invoice is paid. They do not cover configuring a database trigger to send a receipt immediately upon payment. We recommend using triggers on system events sparingly. For assistance on setting up a triggered email receipt, please work with your iMIS solution provider or consultant.
Customers can be notified of the receipting schedule in the “Thank You” content block within the QuickPay setup in the Cloud Dashboard.
- From the Filters tab add the following:
- Payment Method ID:
- Comparison - Equal
- Value - Constant, "QP"
- Payment Status:
- Comparison - Equal
- Value - Constant, "Paid"
- Payment Date:
- Comparison - Within Days
- Value - 1
- Click Add Condition and ensure And is selected.
- Payment Date:
- Comparison - Less
- Value - Dynamic, Current Date
- From the Display tab, include any fields that should be available as merge fields in the communication template.
This is the payment method used to process QuickPay transactions. Configure a dedicated payment method for QuickPay to ensure your custom receipt process applies only to customers who pay through QuickPay.
It is recommended only sending receipts when the payment status is Paid.
The payment date must be included in two separate filter groups using an And Condition; otherwise, the filters will evaluate with an OR EXIST condition and include all prior payments.
Step 2. Create a Communication Template
After building the IQA query to identify receipt recipients, create a communication template for sending the receipts.
See Sample communication templates and Customizing the out-of-the-box templates for more information.
Step 3. Create the Process Automation Task
After the IQA query and communication template are complete, set up the process automation task. To learn how to create or edit tasks, See Creating and editing scheduled tasks.