Last updated on: May 07, 2026
Creating a Power BI Data Warehouse workflow
A lightweight data mart in Azure Blob Storage can be used to store historical iMIS data and integrate with Power BI for reporting.
Note that the following concepts are not covered:
- Data warehousing concepts like cubes, dimensions, or facts
- Official Data Warehousing solutions, such as Azure SQL Data Warehouse, Azure Data Lake / OneLake, AWS Redshift, etc.
- Detailed Power BI queries or other reporting techniques for visualizing historical data
Prerequisites
In order to create a Power BI workflow, ensure you have the following:
- Microsoft Power Automate
- The iMIS Power Automate Connector
- Microsoft Power BI
- A Microsoft Azure Storage Account (with blob access)
Setup
The process is as follows:
- Creating queries to expose data
- Creating a scheduled workflow
- Creating the report
Creating IQAs to Expose Data
Go to RiSE > Intelligent Query Architect, and create as many queries as needed to expose the data. See Building a new query for basic query creation.
Note: These queries will be run on a schedule, so the data in the queries should be a brief snapshot of the necessary data to report on over time.
In the sample below, there are two datasets :
- Count of contacts by member type
- Order total by the order category
Note: These are just samples - any data can be used. In addition, the workflow can be run as often as needed, such as daily, weekly, quarterly, or even hourly.
Creating a Scheduled Workflow
To create a scheduled workflow in iMIS Power Automate Connector, you must define when and how often the data needs to be captured.
Example: "Start on: 5/1/2023 at 1:00 AM" and "Repeat Every 1 Day".
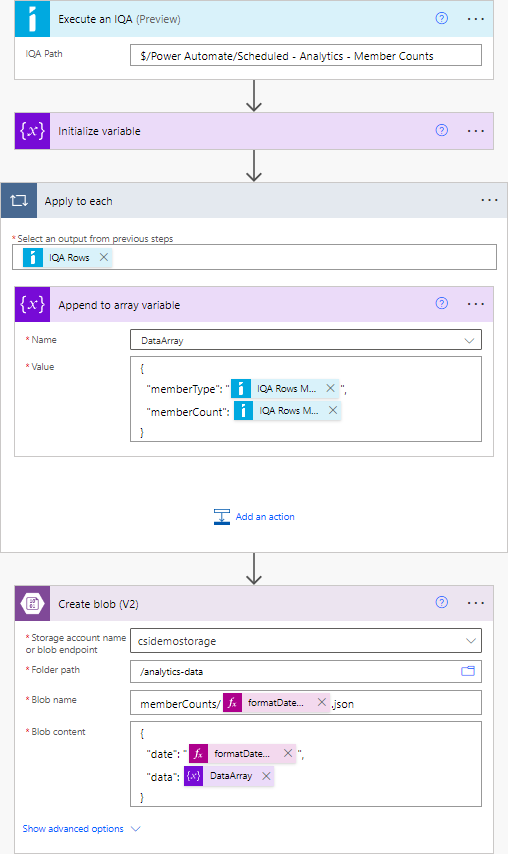
Review the basic outline of the workflow:
- (Trigger) On a schedule
- Execute an IQA
- Initialize a variable (Type: array)
- For each record in the query results:
- Append a JSON object to the array variable
- Create a blob in Azure Storage with the path: <data category>/<current date>.json (e.g. memberCounts/2023-05-12.json)
Creating the Report
Do the following to create the report in Power BI:
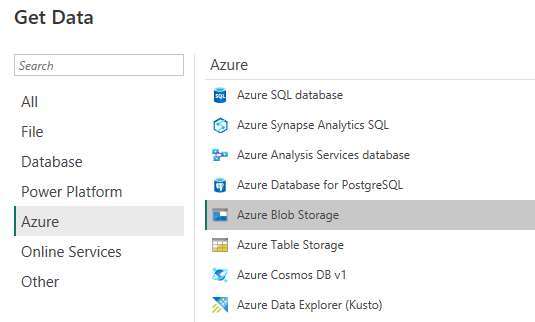
- Go to Power BI.
- Click Get Data.
- In the data source selection window, under Azure, select Azure Blob Storage.
- Authenticate using the preferred method.
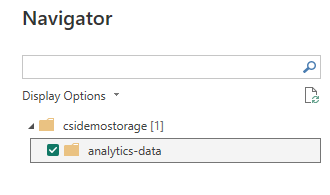
- On the Navigator screen, select the blob container that contains the JSON data files:
- Click Transform Data. A list of files appears, assuming that you've run the Power Automate flow at least once.
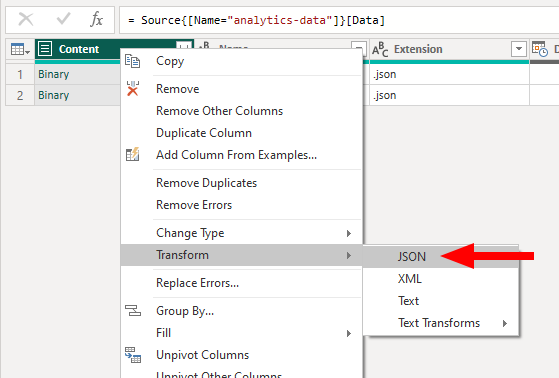
Note: Power BI can extract the contents of the files themselves, not just the list of files.
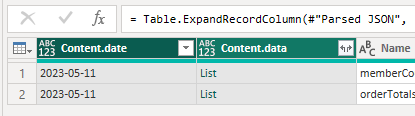
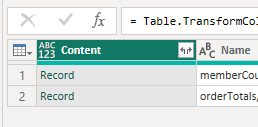
- Find the Content column, right-click, and select Transform > JSON. You'll notice that the column has changed from Binary to Record.
- Use Power BI to expand this column and incorporate the data into the dataset.
- Click the <> icon alongside the Content column, and click OK on the pop-up to include all properties.
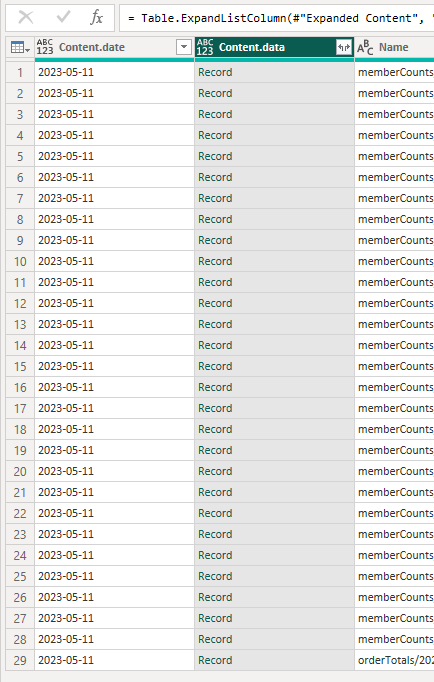
- Depending on how structure of the data, you'll see some additional columns. If using a nested array, you'll see an object of type List. This list can be expanded so that, instead of one row representing one file, a row can represent one item in the list.
- Click the <> icon alongside the List column, and select Expand to new rows.
- Next,use Power BI to expand this Record column into multiple individual columns.
- Click the <> icon again and click OK.
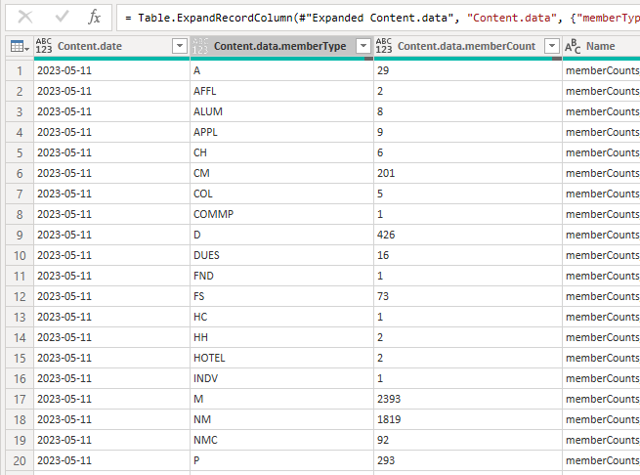
The data is now in a usable format.
- Proceed to rename or delete columns, change their type, or otherwise perform any other necessary M query operations on the data.
- Click Close & Apply to begin reporting.
Warning! If your JSON objects have different property names within them (e.g. you don't have a well-defined schema that can be represented within a table), Power BI may not be able to extract all of the information in each object. We recommend that all of your objects contain the same property names (within a given dataset). It is possible to work with schema-less data in Power BI, however that is outside the scope of this article.