Last updated on: January 27, 2026
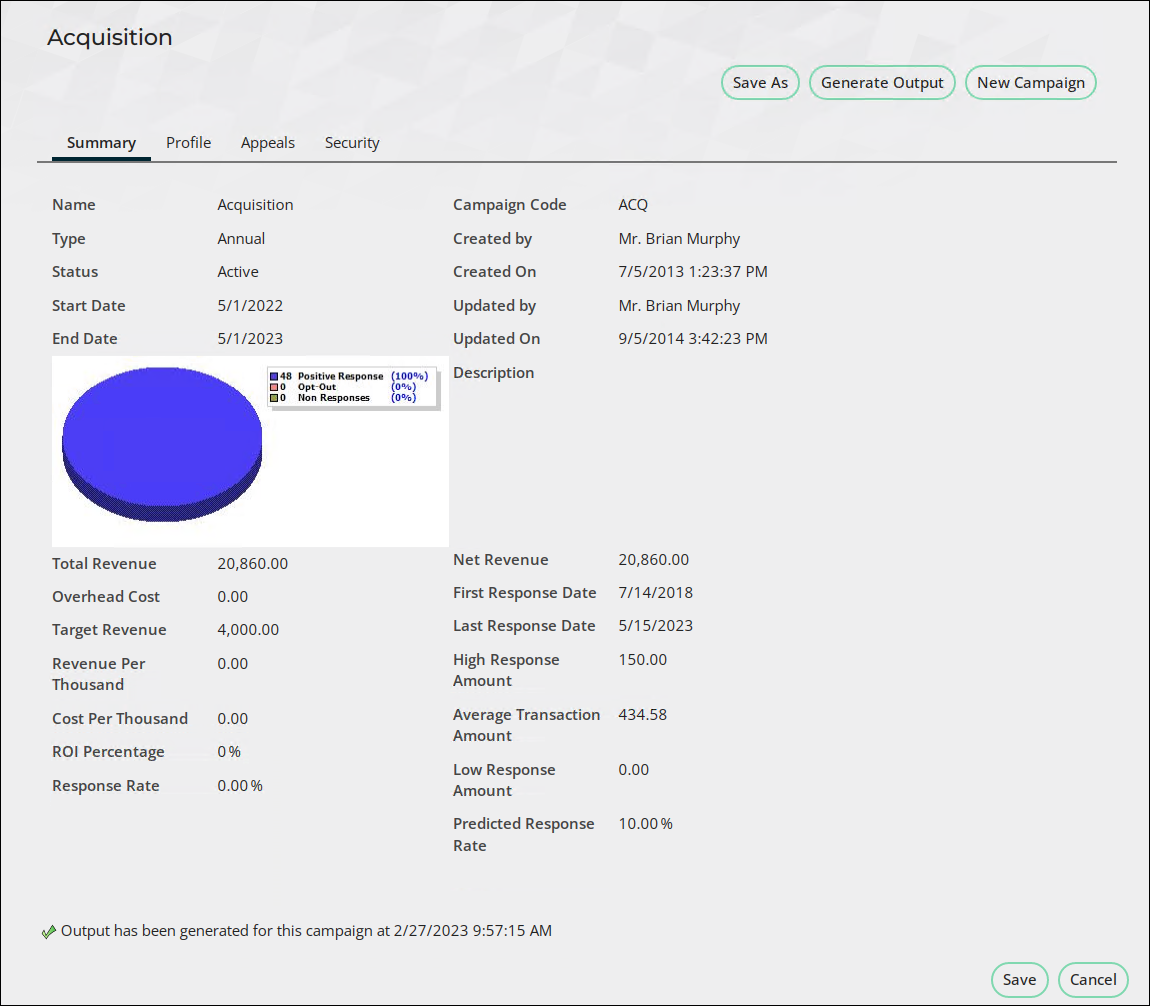
A basic campaign generally includes a few appeals and related solicitations, and likely only uses one or two source codes per appeal.
Important! You cannot set up a basic campaign until the following setup tasks are complete:
- Define setup options for all campaigns
- Set up security groups for campaigns
See Setting up campaigns for more.
In This Article
- Outline
Planning
Setting up the campaign
Defining appeals
Defining solicitations
Creating source codes
Creating source lists
Defining inserts
Generating output
Cloning a campaign
Outline
Defining a campaign consists of the following steps:
- Planning the campaign
- Setting up the campaign
- Defining appeals
- Defining solicitations
- Creating source codes for each solicitation
- Assigning the source list and inserts for each source code
- Generating the output
Planning
By planning your campaign carefully, you and your staff can perform efficiently and effectively. The planning process includes:
- Setting goals for the campaign.
- Defining campaign components and hierarchy.
- Defining the budget and cost tracking, if any.
- Identifying targets.
- Specifying marketing efforts.
- Defining campaign performance measurement.
See Planning a campaign for more.
Setting up the campaign
- Go to Marketing > Campaigns > Define campaigns.
- Select Add a Campaign.
- Enter a Name and Campaign Code.
- (optional) Select a Status (Active or Inactive).
- If the status is changed from Active to Inactive, the status of all child entities is set to Inactive.
- If the status is changed from Inactive to Active, the status of child entities is not affected.
- The status of a child component cannot be changed to Active if any parent components have an Inactive status.
- The status of a source code cannot be changed to Active if the campaign has an Inactive status.
- Select a campaign Type:
- None
- Annual – A campaign that occurs every year
- Designated – Funds generated by the campaign that are committed to a specific entity
- (optional) Enter a Start Date and an End Date.
- (optional) Enter a Predicted Response Rate (the estimated percentage of contacts that will respond to the appeal) and the Last Response Date.
- (optional) Enter a Description.
- Click Save.

Defining appeals
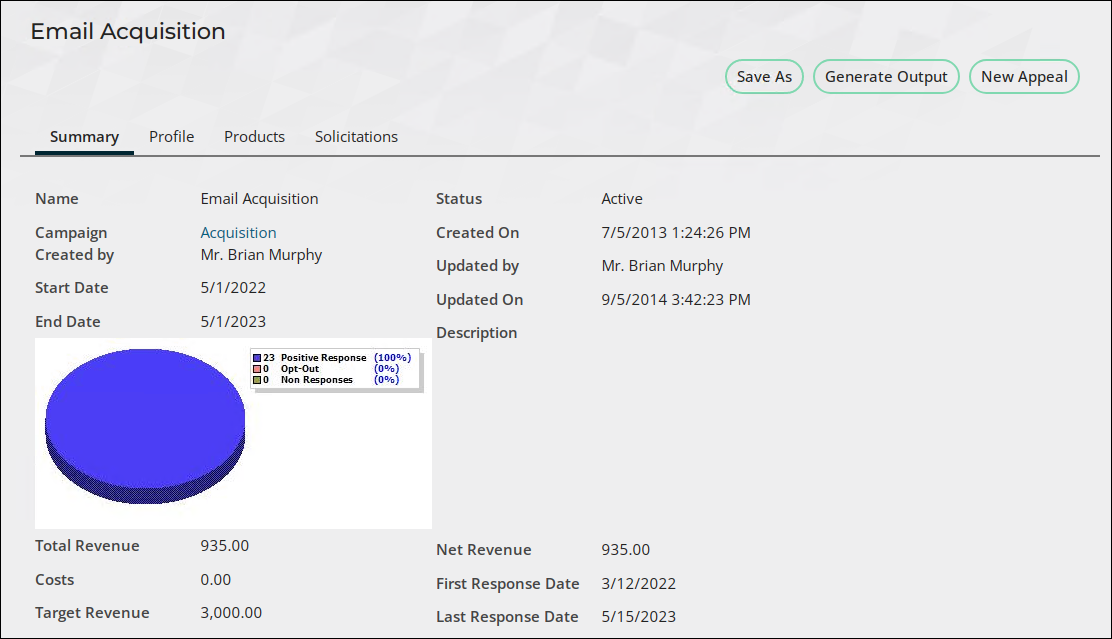
An appeal is the level of a campaign where you link specific products to the campaign, assign drop dates for media and other efforts, and track costs if necessary. Appeals are the building blocks of your campaign.
To define appeals for your campaign, you will:
- Link specific products to the campaign – Your campaign might include physical products such as apparel, books, and documents or non-physical products such as event functions, gifts, and pledges.
- From the Staff site, set up the products in the appropriate area before assigning them to the campaign.
- Fundraising events: Events > Add event
- Gifts and pledges: Fundraising > Add gift item
- Physical products: Commerce > Add product
- Add the products to the appeals in the campaign.
- (optional) Set up minimum required gift amount to receive each product.
- From the Staff site, set up the products in the appropriate area before assigning them to the campaign.
- Assign drop dates
- The definition of drop date depends on the media involved:
- Direct mail – Date the post office starts to deliver the mailing
- Telemarketing – Date the calls begin
- Media spots (TV, radio, webcast) – Date of airing
- Newsletters – Date of mailing, by issue
- Online campaigns – Date the email messages are sent
- Drop dates for other efforts can include:
- Mailing list generation
- Creative concepts/artwork complete
- Response management process set up
- The definition of drop date depends on the media involved:
- (optional) Track costs – If your organization tracks operational costs at the appeal level, you will need to enter cost information when you set up the appeal.
Important! Before creating appeals, there must be a campaign set up, and all products must exist before linking them to an appeal.
Do the following to create an appeal:
- Go to Marketing > Campaigns > Define campaigns and open a campaign.
- From the Appeals tab, select Add an Appeal.
- Enter a Name.
- Select a Status (Active or Inactive).
- (optional) Enter a Start Date and an End Date.
- (optional) Enter a Predicted Response Rate and the Last Response Date.
- (optional) Enter a Target Revenue.
- (optional) Enter a Description.
- Click Save.
- Do the following to assign Products to the appeal:
- Open a campaign.
- Click the Appeals tab and select an appeal.
- Click the Products tab.
- Select a Query to view:
- All Products
- Products By Code
- Select the desired products. The added products display in the list of Selected Products.
- Click Save.
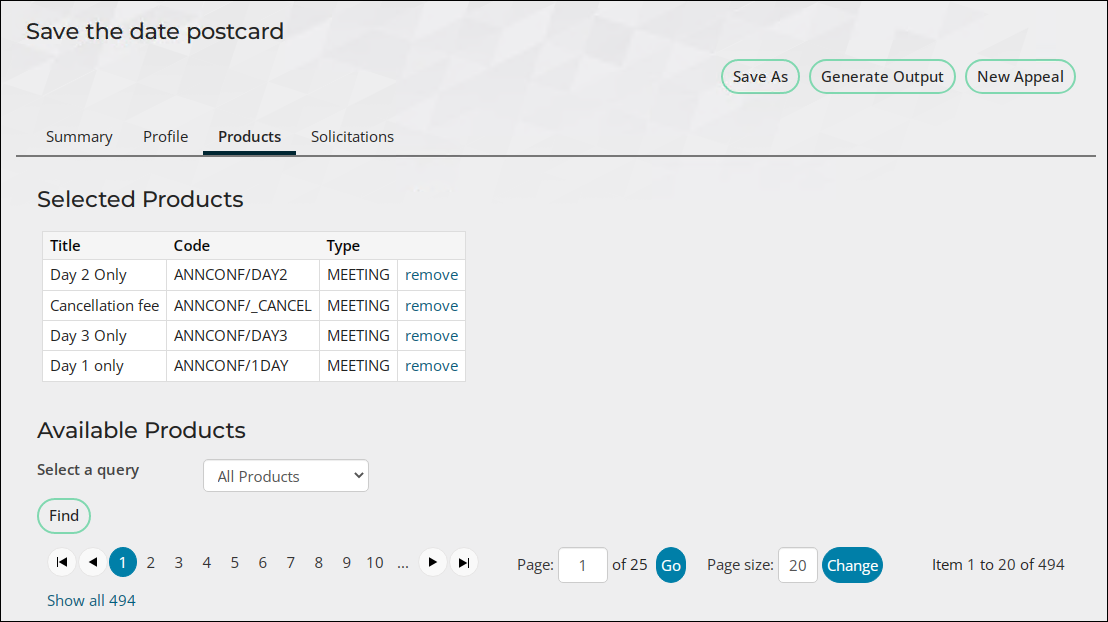
Note: When you delete a product after it has been assigned to an appeal, the Products tab displays only the product code of the deleted product.
Defining solicitations
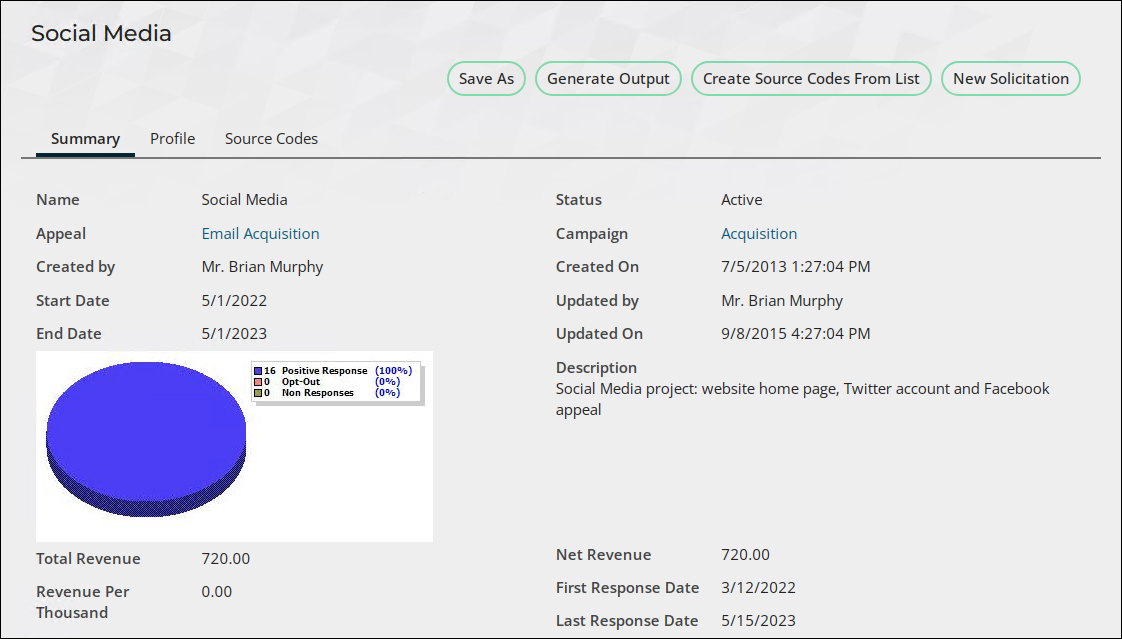
A solicitation is a series of source codes that request a response from contacts and prospects (such as a reply, donation, or purchase). Using source codes, you create solicitations to target a specific marketing appeal for different groups of contacts and prospects. Solicitations can be in the form of letters, phone calls, personal conversations, or other methods of contact.
- Go to Marketing > Campaigns > Define campaigns and open a campaign.
- From the Appeals tab, open an appeal.
- From the Solicitations tab, select Add a Solicitation.
- Enter a Name.
- Select a Status (Active or Inactive).
- (optional) Enter a Start Date and an End Date.
- (optional) Enter a Predicted Response Rate and the Last Response Date.
- (optional) Enter a Description.
- Click Save.
Creating source codes
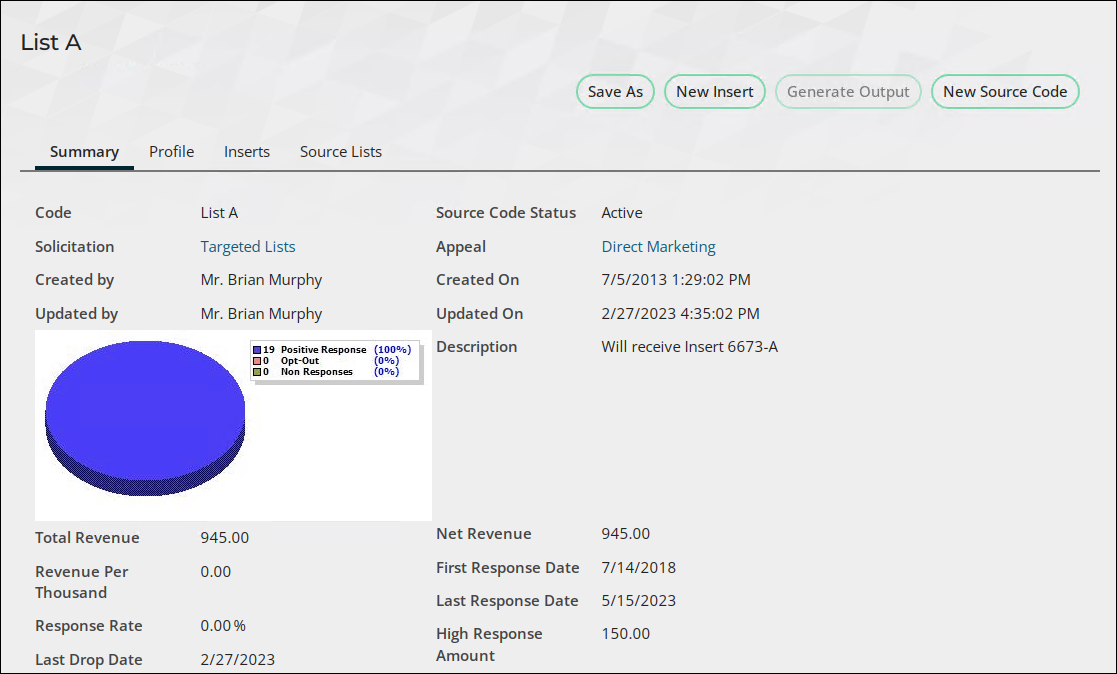
Source codes are the most granular level of measurement in Campaign Management. These codes are used to identify messages you send out and track the responses to these messages. Source codes are linked to reply devices such as postcards, website links, donations, and purchases.
With source codes you can tag marketing messages and track responses, set up codes for bounce-backs and responses that aren’t linked to a specific message, and identify messages that prompt certain responses.
There are three general kinds of source codes:
- Codes assigned to outgoing marketing efforts to track the incoming responses to the effort. Sometimes a contact receives more than one solicitation from your organization in a certain time frame.
- Generic codes that are assigned to ongoing passive ways in which a customer can support your organization, such as web transactions, word-of-mouth, or calls to action.
- Codes that are assigned to capture responses when the actual source code is not known.
Important! Before defining source codes, you must have one or more solicitations created.
- Go to Marketing > Campaigns > Define campaigns and open a campaign.
- From the Appeals tab, open an appeal.
- From the Solicitations tab, open a solicitation.
- From the Source Code tab, select Add a Source Code.
- Select a Source Code Status (Active or Inactive).
- (optional) Enter a Description.
- (optional) Enter a Predicted Response Rate and the Last Drop Date.
- Select a List Member Type (Contact or Prospect).
- (optional) Enter a Last Response date.
- (optional) Select the Source Code Type - Indicates whether source code list sources are defined by internal data or by an external file:
- RunOnce - The source code will be used only once.
- RunMany – The source code will be used more than once.
- ExternalList– The source list is an external file. Enter the External File Name and External List Count if using this type.
Note: When using RunMany, the number of responders and non-responders may increase with each use of the source code. To make sure your count is accurate, associate a separate source code with each piece of campaign communications material so the counts accurately reflect the effectiveness of the material.
- Click Save.
Creating source lists
The Source List is the group of contacts to be solicited. Source lists can be defined in the following ways:
- Segment Definition – Select a segmentation job and subsequent contacts to solicit.
- Solicitation Response – Select a Campaign, Appeal, Solicitation, and State.
- Query – Select a query of contacts to solicit.
To add a source list, do the following:
- Go to Marketing > Campaigns > Define campaigns and open a campaign.
- From the Appeals tab, open an appeal.
- From the Solicitations tab, open a solicitation.
- From the Source Code tab, open a source code.
- Go to the Source Lists tab.
- From the Select Type drop-down in the Add Source List area, choose the source list type:
- Segment Definition
- Select a segmentation job from the returned list.
- Click Save.
- Solicitation Response
- Select a campaign from the returned list.
- Define the Appeal, Solicitation, SourceCode, and Comparison fields.
- From the State field, select the type of response to solicit. Be sure to click add or the solicitation response will not be saved. Continue adding responses as needed.
- Click Continue.
- Query
- Select a query of contacts to solicit.
- Click Save.
- Segment Definition
- Click Save As.

Defining inserts
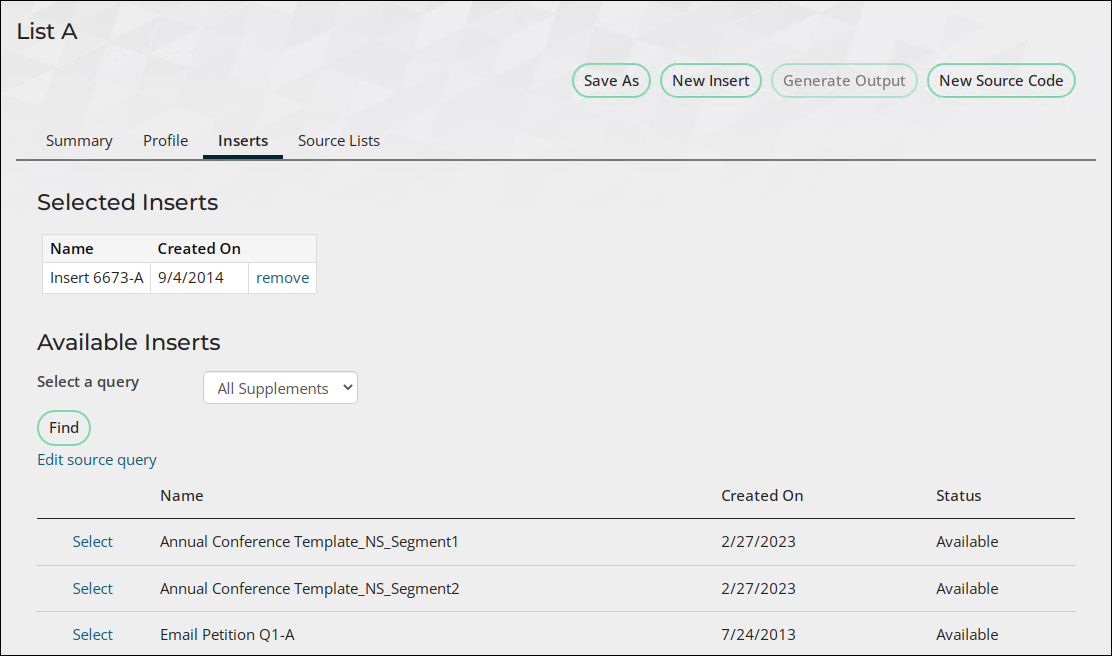
An insert is a physical item sent to a contact such as a merge letter, pre-printed collateral, or envelope. Once created, Inserts can be used by multiple campaigns.
Once a Source List has been created for each source code, do the following to create an insert:
- Go to Marketing > Campaigns > Define campaigns and open a campaign.
- From the Appeals tab, open an appeal.
- From the Solicitations tab, open a solicitation.
- From the Source Code tab, open a source code.
- Go to the Inserts tab.
- Either select an existing insert, or click New Insert.
- Enter a Name.
- (optional) Enter a Description.
- (optional) Define a Total cost by clicking the browse icon. Once finished, click OK.
- (optional) Select a Status.
- Select the Insert Type.
- Postage
- Enclosure
- Envelope
- Form
- Brochure
- Browse to select an Output Process.
- Click Save.
Note: Do not use CsContactBasic or CsProspect as query sources for output processes. Use only the NetContactData or Prospect business objects.
Generating output
You can generate output from a campaign, appeal, solicitation or source code. When you generate output from one level, such as an appeal, output for all of the components beneath it generates. For example:
- Appeal – generates output for all solicitations and source codes beneath it
- Solicitation – generates output for all source codes linked to it
- Source Code – generates output for that one source code only
The following output processes are available:
- Email merge – Send email messages to contacts.
- Campaign list export – Generate a list of contacts for an external service or for mass email output.
- RFM definition – Rank records based on Recency, Frequency, and Monetary value.
- Project process outputs – Generate projects for further relationship building.
To generate output, do the following:
- Go to Marketing > Campaigns > Define campaigns and open a campaign.
- From the Appeals tab, open an appeal.
- From the Solicitations tab, open a solicitation.
- From the Source Code tab, select a source code or create a new one.
- Click Save.
- From the Inserts tab, select an insert or create a new one.
- Click Save.
- From the Source Lists tab, select a source list or create a new one.
- Click Save.
- Click Generate Output.
Note: If the output is generated at a level higher than source code, output can be generated only once. If the output is generated at the source code level, output can be generated repeatedly.
Campaign list export files are stored after running. Go to Marketing > Campaigns > View output to view the export files.
Cloning a campaign
A cloned campaign is an exact duplicate of the original campaign with the following exceptions:
- The Name and Campaign Code are different.
- The Created Date equals the copy date.
- The Created By field equals the user who copied the campaign.
- The Start Date, End Date, and Reminder Date are adjusted automatically for the copied campaign.
- The copy has the same structure as the original campaign, including all appeals, solicitations, and source codes.
- All copied source codes contain the same inserts and messages as the original campaign.
- Source lists are not copied.
- If Campaign Management is configured to assign source codes automatically, all new source codes are regenerated automatically.
- If Campaign Management is configured to assign source codes manually, all new source codes are formatted as 'Copy of (original code).' If this code already exists, the code is copied until a unique code is found: 'Copy (sequence #) of (original code).'
To create a new campaign quickly, you can clone an existing one and edit it.
- Select Marketing > Campaigns > Define campaigns.
- Select a campaign.
- Click Save As.
- Enter the new campaign Name, Campaign Code, and Type.
- Click Save.