Last updated on: June 30, 2026
Before creating new campaigns, set up the following areas:
- Security groups – Define user access to Campaigns, Segmentation, and RFM.
- Campaign settings – Configure the campaign options.
In This Article
Setting up security groups for campaigns
Security groups specify levels of access and control for users. Before creating new campaigns, add users to the following security groups:
Campaign security groups
The following security groups manage campaigns:
- CampaignAdmin – Has full control access to the Campaign functionality and its objects.
- CampaignMgr – Has read/add/edit/delete access to the Campaign functionality and read/edit access for all campaigns.
- CampaignUser – Has read-only access to the Campaign functionality and its objects.
To add users to the campaign security groups, do the following:
- Go to Marketing > Campaigns > Settings.
- Click the Security groups tab.
- Select a security group.
- Under Select New Members, search for and select the additional users.
- Click Save.
Segmentation security groups
The following security groups manage segmentation:
- SegAdmin – Has full-control access to the Segmentation functionality and its objects.
- SegMgr – Has read/add/edit/delete access to the Segmentation functionality, and read/edit access to its objects.
- SegUser – Has read-only access to the Segmentation functionality and its objects.
To add users to the segmentation security groups, do the following:
- Go to Marketing > Segmentation > Settings.
- Click the Security groups tab.
- Select a security group.
- Under Select New Members, search for and select the additional users.
- Click Save.
RFM security groups
The following security groups manage RFM analytics:
- RFMAdmin – Has full-control access to the RFM application and its objects.
- RFMMgr – Has read/add/edit/delete access for all analysis and reports.
- RFMUser – Has read-only access for reports.
To add users to the segmentation security groups, do the following:
- Go to Marketing > RFM > Settings.
- Click the Security groups tab.
- Select a security group.
- Under Select New Members, search for and select the additional users.
- Click Save.
Configuring campaign options
Set up Campaign Management according to the method your organization uses to track and process data. These options apply to all campaigns.
To configure the campaign options, do the following:
- Go to Marketing > Campaigns > Settings.
- From the Options tab, define the following settings:
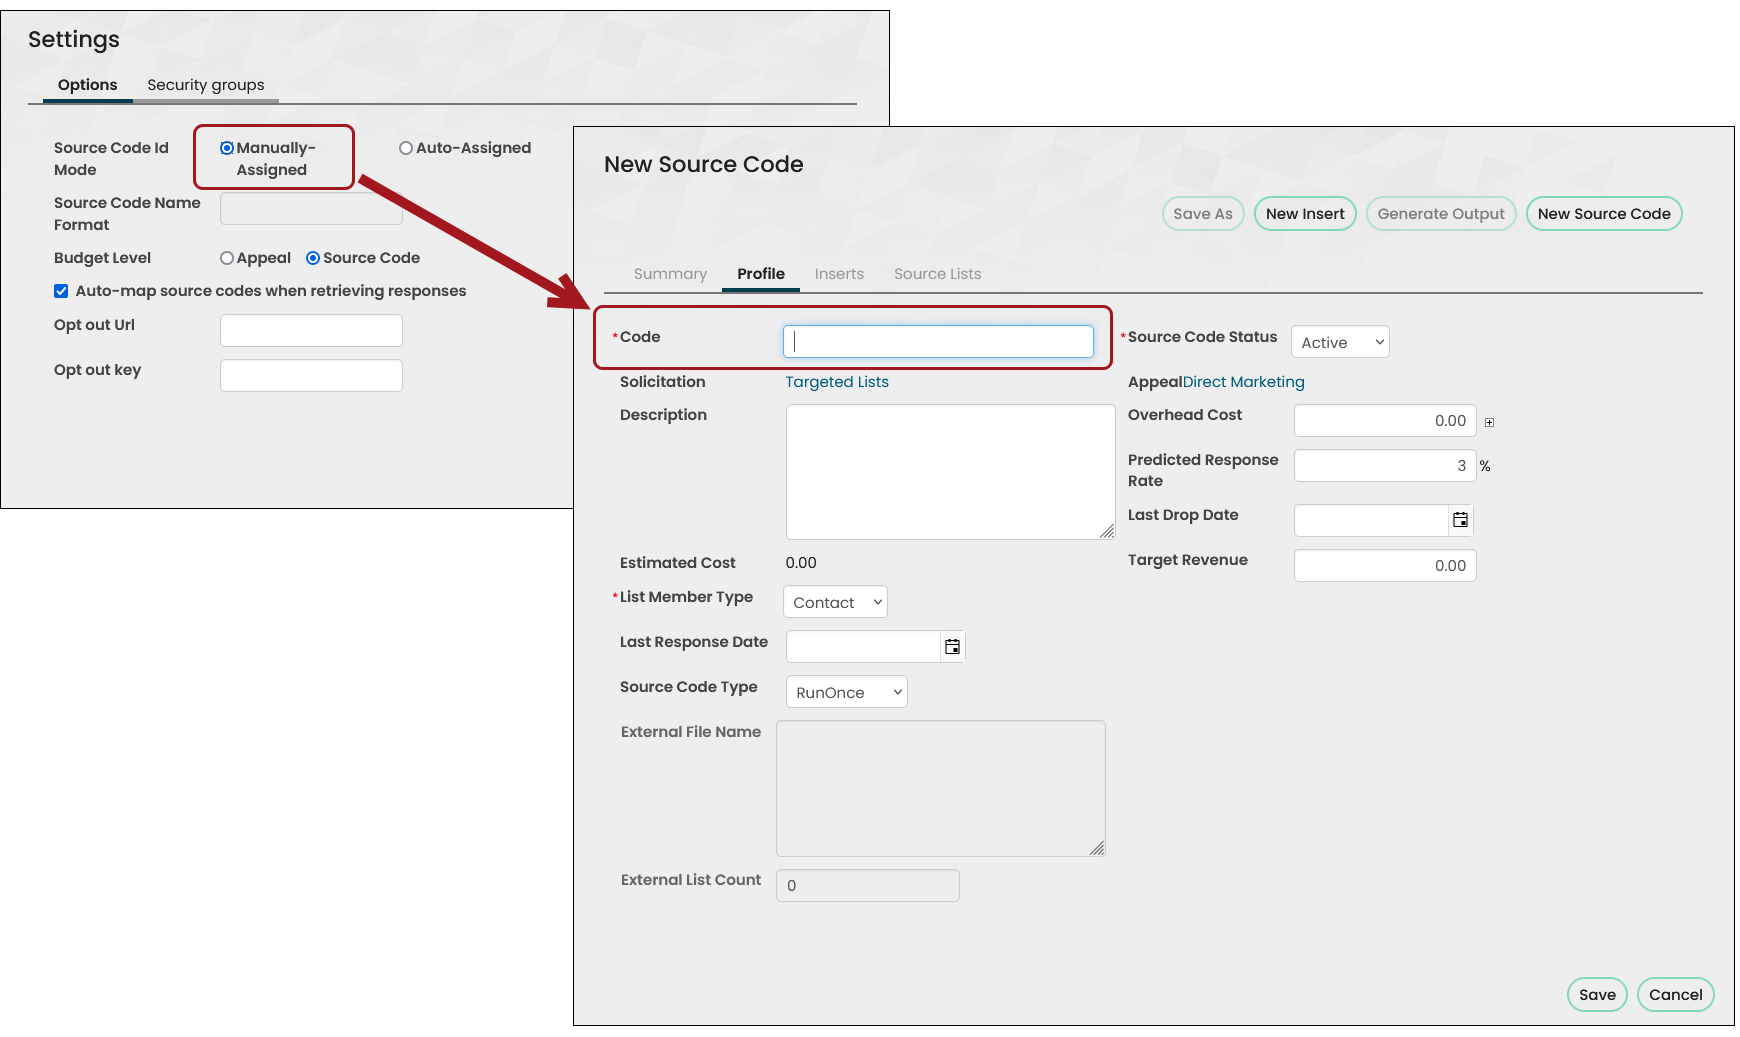
- Source code ID - Determines whether to generate source codes manually or automatically:
- Manually-Assigned – When enabled, you must enter a unique value in the Code field to save a source code. Once saved, the Code cannot be edited.
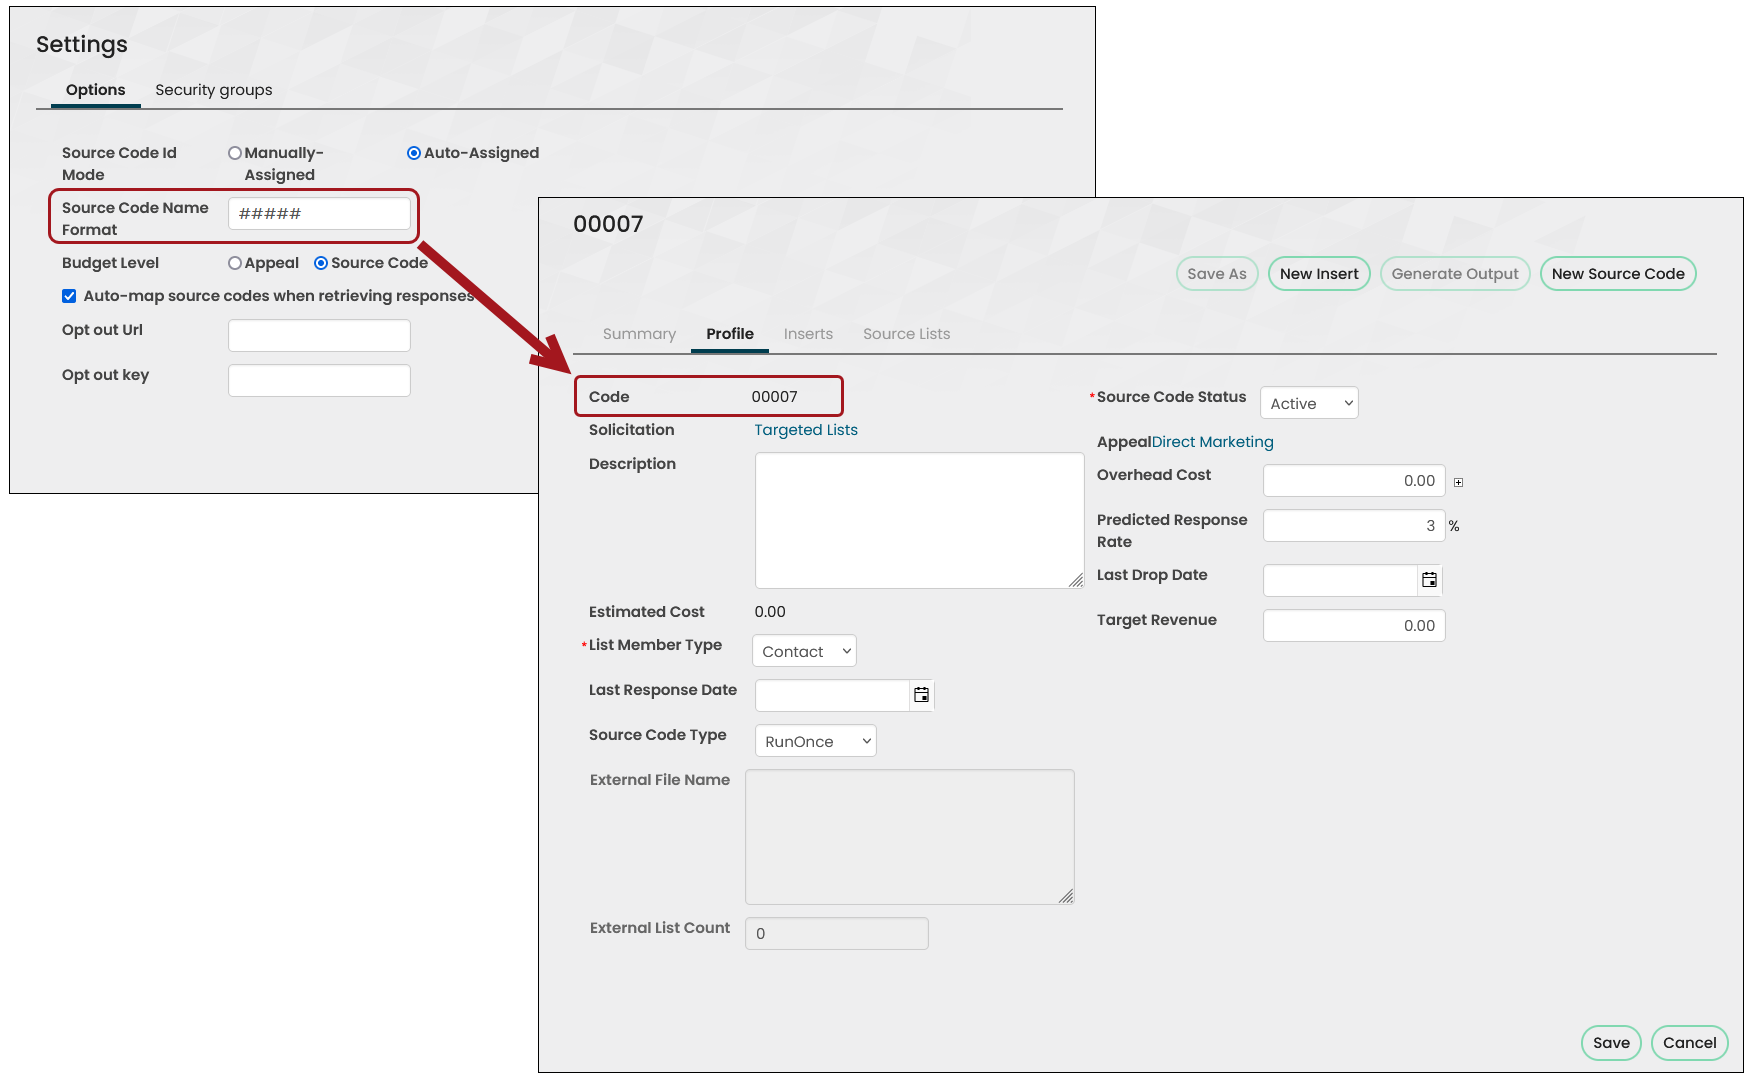
- Auto-Assigned – Enable to enter a Source Code Name Format. The Source Code Name Format is used to generate a unique code for each new source code. Auto-Assigned codes cannot be edited.
- Source Code Name Format – If Auto-Assigned is enabled, enter a formula for automatically generated source codes.
- Budget level – Determines how to calculate the various campaign costs:
- Appeal – Enable to calculate costs at the Appeal level. When enabled, the following costs are available:
- Total Cost, Target Revenue, Predicted Response Rate, and ROI displays for campaigns and appeals only.
- Total cost calculation ignores insert costs and equals the sum of all overhead costs for an appeal and for all appeals within a campaign. Because Total Cost calculation relies solely on overhead costs, Total Cost is never estimated.
- Users can edit the Overhead Cost, Target Revenue, and Predicted Response Rate for appeals.
- Source Code – Enable to calculate costs at the Source Code level. When enabled, the following costs are available:
- Total Cost (Actual or Estimated), Target Revenue, Predicted Response Rate, and ROI displays for campaigns, appeals, solicitations, and source codes.
- Total cost calculation includes insert costs. Before source code output is generated, the Estimated Cost displays the sum of the overhead costs and estimated insert costs. After generating output for source codes, the Actual Cost displays the sum of the overhead costs and actual insert costs.
- The Calculate Estimated Costs button is available on the campaign, appeal, solicitation, and source code portfolio pages.
- Users can edit the Overhead Cost, Target Revenue, and Predicted Response Rate for source codes.
- Appeal – Enable to calculate costs at the Appeal level. When enabled, the following costs are available:
- Auto-map source codes when retrieving responses – Enable to map source codes to orders, gifts, and pledges if a source code is not provided when synchronizing responses. The source code is obtained from Events, Commerce, or Fundraising. If the setting is not selected, iMIS does not recognize responses if an order, gift, or pledge does not have an associated source code.
- (optional) Enter the Opt Out URL and the Opt Out Key to use in email templates for customers who want to be removed from a mailing list.
- Opt Out Url – Points to an opt out page, such as http://www.example.org/iMIS/OptOut.aspx. When an email recipient clicks the "click here" link in the campaign email, they go to the URL for the Opt Out Url page.
- Opt Out Key – Contains the code you insert into the email template. The default value is %OPTOUTURL%. If you choose to change the Opt Out Key, be sure to change the code in the email templates that use the Opt Out Key.
Example: Enter XXX### for source codes to conform to the format of three letters, followed by three numbers. The ### characters must be next to each other. Numbers are not necessary, and special characters are accepted.
Note: This feature only applies if one or more products are associated with an appeal.
- Source code ID - Determines whether to generate source codes manually or automatically:
- Click Save.