Last updated on: June 08, 2026
Assign source codes to hyperlinks to track responses to specific communication efforts and associate them with the appropriate campaign.
Hyperlinks associated with source codes can be included in various marketing platforms:
- Email messages
- Social media accounts
- Another organization’s website
- Online advertisements
The following commerce items can be associated with source codes:
- Product purchases
- Event registrations and adjustments
- Give Now donations
- Join Now registrations
In This Article
Understanding source code assignments
Source codes are associated with a particular visit, or session. A session begins once the user selects a hyperlink containing a source code. The source code in the hyperlink acts as the default source code for the session.
When users submit orders during the session, the following occurs:
- The entire order is associated with the default source code.
- Each item line is assigned the source code associated with the last encountered reason for the current visit.
- Any item that does not have a defined source code is assigned the default source code.
A session ends once the browser is completely closed, or once a user logs off.
Example: A user follows a link in an organization’s Facebook post to add a book to their cart. This link uses the “FBOOK1” source code. Before checking out, the user clicks a link in an email from the same organization to register for an upcoming event. The link uses the source code “EMAIL2.” With the book and the event registration in their cart, the user submits the order. The entire order is assigned the “FBOOK1” source code, the book is assigned the “FBOOK1” source code, and the event is assigned the “EMAIL2” source code. The dollar amount raised for each source code is added to the total amount of the associated campaigns.
Staff users can override the default source code by doing one of the following:
- Selecting a new source code from the shopping cart.
- Selecting a new source code from a Give Now page and submitting the donation.
When staff users change the source code from the shopping cart or Give Now page, the new source code is saved as the default source code for the session. For more information, see Associating source codes with transactions.
Assigning source codes to hyperlinks
To assign a source code to a hyperlink in a marketing email template, do the following:
- Open the query-based contact list from the content record.
- Click Email to open the email editor.
- Click Open to select a previously saved email message draft or compose new email content. For more details about composing communications, see Creating a new communication template.
- Select the text or graphic you want to link to your website.
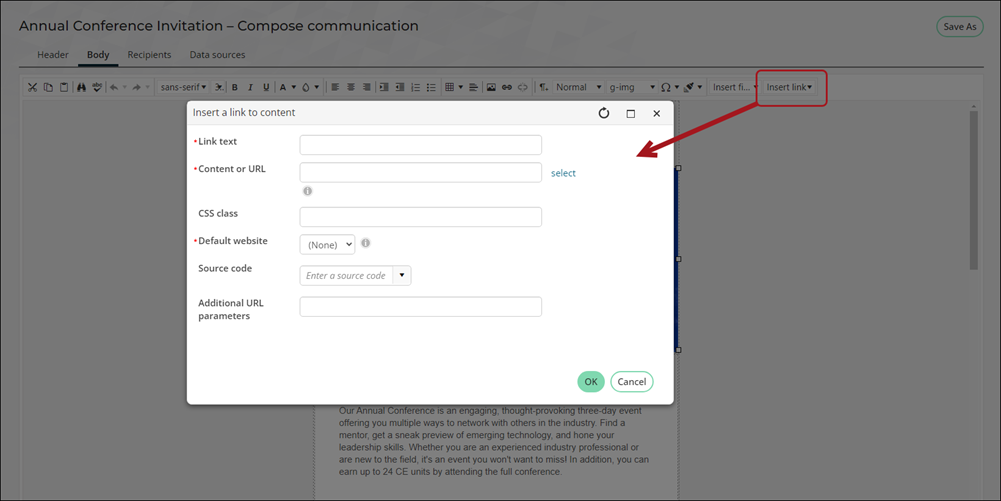
- From the Insert drop-down, select Content or URL.
-
This link allows users to navigate to a separate web page. Do the following to configure the link:
- Enter the Link text.
- Define the Content or URL:
- Select content from the Document browser.
- Enter a content record's direct path. For example, @/iCore/DefaultStaff.
- Enter a shortcut URL. This will preserve the link even if the content is moved in the document system. The shortcut must conform to the format ~/Shortcut.
- Enter a direct link. For example, https://example.com.
- Enter a CSS class that will be applied to the link.
- If the Content or URL is pointing to a content record, select a Default website.
- Enter or select a Source code to associate this link with a marketing campaign.
- Enter Additional URL parameters to include in the link. To add multiple URL parameters, follow the format:
Note: When the link is generated, it follows this format: https://example.com/?SourceCode=[SourceCode]. If the source code name contains spaces, they are replaced with %20 in the URL.
param1=value1¶m2=value2¶m3=value3
- Click OK.
- Click Save As to save to save the communication as a template.
- Name the template.
- Click OK.
Note: The From field and the To field are only required when sending an email. You do not have to populate these fields to create a template.
Note: The Document system saves the template to $/Common/Communications. See Accessing and modifying a saved communication template for information on opening and editing a saved email template.
Note: Any subsequent changes to this template, when attached to the same data source will be a simple save operation. Changes will not require saving a new copy of the template.