Last updated on: January 27, 2026
A source code is a short-term activity, such as a mass mailing, email effort, or a telephone solicitation connected to a campaign.
Select a source code from the Shopping cart to associate source codes with entire orders, member dues, or event registrations. The source code is associated with the purchase when the transaction is generated. To report on source codes associated with transactions to understand the motivation behind the purchase, use the out-of-the-box queries, reports, and business objects.
In This Article
- Creating the campaign
Adding source codes to the campaign
Assigning source codes from the shopping cart
Assigning source codes from the donation creator
Tracking and reporting source code performance
Creating the campaign
All source codes must be associated with a campaign. Do the following to create the campaign:
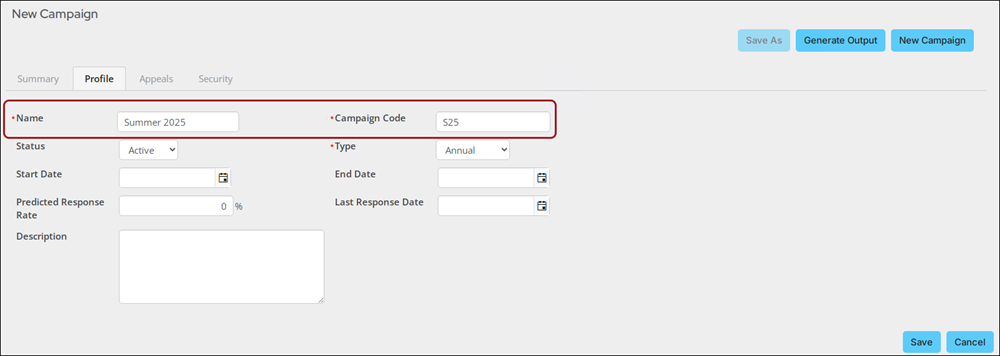
- Go to Marketing > Campaigns > Define campaigns.
- Select Add a Campaign.
- Enter a Name and Campaign Code.
- Click Save.
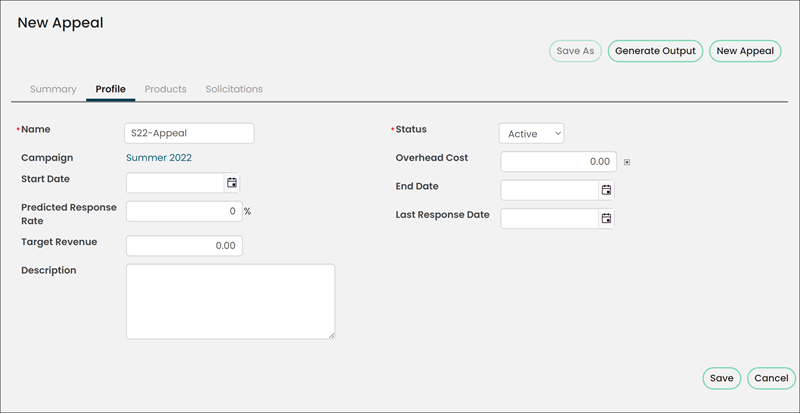
- Click the Appeals tab:
- Select Add an Appeal.
- In the Name field, enter the Campaign Code, followed by - Appeal. For example, if the Campaign Code is S25, the appeal Name is S25 - Appeal.
- Click Save.
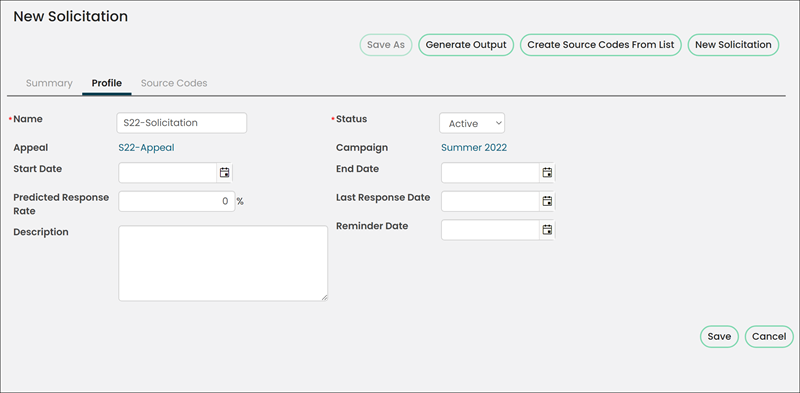
- Click the Solicitations tab:
- Select Add a Solicitation.
- In the Name field, enter the Campaign Code, followed by - Solicitation. For example, if the Campaign Code is S25, the solicitation Name is S25 - Solicitation.
- Click Save.
Adding source codes to the campaign
Every campaign can have multiple source codes associated with it. Do the following to add source codes to a campaign:
- Go to Marketing > Campaigns > Track campaigns.
- Select a campaign.
- Click the Source Codes tab.
- Select Add a Source Code.
- Define the source code:
- Enter a Code (if not automatically generated).
- Select the Source Code Status (Active or Inactive).
- Enter a Description. This is the source code name.
Note: If the Code is being automatically generated but you would prefer to enter your own code, go to Marketing > Campaigns > Settings. Update the Source Code Id Mode to Manually-Assigned and click Save.
- Click Save.
- Continue adding source codes.
Assigning source codes from the shopping cart
To assign source codes to transactions from the shopping cart, do the following:
- Navigate to the user’s account page.
- Choose one of the following:
- Click Join now or Renew Now if the contact is already a member.
- From the Actions drop-down, select Order and add the desired product to the cart.
- From the Actions drop-down, select Register and register the user for the desired event.
- Alternatively, begin working On behalf of the user and add any desired items to the cart.
- Proceed to checkout.
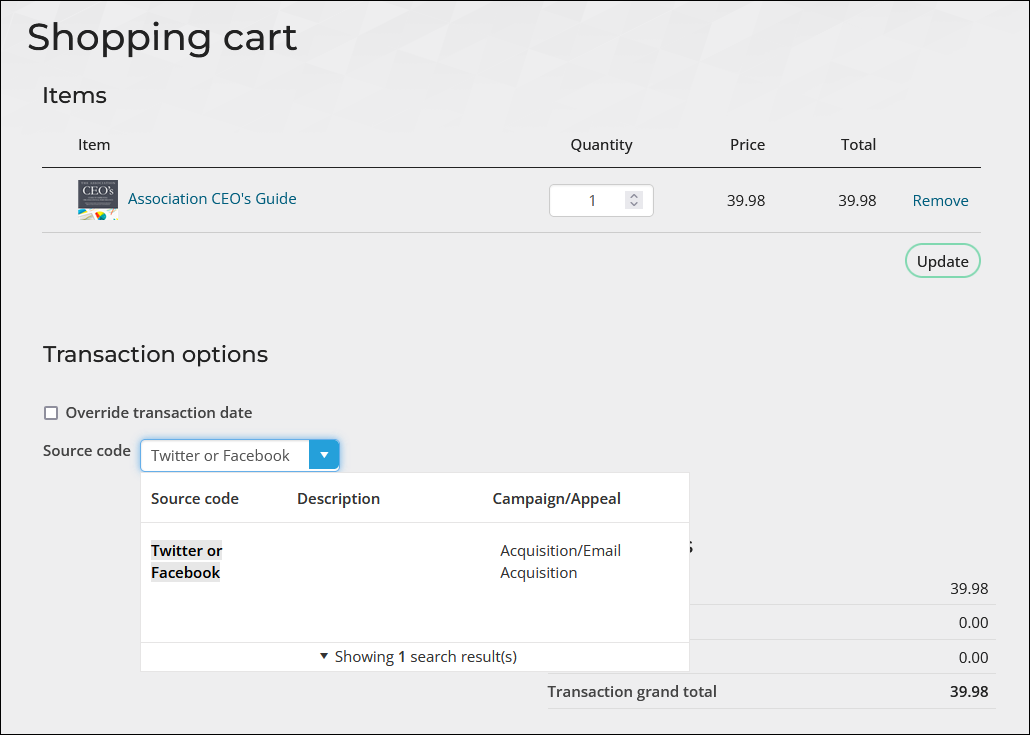
- In the shopping cart, select a Source code for the transaction. As you type in the Source code field, the field acts as a drop-down which displays the name, Description, and Campaign/Appeal for each source code.
- Enter the Payment details.
- Click Submit Order. Upon submitting the order, the Source code is assigned to all orders, donations, joins, renewals, and transactions generated from the cart.

Note: Source codes assigned to the hyperlink appear as the default value in the Source code field. Select a new source code in the cart to update the default value in the hyperlink, Donation Creator, and shopping cart. For more information, see Assigning source codes to hyperlinks.
Assigning source codes from the Donation Creator
When configured to process donations immediately, staff users can enter donations and assign source codes directly from the Donation Creator content item. Staff users can access the Donation creator from the staff site or from public Give Now pages.
Accessing the Donation Creator from the staff site
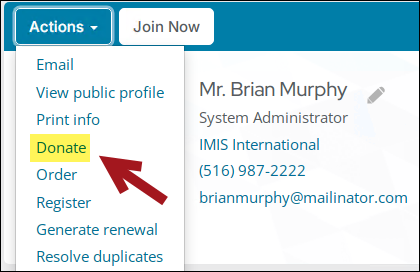
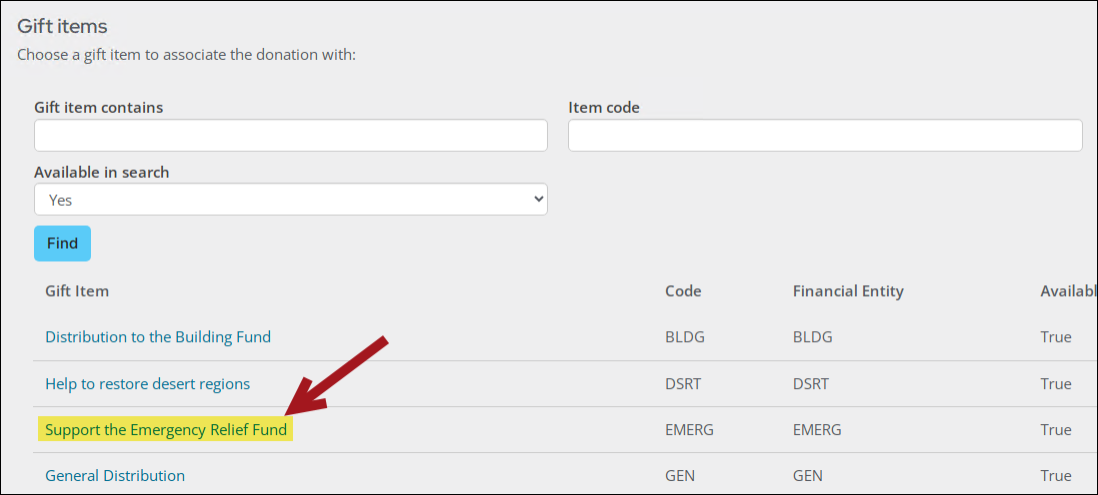
From the staff site, do the following to assign source codes from the Donation Creator content item:
- Navigate to the user’s account page.
- From the Actions drop-down, select Donate.
- Select a gift item.
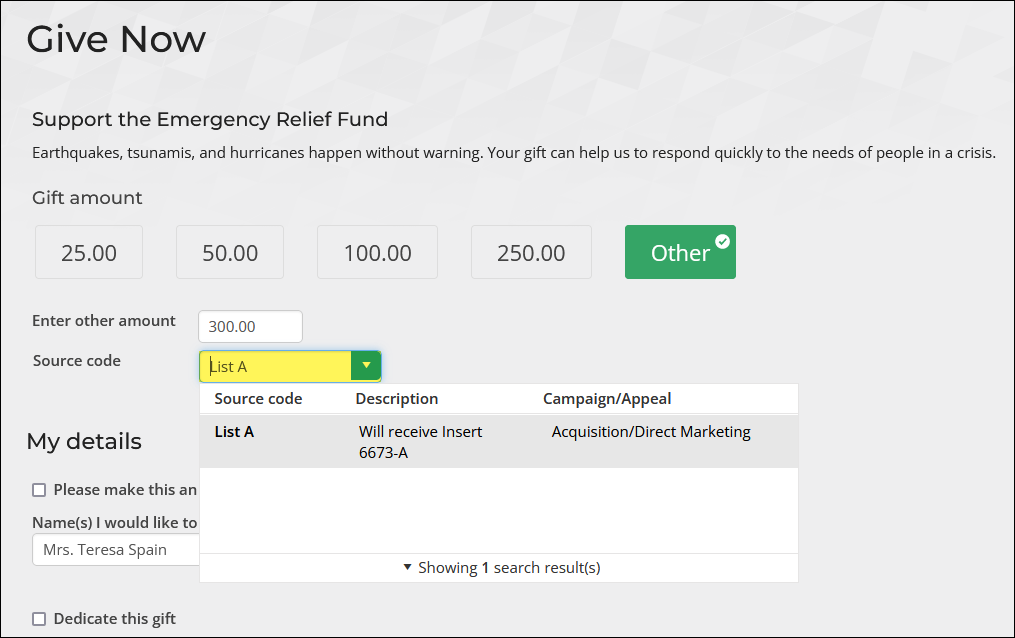
- Enter the gift Amount.
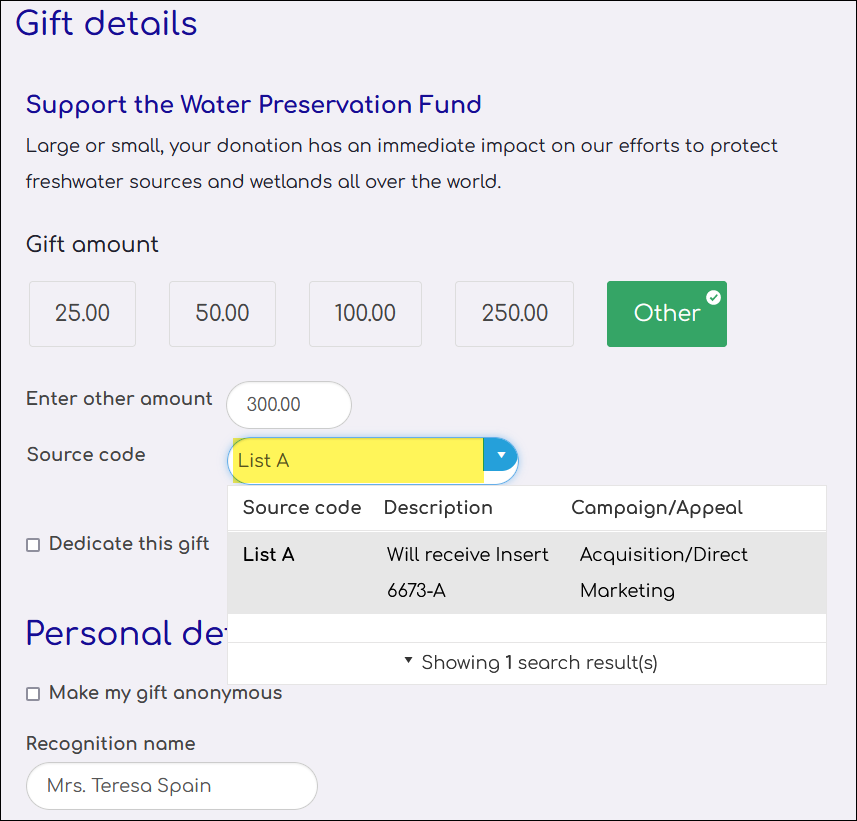
- Select a Source code for the donation. As you type in the Source code field, the field acts as a drop-down.
- Enter the remaining gift and payment details.
- Click Submit Order.
Note: Source codes assigned to the hyperlink appear as the default value in the Source code field. Select a new source code to update the default value in the hyperlink, shopping cart, and donation creator once the donation is submitted. For more information, see Assigning source codes to hyperlinks.
Accessing the Donation Creator from public Give now pages
Note: To assign source codes from custom Give Now pages, the Donation Creator must be configured to process donations immediately. For more information, see Setting up a custom donation page.
To assign source codes to donations from a public Give Now page, do the following:
- Begin working On behalf of the donor.
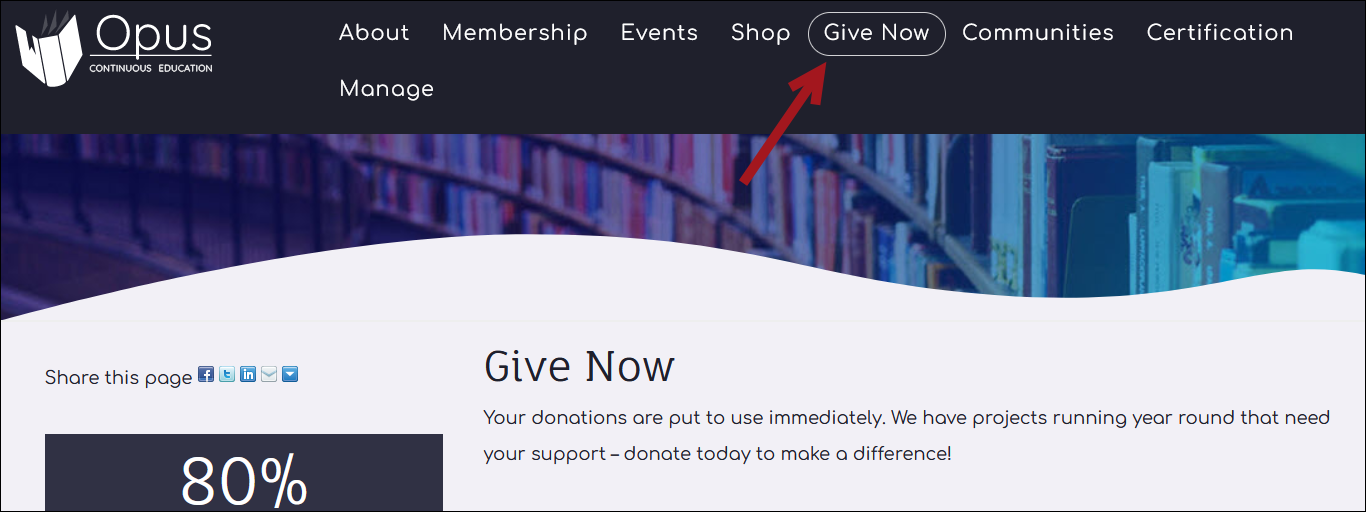
- Navigate to the public Give Now page. For example, from the Member quick-start site, go to Give Now.
- Enter the gift Amount.
- Select a Source code for the donation. As you type in the Source code field, the field acts as a drop-down.
- Enter the remaining gift and payment details.
- Click Submit Donation.
Note: Source codes assigned to the hyperlink appear as the default value in the Source code field. Select a new source code to update the default value in the hyperlink, shopping cart, and donation creator once the donation is submitted. For more information, see Assigning source codes to hyperlinks.
Tracking and reporting source code performance
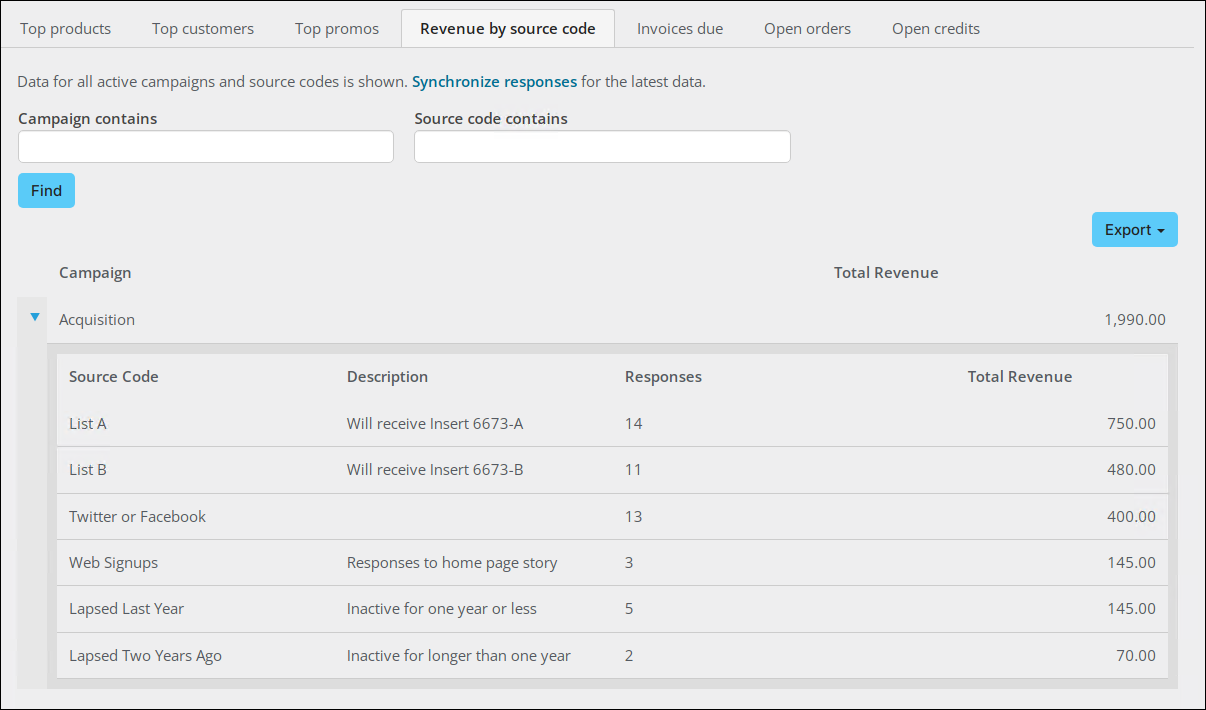
The Revenue by source code query (@/Samples/Dashboards/Commerce /Revenue_by_source_code) tracks campaign revenue and responses by source code. This query is available on the out-of-the-box Commerce dashboard:
- Go to Commerce > Dashboard.
- Select the Revenue by source code tab.
- Selecting Synchronize responses takes you to Marketing > Campaigns > Define campaigns. There you can sync the campaign responses.
- Search by campaign or source code.
- Expand the campaign to view the number of responses and the total revenue by source code.
- Choose to Export the query to Word, Excel, PDF, CSV, or XML.
REPORTING ON REVENUE BY SOURCE CODE
To create a report from the Revenue by source code query, do the following:
- Go to RiSE > Document system.
- Navigate to the $/Samples/Dashboards/Commerce folder.
- Open Revenue by source code for edit.
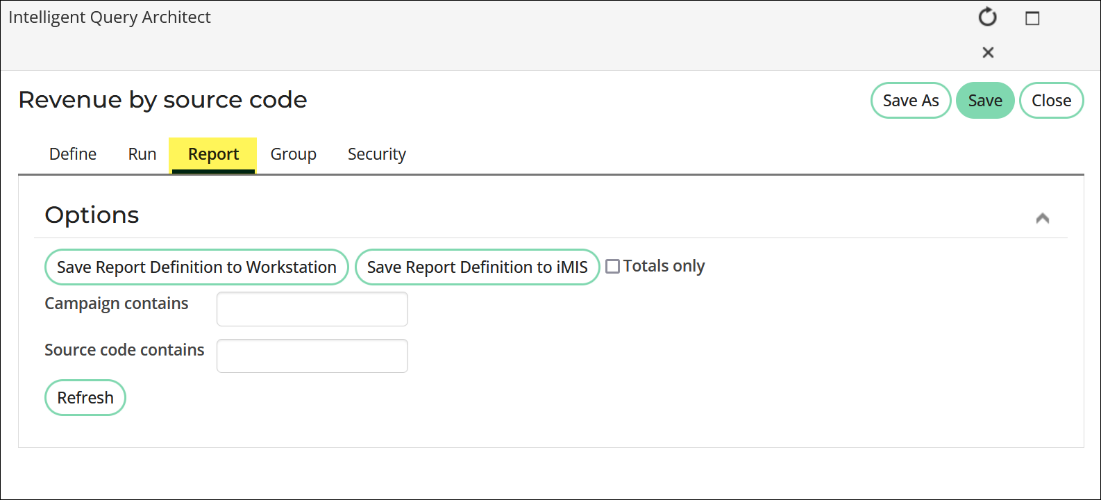
- Click the Report tab.
- Search by Campaign contains or Source code contains. Leave the fields blank to include all campaigns and source codes.
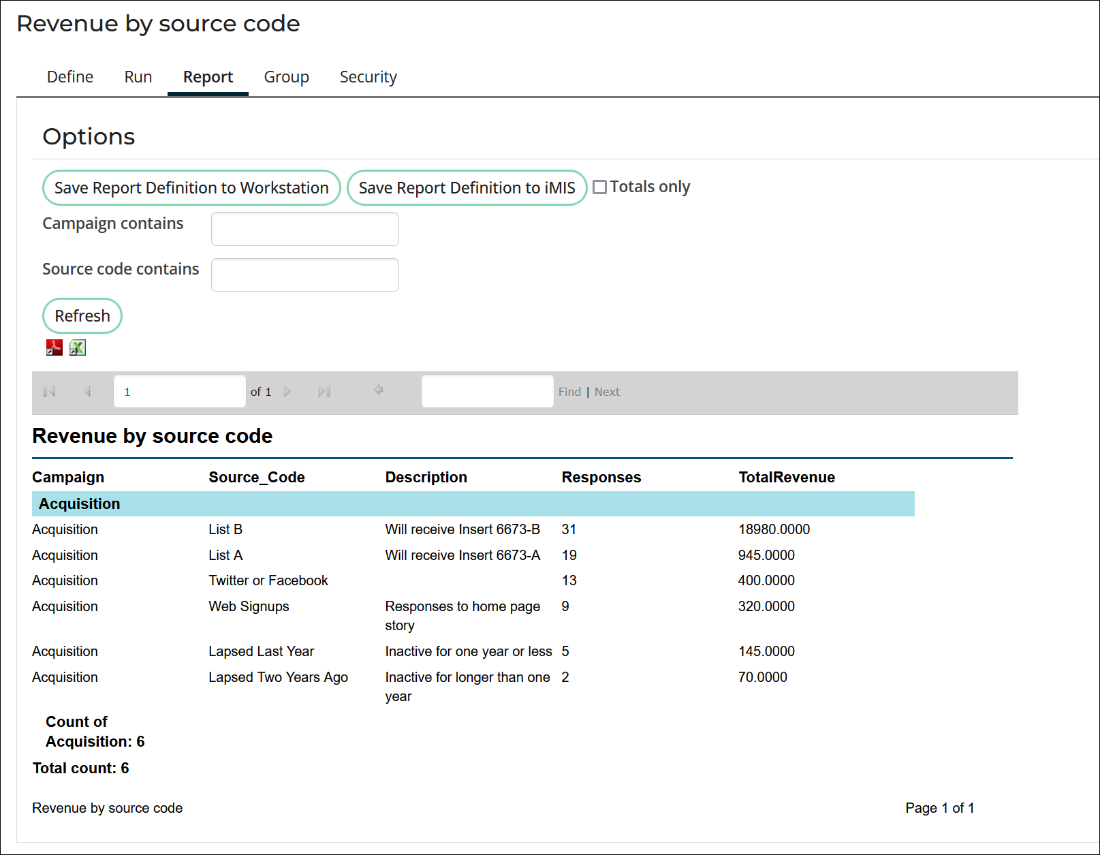
- Click Refresh to generate the report.
- Select the PDF or Excel icons to export the rendered report.
- To save the report, the following options are available:
- Click Save Report Definition to iMIS. Select the name and location you want and click Save, which creates the Reporting Services Template file
 and the Reporting Services Report file
  , already bound to the query.
 - To download the RDL template without creating any iMIS documents, Click Save Report Definition to Workstation.
- Click Save Report Definition to iMIS. Select the name and location you want and click Save, which creates the Reporting Services Template file
For more information, see Creating IQA-SSRS reports.
REPORTING ON Fundraising DATA
Gift items purchased through the shopping cart are included in the following out-of-the-box Fundraising reports (Reports > Fundraising reports):
- Gift Item Activity By Campaign
- Source Code Activity Report
- Source Code Performance Analysis
To create a simple custom query for reporting, use the DonationPerformance business object.
Related articles
- For more information on using the shopping cart, see Making a purchase.
- Staff users can also assign source codes using hyperlinks or when entering gifts. For more information, review the following articles: