Last updated on: June 08, 2026
To modify an out-of-the-box dashboard, you must first do the following:
- Make a copy of the dashboard content record (@/iCore/Staff_Dashboards).
- Update the related shortcut or sitemap item.
The dashboards were designed to visually look similar, but contain different information specific to the featured area. To learn more about the information on each dashboard, see iMIS Dashboards Overview.
In This Article
- Making a copy of the dashboard content record
Updating the related shortcut or sitemap item
Editing the dashboard
Customizing the dashboard queries
Making a copy of the dashboard content record
Do the following to make a copy of a dashboard content record:
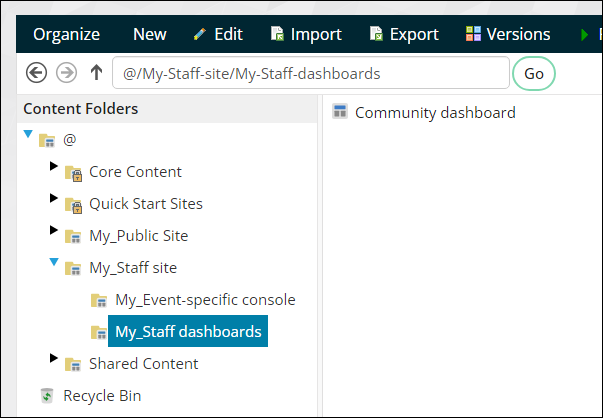
- Go to RiSE > Page Builder > Manage content.
- Navigate through the following folder path: @/iCore/Staff_Dashboards
- Open the folder of the dashboard you wish to modify.
- Select the dashboard content record, then choose Organize > Copy.
- Navigate to a non-system folder, then choose Organize > Paste.
- Click Publish, then click OK.
- Choose Organize > Refresh to confirm the content records have published.

Updating the related shortcut or sitemap item
The navigation items for the top-level dashboards use default shortcuts to point to the dashboard content records. Do the following to update the related shortcut, so that your copied content is used instead:
- Go to RiSE > Site Builder > Manage shortcuts.
- Locate the related shortcut.
- Click the edit icon.
- From the URL or content record field, choose the copied dashboard content record.
- Click OK, then click Update.
- Go to Settings > About iMIS, then click Purge System Cache.
| Dashboard | Shortcut |
|---|---|
| Community | StaffCommunityLanding |
| Engagement Overall | StaffEngagementLanding |
| Engagement Organizations | StaffOrgEngagement |
| Data integrity | DataIntegrityDashboard |
| Membership | StaffMembershipLanding |
| Chapter | ChapterDetailAdmin |
| AutoPay Membership | AutoPayMembershipDashboard |
| Fundraising | StaffFundraisingLanding |
| Moves management | StaffMovesManagementLanding |
| AutoPay Fundraising | AutoPayFundraisingDashboard |
| Events | StaffEventsLanding |
| Event-specific dashboard | See Modifying the event-specific console. |
| Commerce | StaffCommerceLanding |
| Communications | StaffCommunicationLanding |
| Advanced Email | AdvancedEmailDashboard |
| Finance | FinanceDashboard |
Editing the dashboard
You can update the dashboard from Page Builder, or you can use Easy Edit:
- Navigate to the dashboard using the Staff site sitemap (e.g., Community > Dashboard).
- Enable Easy Edit.
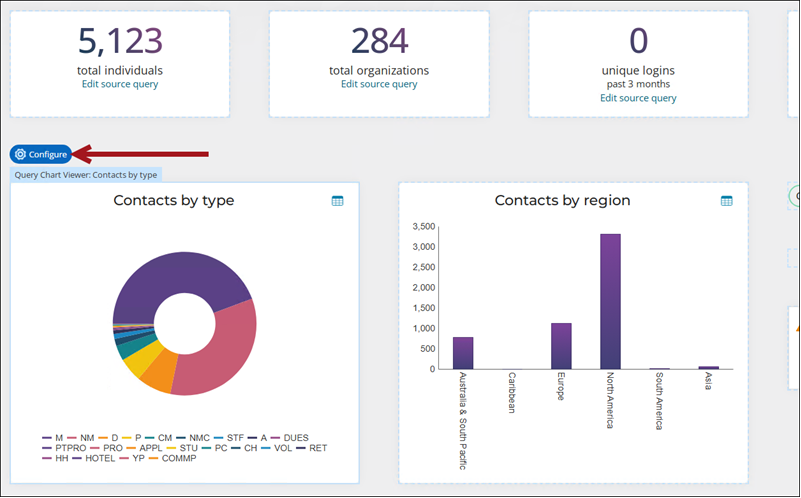
- To edit a specific content item, hover over the content item, then click Configure.
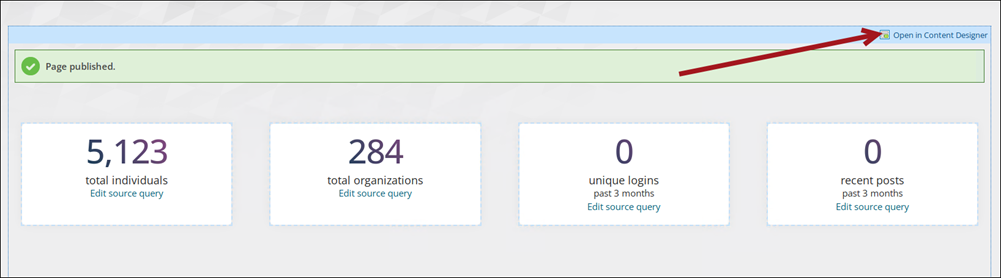
- To edit the entire page, select Open in Content Designer.
- When finished, click Save & Publish.
Customizing the dashboard queries
Several areas of the out-of-the-box dashboards contain Top queries. For example, the Top Products or Top customers in the following image. These areas are limited to show a maximum result of ten, but can be easily modified to show a different top ten. For example, if you click Revenue in the image above, the list reorders to show the products with the lowest generated revenue. Query-generated information on each dashboard can be found in the appropriate folder at $/Samples/Dashboards.
Some tabs allow you to select an entirely different query to display. For example, the Top customers tab on the Commerce Dashboard. From the Select a query drop-down, choose a different list of Top customers to display. To add queries to this drop-down, do the following:
- Copy the query you want to add to the drop-down.
- Navigate to $/Samples/Dashboards and open the appropriate dashboard folder.
- Locate the folder with the same title as the Select a query drop-down. For this example, the folder is Top customers ($/Samples/Dashboards/Commerce/Product Sales/Top customers).
- Paste the query into the folder.
Note: If the Select a query drop-down is not on the out-of-the-box tab, no other queries can be added to that tab.
Warning! Do not modify a system query. Make a copy of the query and apply the changes to the copy. Any system query that is modified will be overwritten on an upgrade.