Last updated on: April 23, 2026
Staff and public users see different landing pages for events:
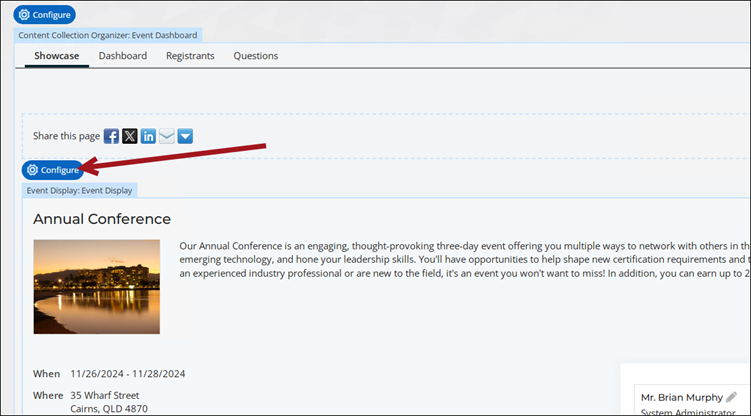
- Staff users: They see an event-specific console that includes the Showcase, Dashboard, Registrants, and Questions tabs.
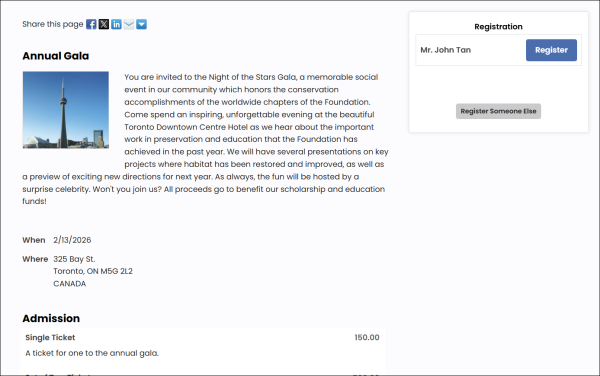
- Public users: They see only the event details, such as the title, description, admission options, and program items, along with the registration button.

Staff can modify both the staff view or public view of an event page.
In This Article
- Modifying the staff view of the event landing page
Modifying the public view of the event landing page
Modifying the staff view of the event landing page (event-specific console)
To configure or modify the event-specific console, you must do the following:
- Copy the tabbed content records (Showcase, Dashboard, Registrants, Questions).
- Update the Event content record to point to the newly copied content.
- Update the EventDashboard shortcut to use the newly copied content.
1. Copying the tabbed content records
Do the following to copy the event-specific console content records:
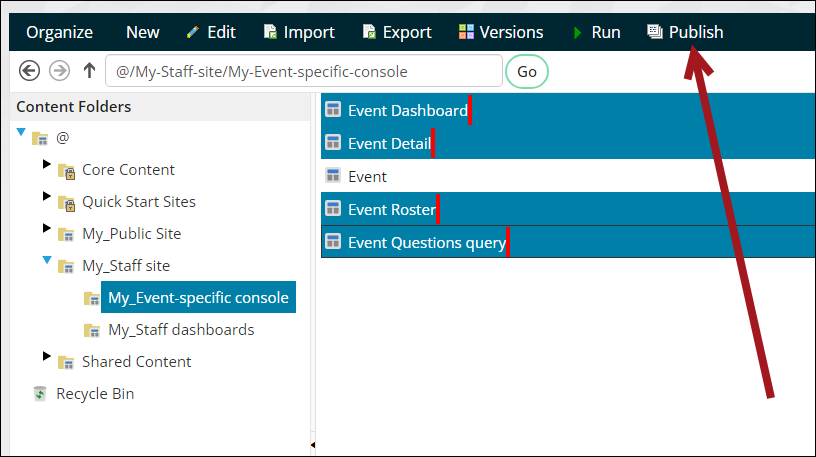
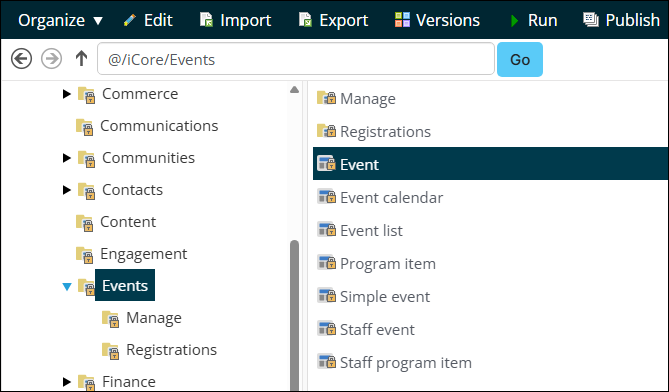
- Go to RiSE > Page Builder > Manage content.
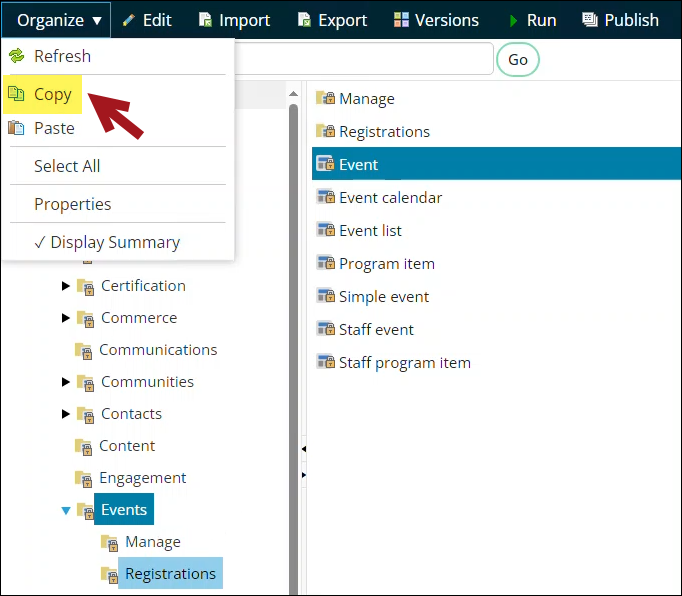
- Navigate through the following folder path: @/iCore/Events
- Select the Event content record, then choose Organize > Copy.
- Navigate to a non-system folder, then choose Organize > Paste.
- Navigate through the following folder path: @/iCore/Staff_Dashboards/Specific_Event
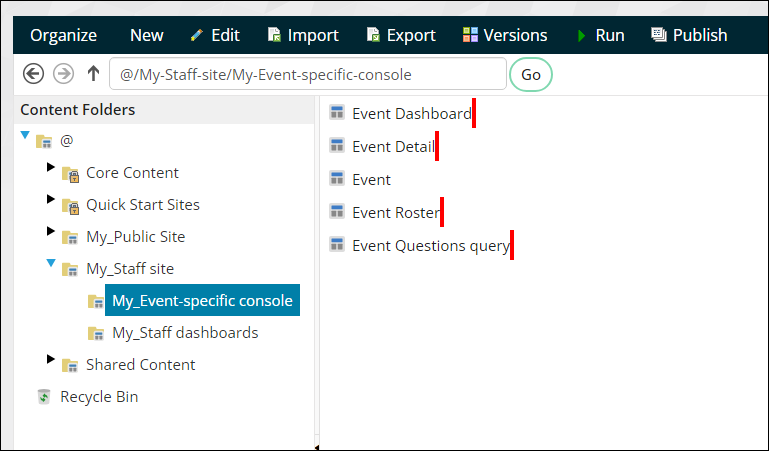
- Select the following content records (hold down the Ctrl key to select more than one content record):
- Event Dashboard - The staff view of the event registration page.
- Event Detail - An analytics page.
- Event Roster - A detailed view of the current roster.
- Event Questions query - Used for reporting on registrant responses to questions.
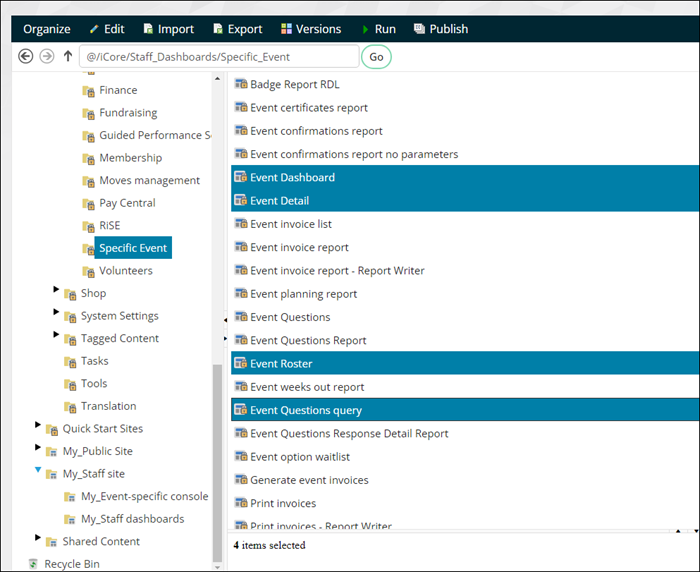
- Choose Organize > Copy.
- Navigate to the same non-system folder, then choose Organize > Paste.
- Publish the content records (hold down the Ctrl key to select more than one content record).
- Double-click the Event Dashboard content record, then make the following changes:
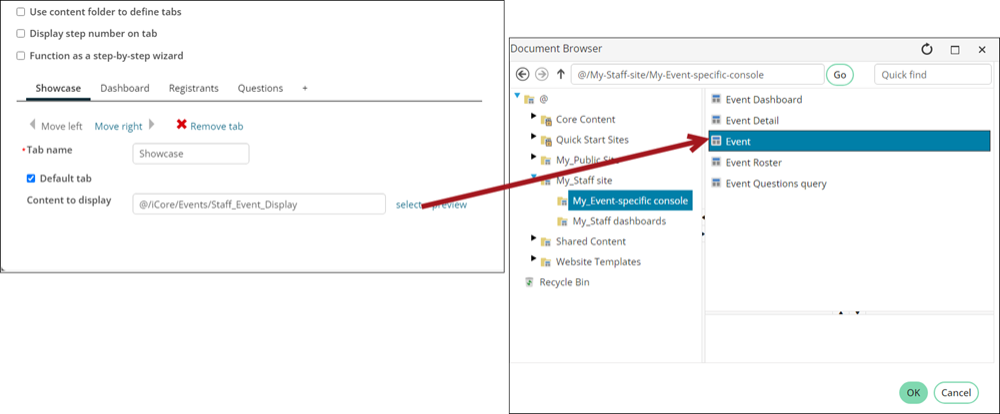
- From the Event Dashboard content item, select Configure.
- Update the Showcase tab to point to the copied Event content record.
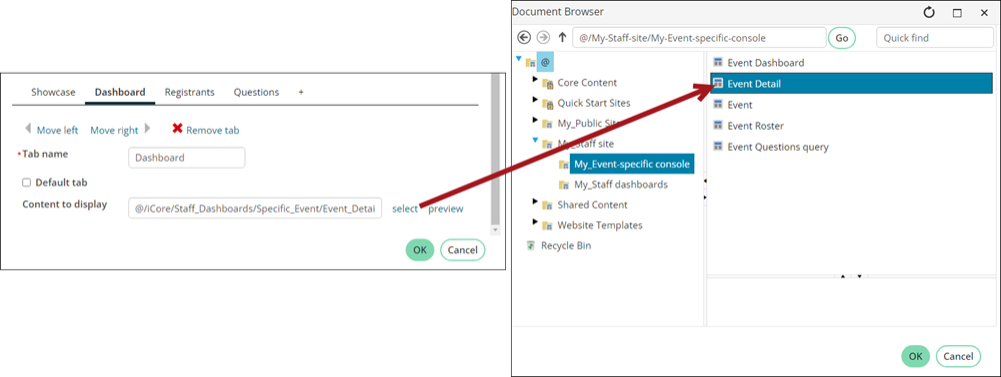
- Click the Dashboard tab, then update the content record to point to the copied Event Detail content record.
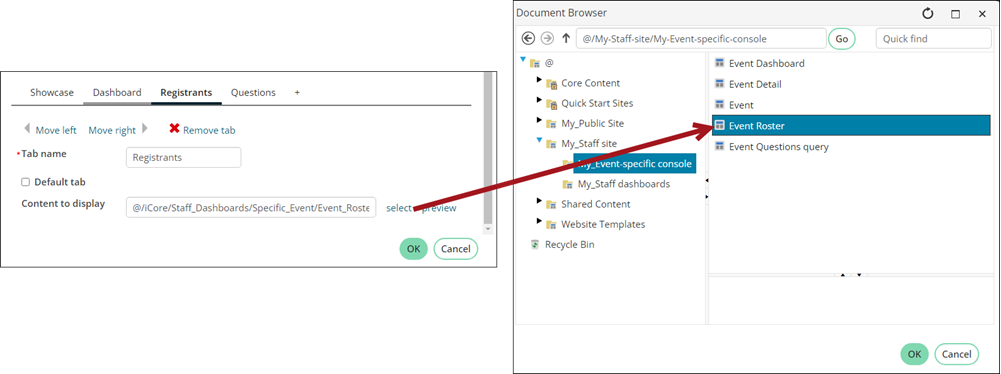
- Click the Registrants tab, then update the content record to point to the copied Event Roster content record.
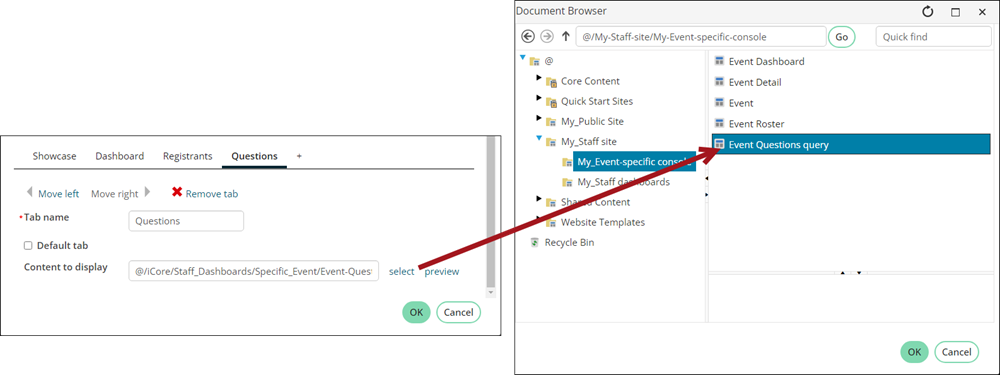
- Click the Questions tab, then update the content record to point to the copied Event Questions query content record.
- Click OK, then click Save & Publish.


2. Updating the related shortcut
Do the following to update the shortcut:
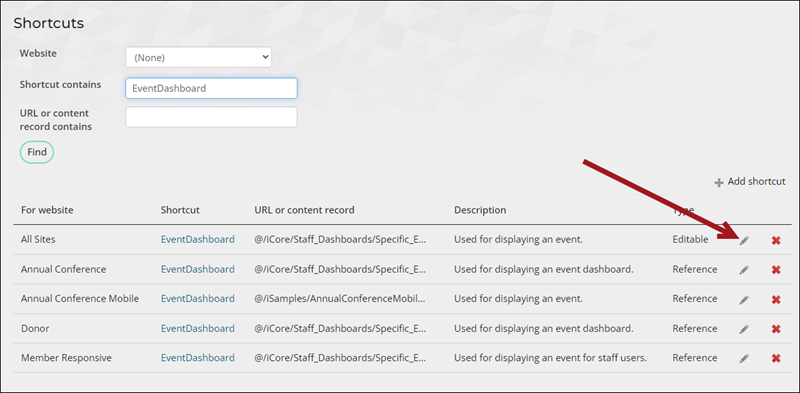
- Go to RiSE > Site Builder > Manage shortcuts.
- Search for the EventDashboard shortcut.
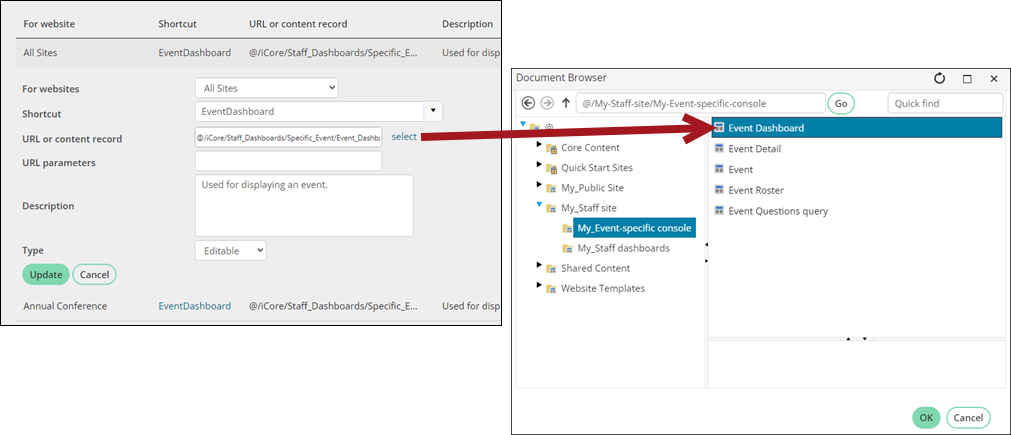
- Click the edit icon for the All Sites Event Dashboard shortcut.
- From the URL or content record field, select the copied Event Dashboard content record.
- Click Update.
- Go to Settings > About iMIS, then click Purge System Cache.
3. Editing the event-specific console
To edit the dashboard, you can modify the content records in Page Builder, or you can use Easy Edit:
- Go to Events > Find events.
- Open any event.
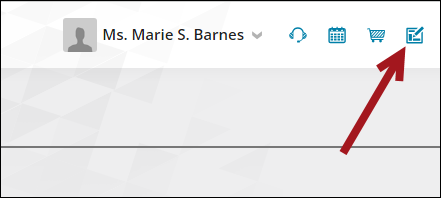
- Enable Easy Edit.
- Navigate to the content item you need to edit, then click Configure.
- Make the desired changes, then click Save & Publish.
- Disable Easy Edit when you are finished.
Tip: If you are making many updates, it may be easier to edit the content from Page Builder.
Modifying the public view of the event landing page
To configure or modify the public view of the event landing page, you must do the following:
- Copy the Event content record and make the desired changes.
- Update (or create) the EventDetail shortcut to use the newly copied content.
1. Copying the event content record
Do the following to copy the Event content record:
- Go to RiSE > Page Builder > Manage content.
- Navigate through the following folder path: @/iCore/Events
- Select the Event content record.
-
- Hover over Organize, then choose Copy.
- Select the correlating website folder where the content record will be saved.
- Hover over Organize, then choose Paste.
- Double-click the content record to open it for editing, then make the desired changes.
- Click Save & Publish.
2. Update (or create) the EventDetail shortcut
Do the following to update (or create) the EventDetail shortcut:
- Go to RiSE > Site Builder > Manage shortcuts.
- From the Website drop-down, select the associated public website where events are displayed.
- Click Find.
- If there is an EventDetail shortcut, simply update the URL or content record to point to the content record you just created. If there is not an EventDetail shortcut, click Add shortcut:
- For websites - Associated public website
- Shortcut - EventDetail
- URL or content record - Select the content record you created in the previous section
- Description - Used to display an event on the public website
- Click Save.


- To confirm the changes, navigate to the public website as a public user and open an event. You should see your changes on the any of the event landing pages. If you navigate to the public site as a staff user, you will see the staff view. Be sure you are reviewing the event as a public user for testing purposes.