Last updated on: April 23, 2026
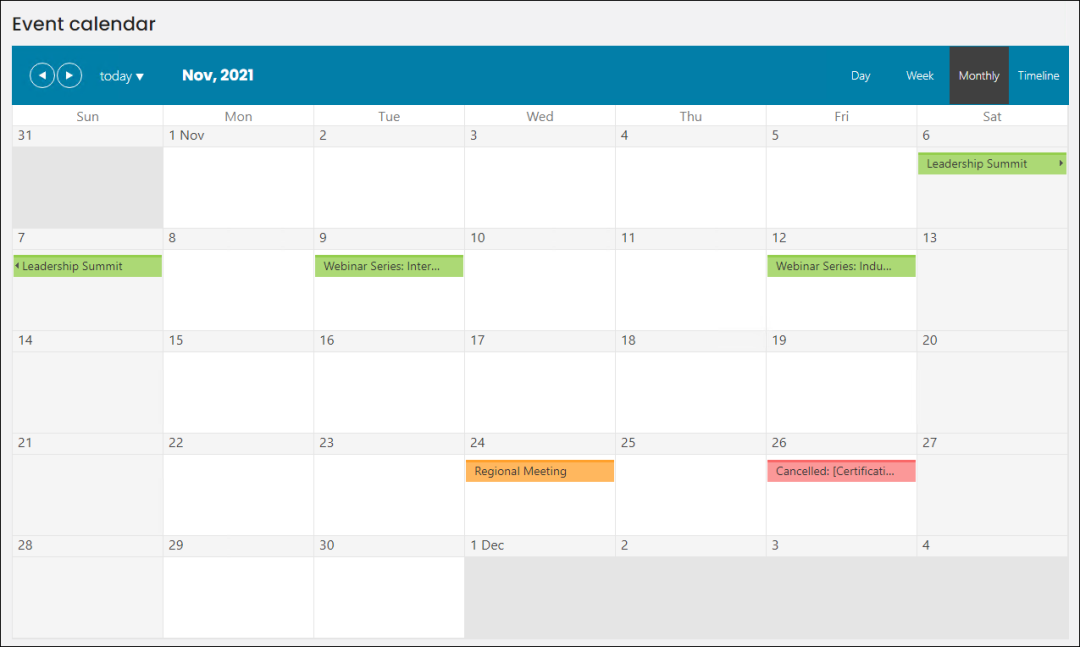
Go to Events > Calendar to view events by Day, Week, Monthly, or Timeline. Events listed on the Event calendar are color-coded to indicate visibility and availability for registration:
- Green indicates that the event is visible to all users and open to registration.
- Yellow indicates that the event is visible to all users but not open to registration.
- Orange indicates that the event is visible only to staff users.
- Red indicates the event was cancelled.
Note: If double-clicking an event in the Event calendar returns the error The requested content could not be found, ensure that the EventDetail shortcut is configured correctly.
Events appear on the calendar depending on their specified beginning and end dates defined when the event was created:
- If there was no date range specified, the event will display on the calendar for non-staff users to see.
- If the date range includes the current date, the event will display on the calendar for non-staff users to see.
- If the date range does not include the current date, only staff users will see the event on the calendar.
Editing the event calendar
To edit the event calendar configuration, you must make a copy of the out-of-the-box content, make changes to the content, then update the related sitemap item.
Copying the content
Do the following to copy the out-of-the-box content:
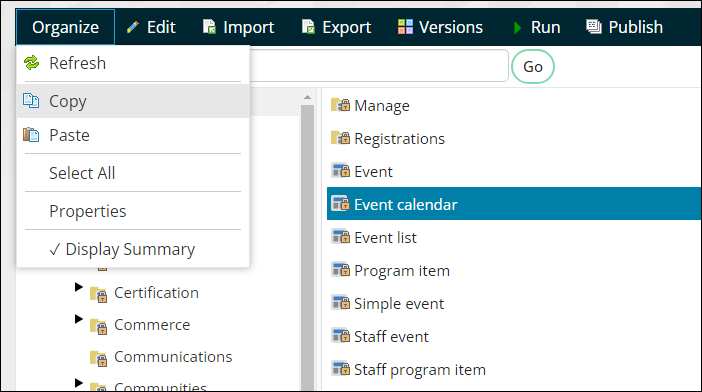
- Go to RiSE > Page Builder > Manage content.
- Navigate through the following folder path: @/iCore/Events/
- Copy the Event calendar content record (Organize > Copy).
Updating the calendar
Do the following to update the calendar configuration options:
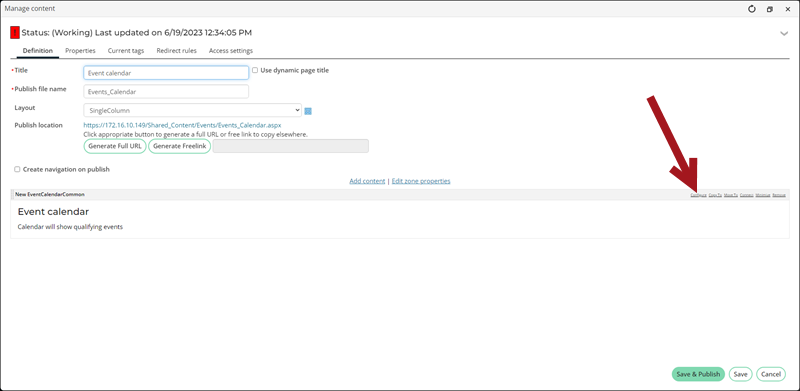
- Open the copied content record for edit.
- From the event calendar content item, select Configure.
- Choose a Filter events by option:
- Standard options - When selected, choose specific event categories to display on the calendar using the Selected event categories field. Only events with one of the selected categories are visible. If no category is selected, then the events will not be filtered by category.
- Query - When selected, choose a Source query. The query is required to have the following Display properties:
- Event Code with an Alias of EventCode
- Begin Date
- Begin Time
- End Date
- End Time
- (Standard options only) The Staff users and Public users sections contain the same configuration options, but are separated by staff-user and public-user view. If the Staff users options are enabled but the Public users options are not, then only staff users will see the enabled options on the calendar:
- Include active events - When enabled, only active events with the same selected categories are displayed. When disabled, inactive events also display.
- Include cancelled events - When enabled, cancelled events with the same selected categories are displayed. When disabled, no cancelled events display.
- Include closed events - When enabled, closed events with the same selected categories are displayed. When disabled, no closed events display.
- Click OK, then click Save & Publish.
Tip: To explain the color coding to public users, add a Content Html content item to the same page that explains what each color on the calendar means. Calendars based on IQAs have only one green color, regardless of the status or anything else, and there is no difference between staff and public users viewing when using IQAs.
Updating the sitemap
Do the following to update the sitemap:
- Go to RiSE > Site Builder > Manage sitemaps.
- Select the Staff site from the drop-down.
- Expand Events, then select the Calendar item.
- From the Content or URL to link to field, select the updated content record.
- Click OK, then click Save.
- Click Publish.
- Repeat that process for each site that uses the event calendar.
Notes
- If you want all users to be able to see the calendar, go to the Security tab, enable Advanced, and select Everyone Read from the drop-down.
- Calendars based on IQAs have only one green color, regardless of the status or anything else, and there is no difference between staff and public users viewing when using IQAs.
- No functions (program items) appear on the calendar, which allows users to focus just on discrete events.
- This content item is currently not keyboard accessible.
- If double-clicking an event in the Event Calendar
returns the error
The resource cannot be found, make sure that the EventDetail shortcut is configured correctly at RiSE > Site Builder > Manage shortcuts.