Last updated on: January 27, 2026
You must create a donation page that allows donors to submit a Gift Aid donation. Donors can use a Give Now page configured to use Gift Aid to make Gift Aid-eligible donations.
In This Article
- Using out-of-the-box Gift Aid donation pages
Creating a custom Gift Aid donation page
Gift Aid text on a donation page
Redirecting the Donate link on account pages
Using out-of-the-box Gift Aid donation pages
To use the out-of-the-box content pages, you will first need to make a copy of the content records and update the associated shortcuts. To use the out-of-the-box Gift Aid content, do the following:
- Complete the steps in the Setting up Gift Aid article.
- Go to RiSE > Page Builder > Manage content.
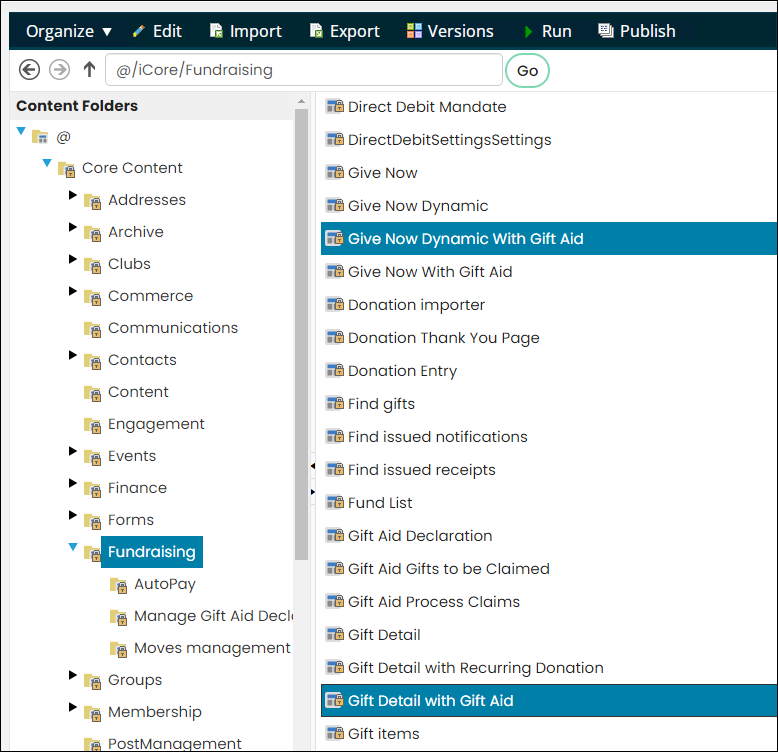
- Navigate to @/iCore/Fundraising and @/iCore/Fundraising/Donate.
- Copy the Gift Detail with Gift Aid content record, then also copy one of the following content records:
- Give Now with Gift Aid (public site): Presents a single gift item to the donor, or
- Give Now Dynamic with Gift Aid (Staff site): Dynamically displays a full list of available gift items to the donor. You do not have to copy this content record unless you want to make specific modifications. It can be used as-is.
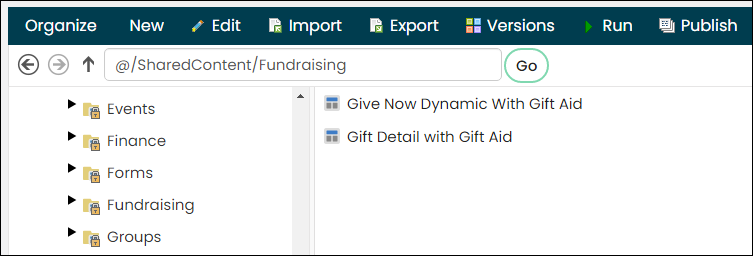
- Paste the content records in a Shared Content folder.
- Tailor the Gift Now and Gift Detail pages, so that they are unique to your organisation.
- Save & Publish the content records.
- Go to RiSE > Site Builder > Manage shortcuts.
- Edit the GiftDetail shortcut for All Sites:
- From the URL or Content Record field, select the Gift Detail with Gift Aid content record located in the Shared Content folder.
- Click Update.
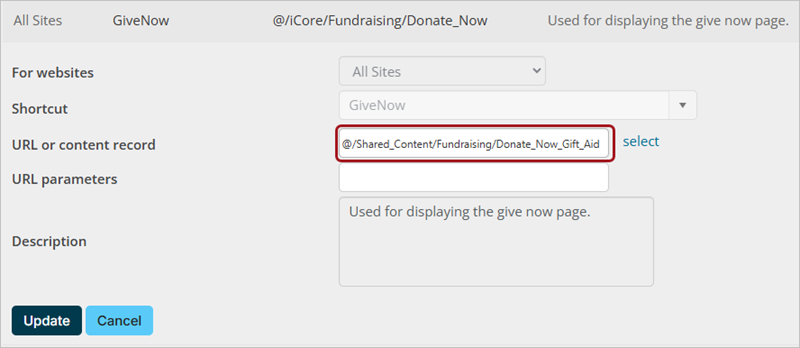
- Edit the GiveNow shortcut for All Sites:
- From the URL or Content Record field, select the Give Now with Gift Aid content record located in the Share Content folder.
- Click Update.
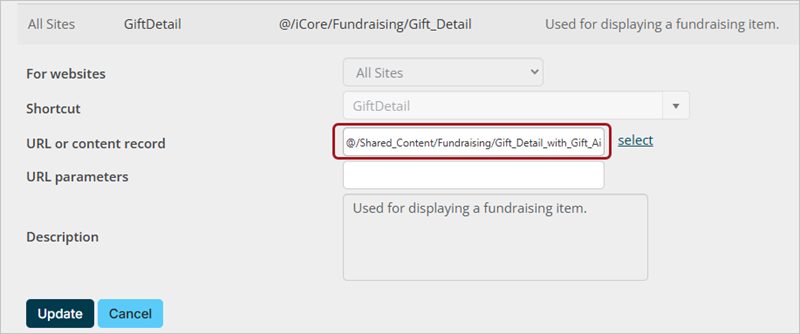
The GiftDetail shortcut displays the Gift Detail with Gift Aid content record, which uses the Donation Creator and Gift Aid Declaration content items to display donations pages selected from search results.
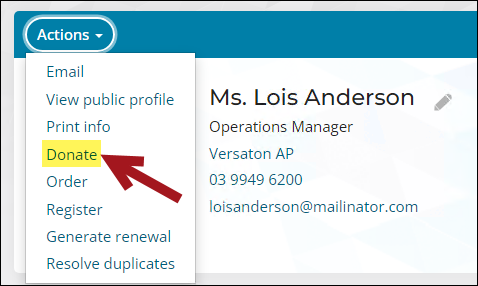
The GiveNow shortcut is associated with the Donate link in the Actions button on all out-of-the-box account pages.
Creating a custom Gift Aid donation page
If you prefer to create your own Gift Aid page, ensure that your content record includes, at minimum, the Contact Account Creator, Donation Creator, Gift Aid Declaration, Payment Creator, and Submit Order Button Link content items. The following is an example of a Give Now page configured for Gift Aid:
Donation Creator (Offering)
Do the following:
- Choose to Process donation immediately.
- Identify your Gift Item, either from the drop-down, or from a URL parameter.
- Enter a commit sequence of 3.
Recurring Donation Creator (Offering)
Note: You must be licensed for AutoPay to have access to this content item.
Do the following:
- Enter a commit sequence of 4.
- (Optional) Edit the radio option text as necessary:
- 'No' radio option text – No, this is a one time gift.
- 'Yes' radio option text – Yes, please make this a recurring gift.
- (Optional) Edit theGift frequency text as necessary.
- Connect your Donation Creator and Recurring Donation Creator content items. Connections enable content items to interact with one another, significantly reducing the need for additional maintenance for site administrators. The Donation Creator content item needs to know if the donation will be repeating (determined by the Recurring Donation Creator) in order to provide an option for giving frequency.
- Click Connect on the Recurring Donation Creator content item. A Connect window is displayed.
- Click Create a new connection.
- Select the Donation Creator in the Object Consumer drop-down.
- Click Connect.
- Click the red X to close the Connect window.
Note: This commit sequence must be less than the commit sequence of Payment Creator and the Submit Order Button Link.
Do the following:
Gift Aid Declaration (Offering)
Do the following:
- Enter a commit sequence of 2.
- From the Mode drop-down, select GiveAndGo.
- Provide a Gift Aid checkbox label to be displayed next to the option to designate a donation for Gift Aid.
- (optional) Select Override default text for Gift Aid checkbox confirmation if you would like to enter custom Gift Aid confirmation text for this instance of the Gift Aid Declaration content item.
- Connect your Gift Aid Declaration and Donation Creator content items. Connections enable content items to interact with one another, significantly reducing the need for additional maintenance for site administrators. There must be a connection made between the Gift Aid Declaration content item and the Donation Creator content item in order for a one-time donation to be made, without creating a Gift Aid declaration that carries forward.
- Click Connect on the Gift Aid Declaration content item. A Connect window is displayed.
- Click Create a new connection.
- Select the Donation Creator in the Object Consumer drop-down.
- Click Connect.
- Click the red X to close the Connect window.
Note: You can also modify the text in the Active declaration text field. This text is shown to donors who already have active Gift Aid declarations.
Do the following:
Contact Account Creator (Contacts)
Do the following:
- Select Hide for authenticated users to prevent a duplicate contact record from being created.
- Enter a commit sequence of 1.
- In the Account area, configure your organization preferences for the information gathered during account creation.
- In the Sign In area, select:
- Include Sign In link to provide an opportunity for users to log in.
- Include option to create an account to provide an opportunity for non-registered users to create an account.
- In the Redirect area, select the Do not redirect option to keep donors on the page.
Payment Creator (Commerce)
Do the following:
- Select Donation from the Purpose drop-down.
- Enter a commit sequence of 5.
- Connect your Donation Creator and Payment Creator content items. Connections enable content items to interact with one another, significantly reducing the need for additional maintenance for site administrators.
- Click Connect on the Payment Creator content item. A Connect window is displayed.
- Click Create a new connection.
- Select the Donation Creator in the Object Consumer drop-down.
- Click Connect.
- Click the red X to close the Connect window.
Do the following:
Submit Order Button Link (Commerce)
- Select Prompt unauthenticated users to sign in.
- Enter a URL for order confirmation. You can choose one from the Document browser by clicking Select and navigating to your desired content. You can leave this field to point to the default content at @/iCore/Fundraising/Donation_Thank_You_Page.
- Select Donation from the Purpose drop-down.
- Enter a commit sequence of 6, or the highest number of all of the content items on your page. This will ensure that your page will load and process in the correct order.
Gift Aid text on a donation page
The text that accompanies the option to select Gift Aid on a donation page can vary. The following are the different scenarios that can affect the content of these messages, and the messages that are displayed in those scenarios:
- Staff user on behalf of a donor
- If there is no existing Gift Aid declaration for the current donor, then the message offers basic information about Gift Aid.
- If the current donor has an existing Gift Aid declaration, the text message indicates this. This text is configurable within the content item, in the Active declaration text field. Note that the checkbox is checked by default.
- Unauthenticated donor
- Authenticated donor with active Gift Aid declaration
An unauthenticated (not-signed-in) donor sees the default Gift Aid text. This text is pulled from the Default Gift Aid checkbox confirmation text field (in the Staff site, go to Settings > Fundraising > Gift Aid (UK)).
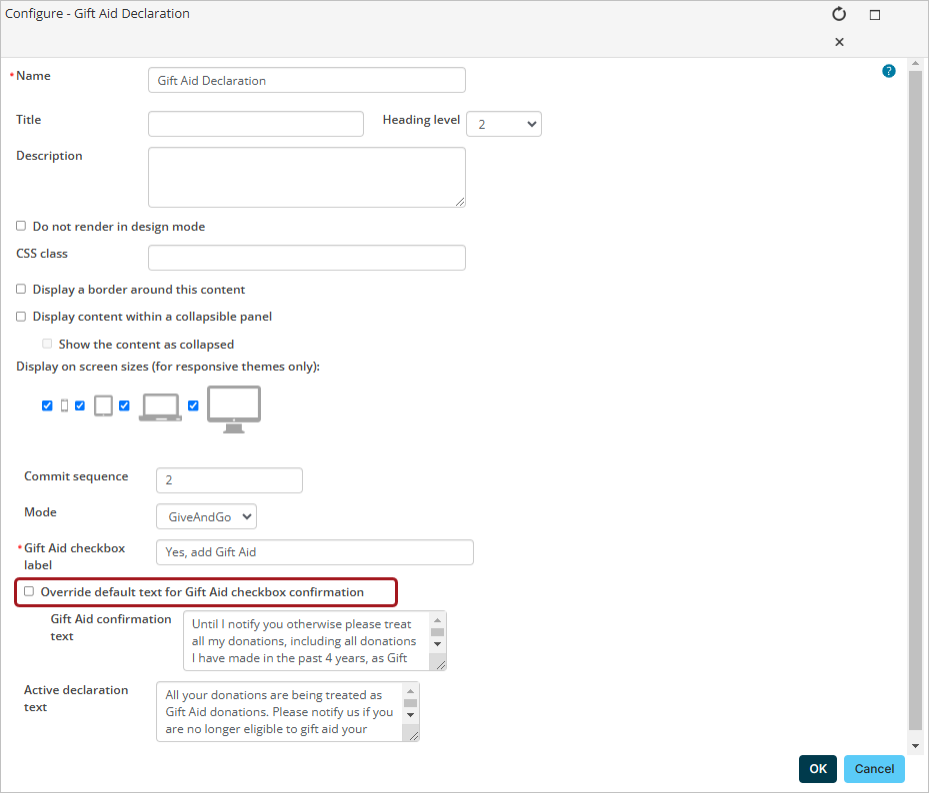
This text can be overwritten using the Override default text for Gift Aid checkbox confirmation option on the Gift Aid Declaration content item.
If the authenticated donor has an existing Gift Aid declaration, the text indicates this. This text is configurable within the content item, in the Active declaration text field. Note that the checkbox is selected by default.
Redirecting the Donate link on account pages
Every out-of-the-box account page has a Donate link located in the Actions button.

This link allows Staff users to go directly to a Give Now page and make a donation on behalf of a donor.
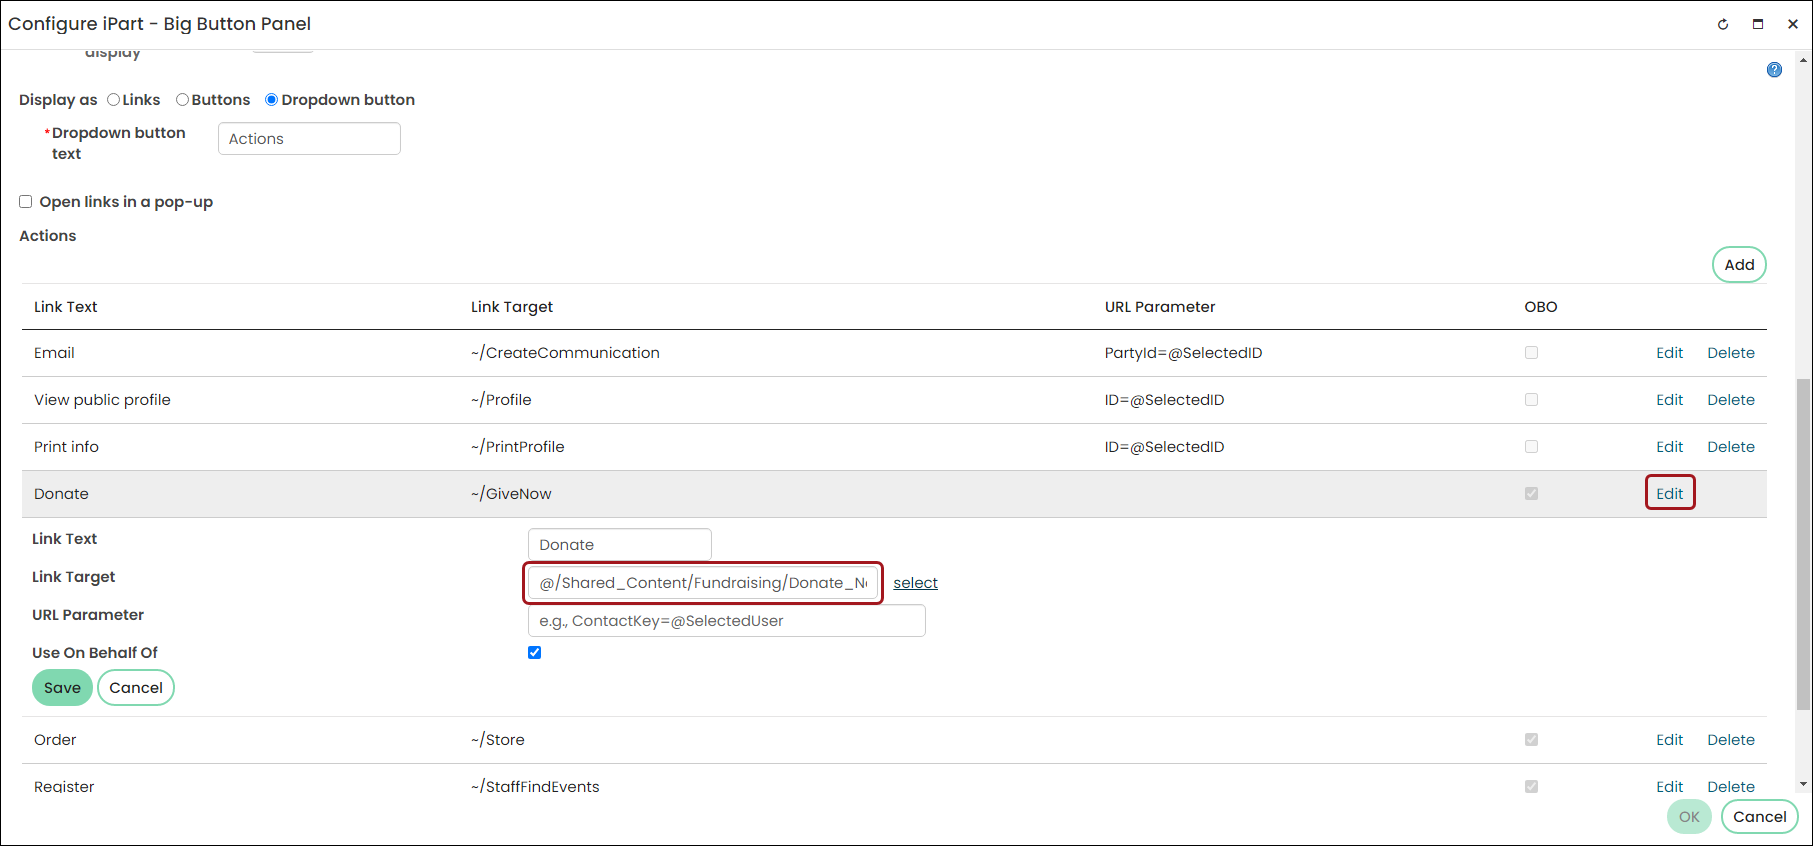
You must configure this link to point to Gift Aid-specific content:
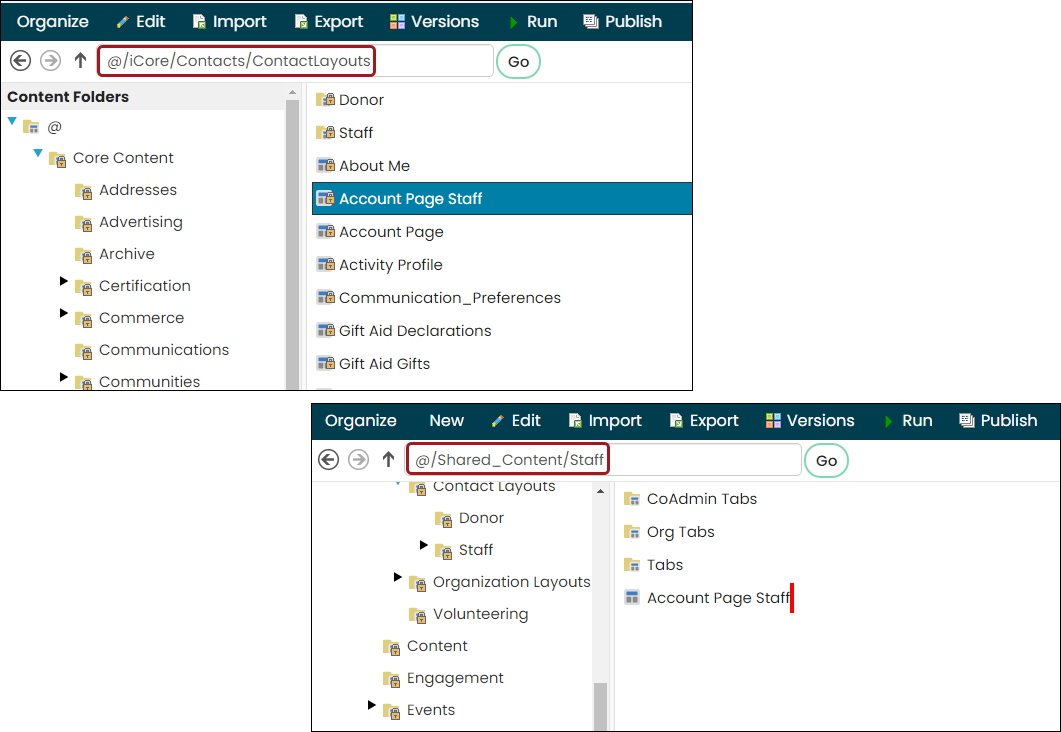
- Save a copy of the @/iCore/Contacts/ContactLayouts/Account Page Staff content record to a Shared Content folder.
- Edit the saved copy of the Account Staff content record:
- Configure the content item.
- Under Actions, edit the Donate link to point to the Give Now with Gift Aid content record.
- Save and OK.
- Save & Publish the changes.
- Change the shortcut to the account page:
- Go to RiSE > Site Builder > Manage shortcuts.
- Find the FullAccount shortcut for All Sites, and edit the shortcut.
- Edit the URL or Content Record field to point to the saved copy of the Account Staff content record.
- Click Update.
