Last updated on: January 27, 2026
ExpressView reports are a quick way to view your data in an easy-to-use format. The intuitive drag-and-drop interface lets you make beautiful reports with minimal effort.
Do the following to create a new ExpressView report:
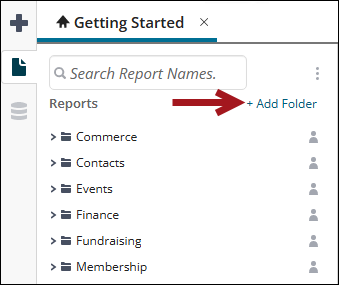
- Go to Reports > Report Writer.
- (optional) Create a new folder:
- Click +Add Folder.
- Add a Name and press the enter key.

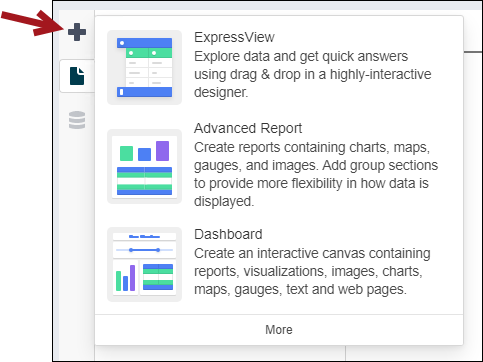
- Click the Create New Report icon and select ExpressView.
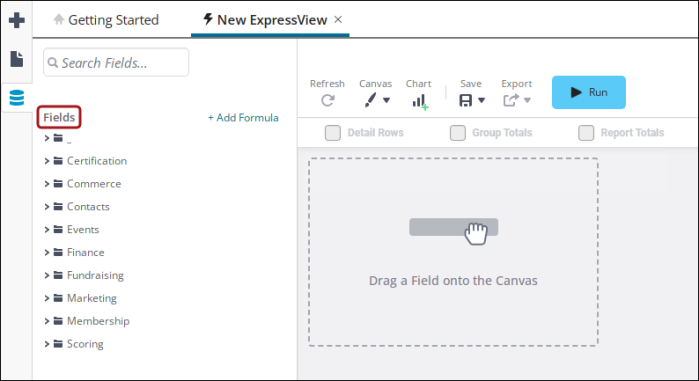
- The Fields pane appears.
- Add the Fields you want in your ExpressView report:
- Drag and drop Fields into the report framework pane.
- Highlight a Field and press the arrow to move the Field into the framework pane.
Note: If you need an additional source that does not appear in the Fields area, you must add the source. See Adding business objects and queries as available sources in Report Writer.
- Run the report to see live data.
- Stop the report to see live data.
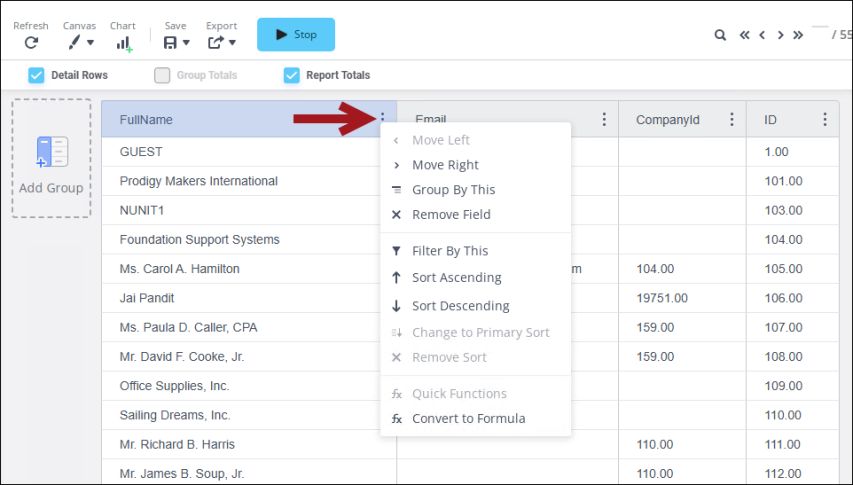
- Once the fields have been added to the report framework, you can press the column menu on theField header to do the following:
- Click Move Left/Right to rearrange the columns.
- Click Group By This to group report content by this field, for example, to group all birth dates that are the same.
- Click Filter By This to filter report content by this field, for example, filtering out all contacts with a blank email address.
- Click Remove Field to remove the selected column.
- Click Sort Ascending or Sort Descending to sort the column data.
- Click Change to Primary Sort to select the primary sort of the column.
- Click Remove Sort to remove sorting on the column.
- Click Quick Functions to add a predefined function to the column. See ExpressView: Formula Columns for more information.
- Click Convert to Formula to either convert a standard column to a Formula Column, or to edit the formula on an existing formula column.

- Adding visulizations:
- To add a chart to your ExpressView report, click theCharticon and the Visualizationstab becomes active.
Use theType,Data, andAppearancetabs to customize the look of your chart.
See Visualizations for more information.- Filtering content:
- To filter a column, click the Filter button on the properties pane.
- Drag and drop the desired fields to the properties pane and define the filter
- Continue adding filters for any of the columns.
- See ExpressView: Filtering for more information.
- Grouping content:
- To group content together, select the column menu on the field header, and select Group By This.
- Enable Group Totals to see counts for grouped content.
- Double-click a Group Totals row to define how the data is displayed.
- You can change the style of the selected content by using the available Selected Section window on the properties pane.


Note: For more information regarding filtering, sorting, and grouping, see the ExpressView: Introduction documentation.
- To edit a column header, select the Field header, then edit the Display Name on the properties pane.
- Click the Save icon. You are prompted for a report Name, an optional report Description, and the Folder to save to.
- (optional) Export the report to an available report type:
- Excel
- RTF
- CSV
- Advanced Report


The Fields pane offers all the accessible data sources with which you can build an ExpressView.
Note: If you add a property from a different data source but do not want all rows from that second data source, you must add a filter.
The data fields available in this pane are related data fields. You can also use the search bar to find fields.
Note: For more information regarding filtering, sorting, and grouping, see the ExpressView: Introduction documentation.

Important! HTML tags included in the report definition are not rendered as HTML in the communication attachment. To include HTML, convert the ExpressView report to an Advanced report, then create a PDF template for the report and include the HTML in the template.
For more information, see the ExpressView: Introduction documentation.