Last updated on: June 30, 2026

An Advanced Report enables you to build complex and feature-rich reports, as well as CrossTab Reports. For more information on CrossTab reports, see Creating a CrossTab report.
Do the following to create a new Advanced Report:
- Go to Reports > Report Writer.
- (optional) Create a new folder:
- Click +Add Folder.
- Right-click and select Add Folder.

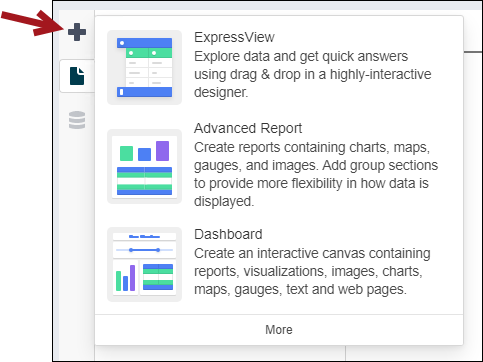
- Click the Create New Report icon and select Advanced Report. A report-creation wizard is opened.
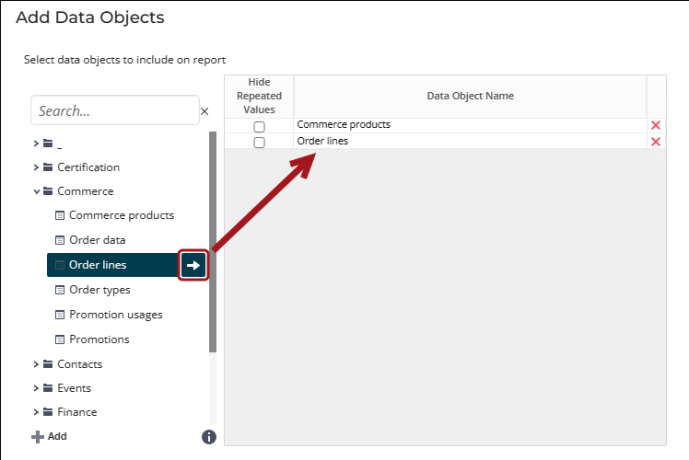
- (Add Data Objects window) Select data objects to include on the report. Expand the folders and then use the arrow to add data sources. See Advanced Reports: Data Objects for more information.
- Click Okay.
- Drag the data Fields to the report. Alternatively, highlight a field and press the arrow to move that field into the report framework pane.
- Use the available options to Filter, Sort, insert Formulas, or Format the report to your liking.
- Use the following to further update your report:
- Right clicking a header row or column brings up several options including adding sections, such as headers and footers, deleting sections, and adding shades to the selected sections. See the video on Report Writer sections for more information.
- Right clicking a regular cell brings up options to format the cells including adding borders, images, or formulas:
- Cut– Cut the contents of the cell.
- Copy– Copy the contents of the cell.
- Paste– Paste the contents of the cell.
- Clear– Clear the contents of the cell.
- Format Cells
- Number- Add formatting to numbers
- Border- Add borders to cells.
- Conditional- Add colors or change the font of cell content.
- Format Cells
- Split Cells- Split cells previously merged back into individual cells.
- Insert
- Image- Add images from your computer.
- Gauge- Add gauges to better conceptualize your information.
- Formula- Add formulas using the Formula Editor, which allows you to create formulas using build-in functions. See the video on Report Writer formulas for more information.
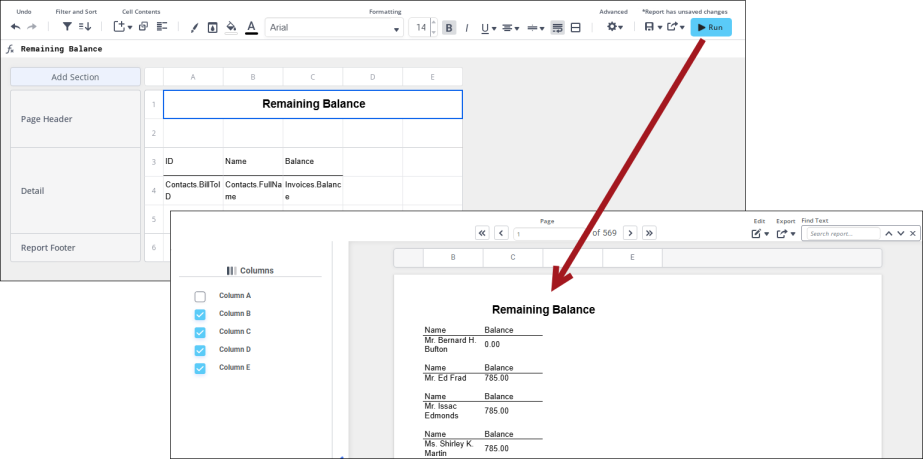
- Click Run to view the results of the report.
- Click Save.
- Give the report a Name, optional Description, and select the folder to save to.
- (optional) Click Export. The available export file types are:
- Excel
- RTF
- CSV
Note: Add additional data sources at any time by clicking the Manage Data Objects button.

For more information, see Advanced Reports documentation.