Last updated on: January 27, 2026
You can create your own themes if you need to have greater creative control over your website design. This section covers the basic pieces required to build your own theme.
Themes control the layout, font, and colors of your iMIS sites. The Quick Start Sites come with a set of themes designed for RiSE sites. For examples, see Using out-of-the-box themes.
Note: You must be a system administrator to perform the following tasks.
In This Article
- Best practices to consider for theme development
Copying a website theme
Creating a custom theme
Making a custom theme available in iMIS
Editing and updating a custom theme
Applying a website theme
Best practices to consider for theme development
Several themes have been created for the Quick Start Sites. You can modify these themes to help identify and personalize your organization’s website.
- Before modifying a theme, find the best one: apply all of the themes to the default Member site in turn, and decide which theme is closest to the final look and layout that you want.
- Always work from your copy of the theme, so that you can begin again. For more information, see Copying a website theme.
- When updating theme files, it is recommended to not rename the .css file names. Renaming the .css files will require you to upload a whole new theme instead of editing the existing theme.
- Make changes only to websites that you create. When a Quick Start Site is updated with each release, the iMIS Upgrader overwrites any changes you made to it.
- Developed toward W3C standards to help meet accessibility requirements
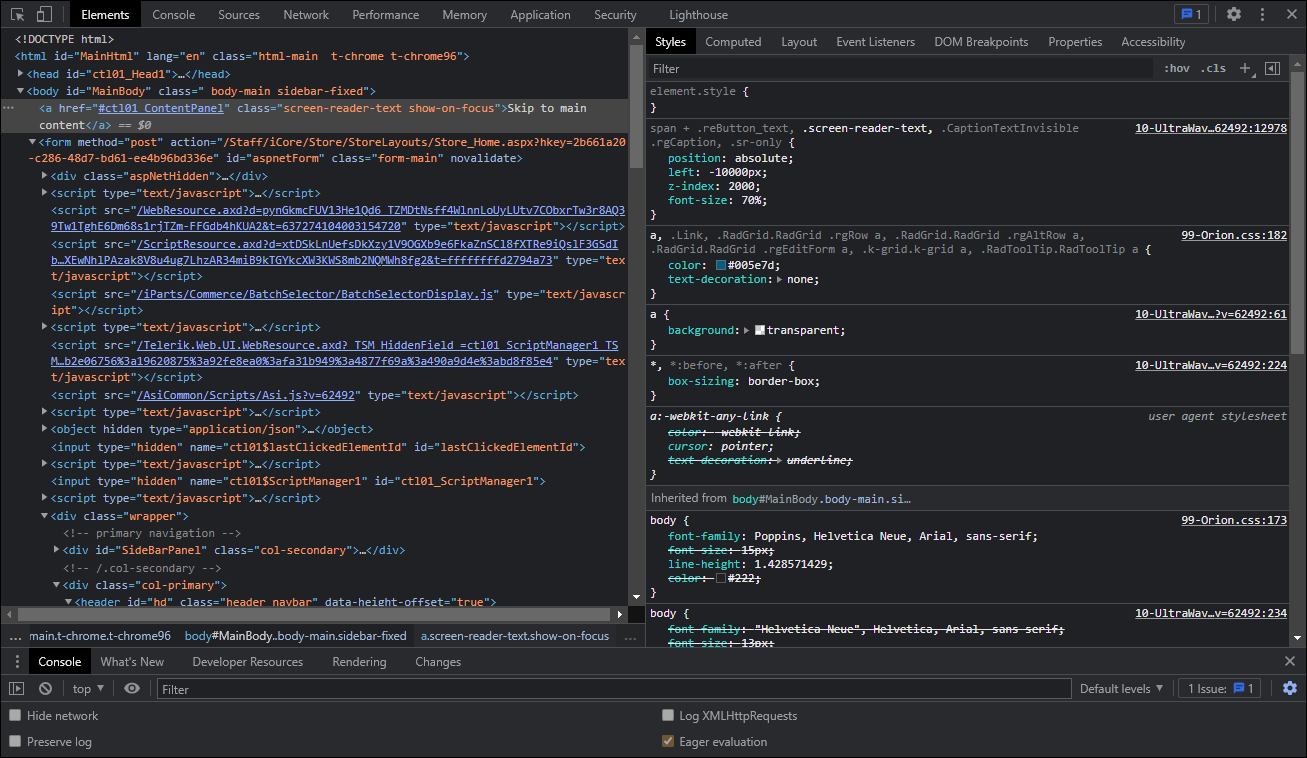
- Take advantage of browser-based developer tools to test and troubleshoot changes before committing them to your style sheets. Press F12 to toggle the Developer Toolbar:
Copying a website theme
Best practices
Review the following best practices before copying a website theme:
- Themes change and develop with every iMIS update. To avoid losing your changes, be sure to work from a copy of the theme. Working from a copy of a website theme is easier than creating a theme from scratch.
- In addition to working with a copied theme, do not edit the copied theme's style sheet directly. The best practice is to create your own style sheet that contains the customizations you need, making sure the custom style sheet loads after the default style sheet.
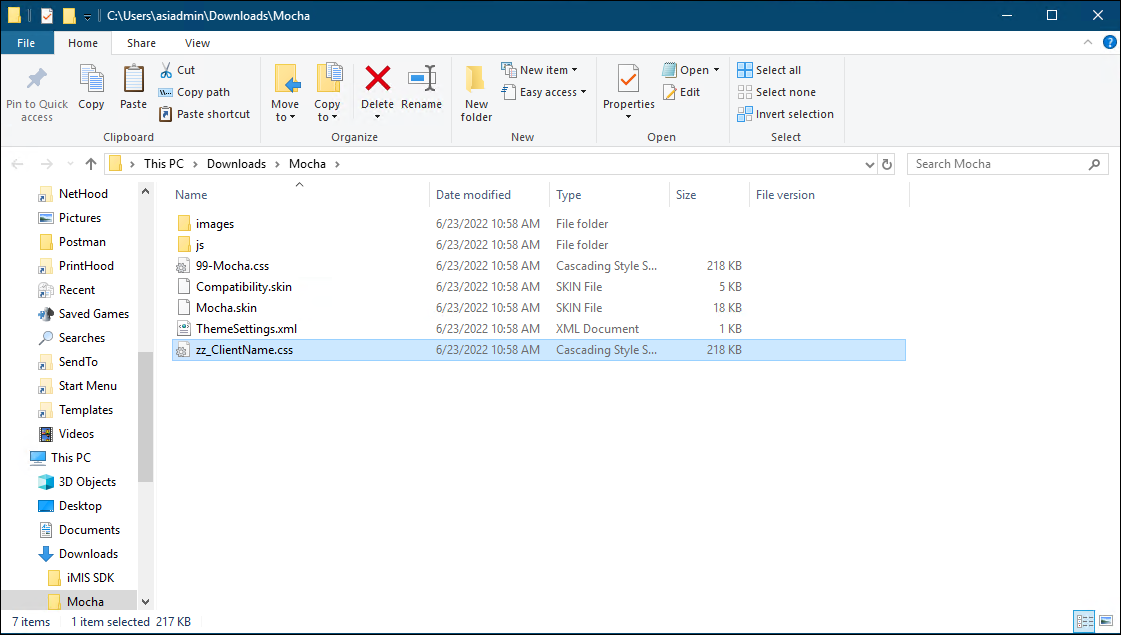
Example: You downloaded the Mocha website theme and want to start changing the default colors. Instead of opening and editing 99-Mocha.css, you create a new .css file called zz_[ClientName].css, add the contents of 99-Mocha.css to zz_[ClientName].css, and begin making changes in zz_[ClientName].css. Style sheets are loaded alphabetically, so prepending the new style sheet with zz_ ensures the custom style sheet loads last, which uses the custom styles over the styles in 99-Mocha.css.
Copying an out-of-the-box theme
Do the following to copy an existing iMIS theme:
- Go to RiSE > Site Builder > Manage websites.
- Open the Quick Start Sites folder.
- Select the Member Responsive site.
- Click the Look and feel tab.
- Click Advanced Options.
- From the Theme drop-down, select the theme you want to copy.
- Select Download theme files. The theme's content (images, skins, and CSS) will download to your computer as a zip file.
- Copy the .css file and paste it in the same folder.
- Rename the copied file to zz_[ClientName].css.
- Any CSS changes must be made to the copied .css file. See the best practices for more information.
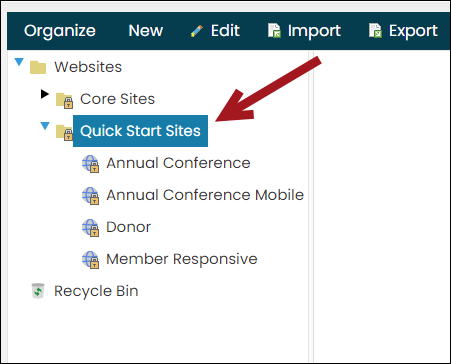
Note: For this example, the Member Responsive site is used, but the ability to download a theme is accessible from any website.

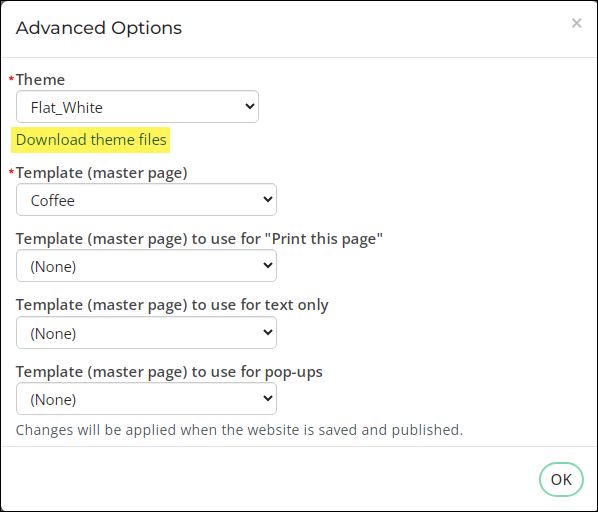
Warning! Do not save the website with an incorrect theme selected from the Theme drop-down.
Note: For a preview of the out-of-the-box iMIS themes, see Using out-of-the-box themes.

To learn more about what files you should edit (for example, how to change the colors or fonts), see Creating a custom theme. To learn how to upload a theme back into iMIS, see Making a custom theme available in iMIS.
Creating a custom theme
Themes control many of the aesthetic elements of your website, such as fonts and colors. To create a personalized theme for iMIS, copy an out-of-the-box theme and customize it to fit your organization's needs. If you want greater creative control over the look and feel of your website, you can build a new theme.
When creating a new theme, it must contain the following required elements:
- Theme CSS files
- A .skin file (one or two is best)
- Required images
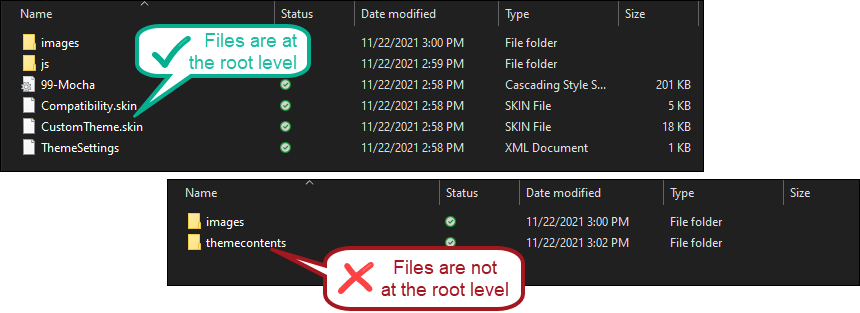
After creating the custom theme, compress all files and images into a single ZIP file. On Windows, select all files within the custom theme, right-click on the CSS file, and select Send to > Compressed (zipped) folder.
Important! Be careful not to zip the already zipped folder that contains all theme files. Instead, select the individual files before compressing them.
Upload the zipped file to RiSE > Theme Builder > Themes. Then, to apply the new theme to a specific website, select the theme in the Look and feel (RiSE > Site Builder > Manage websites > Look and feel tab) definition of the website. See Making a custom theme available in iMIS for more details.
Required elements of a custom theme
Theme CSS files
The theme CSS files control the styles (colors, fonts, headings, button styles, link styles, and so forth) displayed within your website. It is easiest to start from a copy of another theme’s CSS files, but you also have the option to build your own. When designing your custom CSS, test thoroughly to confirm you include the selectors required for iMIS to display as you prefer.
The required base style sheet, UltraWave, is dynamically included in any theme.
To learn more about CSS, visit www.w3schools.com.
A .skin file
Skin files contain property settings for controls such as buttons, labels, and grids. Each theme must have a skin file that includes several required elements so that these controls render correctly in your website.
We recommend that you start with a copy of an iMIS theme’s .skin files and customize as needed (to obtain a copy of the .skin file, you must download the theme). If you upgrade, you should compare your theme’s .skin files with those in a theme provided in the upgrade. Be sure to copy over any missing lines.
Required images
There are several images required for a theme to display properly, including images for icons, user messages, and other elements. Many of the required images are referenced in the .skin files. It is recommended that you copy an images folder from one of the existing themes into your custom theme folder. You can replace or edit any of these images.
Adding a thumbnail image
Associating a thumbnail with a custom theme is not required, but you have the option to do so. Once you select your theme in the Advanced section of the Look and feel tab, your thumbnail will appear in the Website theme section.
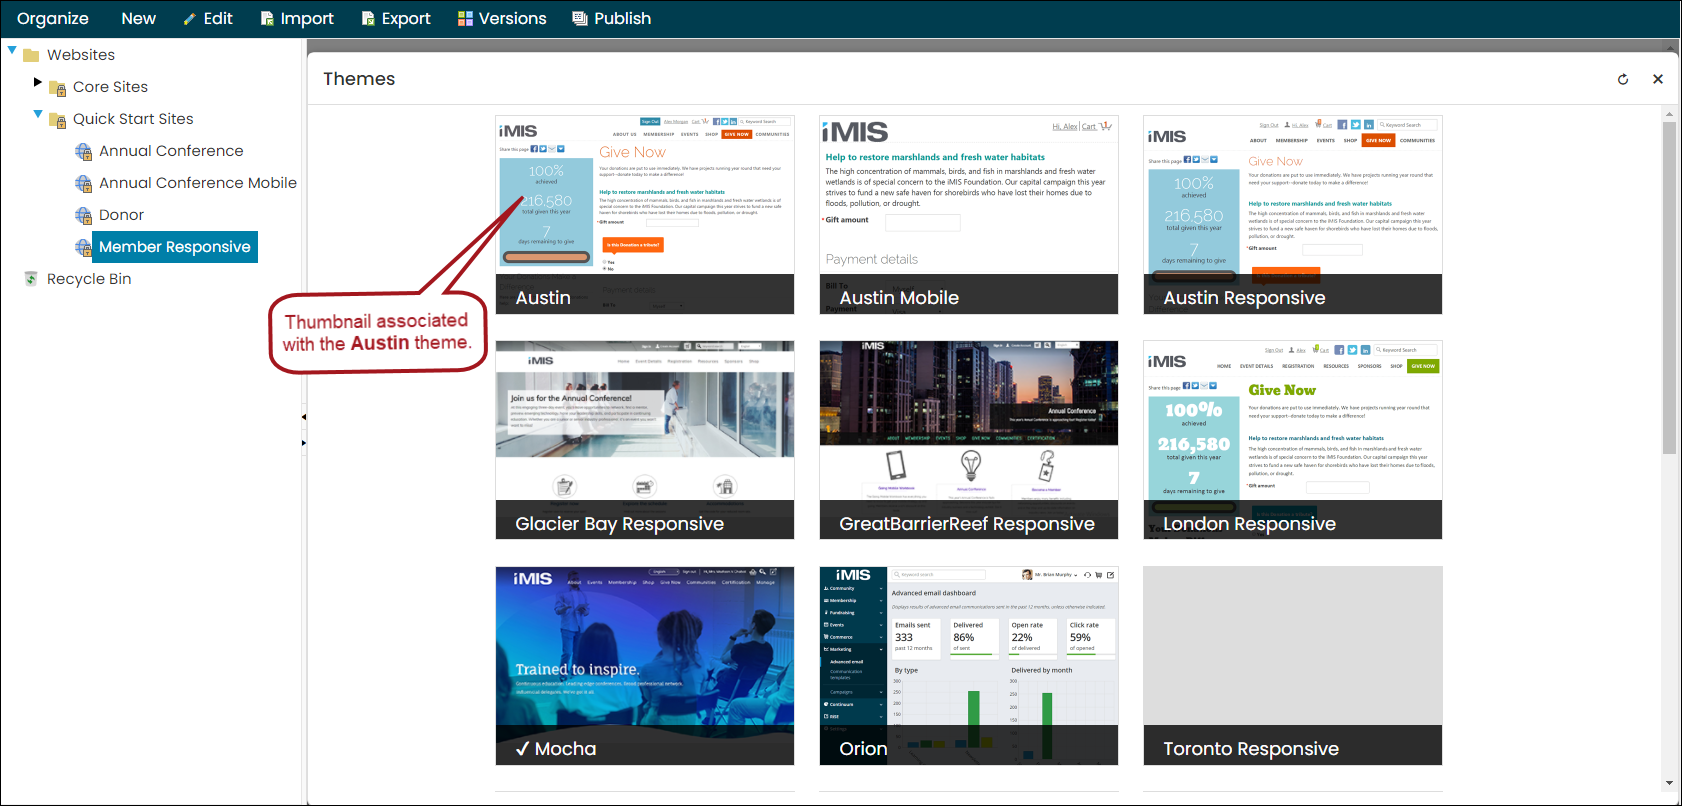
To associate a thumbnail with a theme, do the following:
- Take a screenshot of your theme.
- Name the image ThemeScreenshotSmall.png.
- Include the image in the theme folder.
Note: The image must be in the theme folder before you zip the theme folder and upload it to iMIS.

Note: If no thumbnail is provided, a generic thumbnail image is displayed. We recommend resizing the screenshot to 300px by 200px, or 600 px by 400px.
Making a custom theme available in iMIS
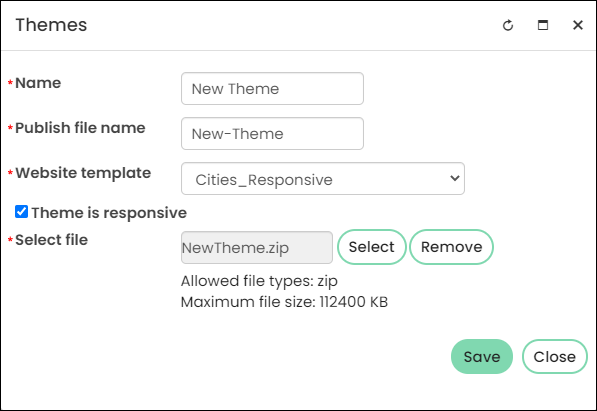
Do the following to upload a custom theme:
- Put all of the required theme elements in one folder, then zip that folder.
- Go to RiSE > Theme Builder > Themes.
- Click New > App Theme.
- Enter the theme's Name. This automatically populates the Publish file name.
- Choose the correlating Website template. See Creating RiSE-built website templates for more information.
- By default, Theme is responsive is enabled. Disable the option if this theme is not responsive, or leave it enabled if it is responsive.
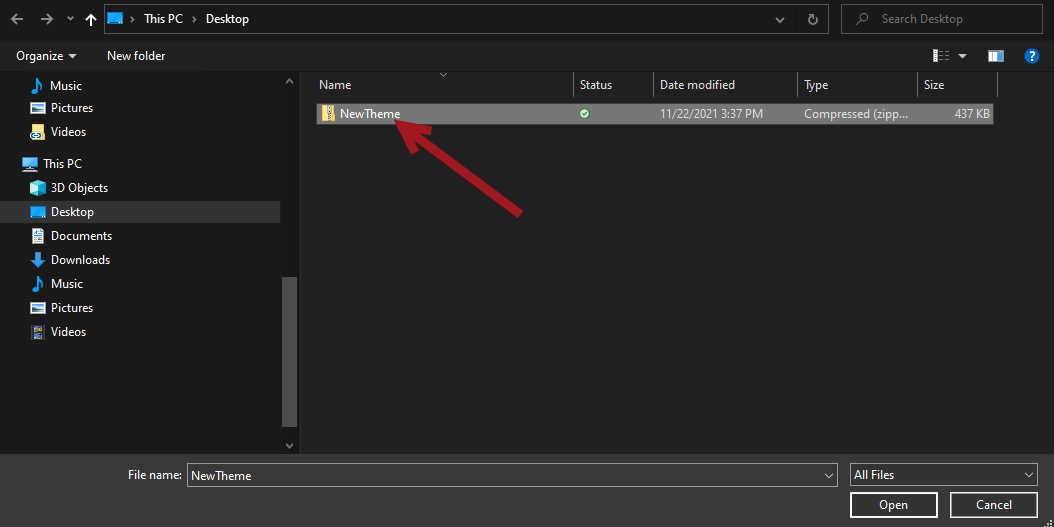
- From Select file, choose the theme's zipped folder.
- Click Save.
- Click the uploaded theme, then click Publish.
- Apply the theme to the appropriate website.
Important! To create a zip file on Windows, be sure to select all files within the custom theme, right-click on the CSS file, and select Send to > Compressed (zipped) folder. Be careful not to zip the already zipped folder that contains all theme files.
Editing and updating a custom theme
Custom themes must be edited in a text editor outside of iMIS. After changes are made, you must replace the existing theme located in iMIS with the updated theme.
Tip: When updating your custom theme files, it is recommended to not rename the .css file. Renaming the .css file will require you to upload a whole new theme instead of editing the existing theme.
Do the following to edit and update an existing theme:
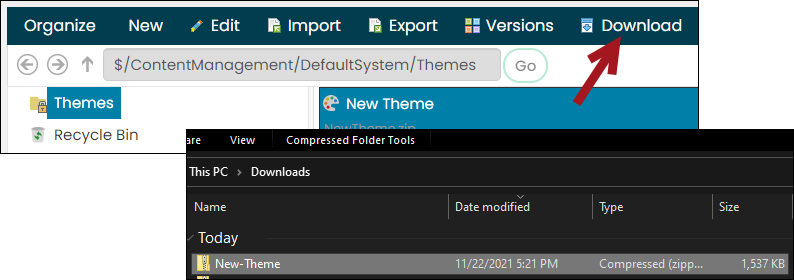
- Go to RiSE > Theme Builder > Themes.
- Click the theme, then click Download.
- The theme downloads to your computer as a zip file. Extract the zip folder's contents, then make the necessary updates.
- Save the changes, then re-zip the folder.
- Navigate back to iMIS, and go to RiSE > Theme Builder > Themes.
- Click the theme, then click Edit.
- From Upload new version, select the updated theme.
- Click Save.
Important! To create a zip file on Windows, be sure to select all files within the custom theme, right-click on the CSS file, and select Send to > Compressed (zipped) folder. Be careful not to zip the already zipped folder that contains all theme files.
Applying a website theme
Do the following to apply a custom theme to a website:
- Go to RiSE > Site Builder > Manage websites.
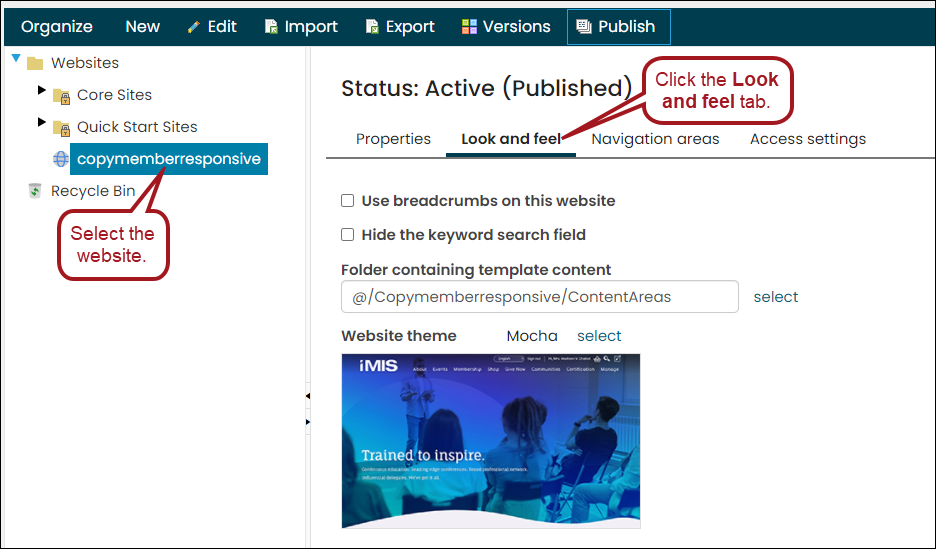
- Select the website, then click the Look and feel tab.
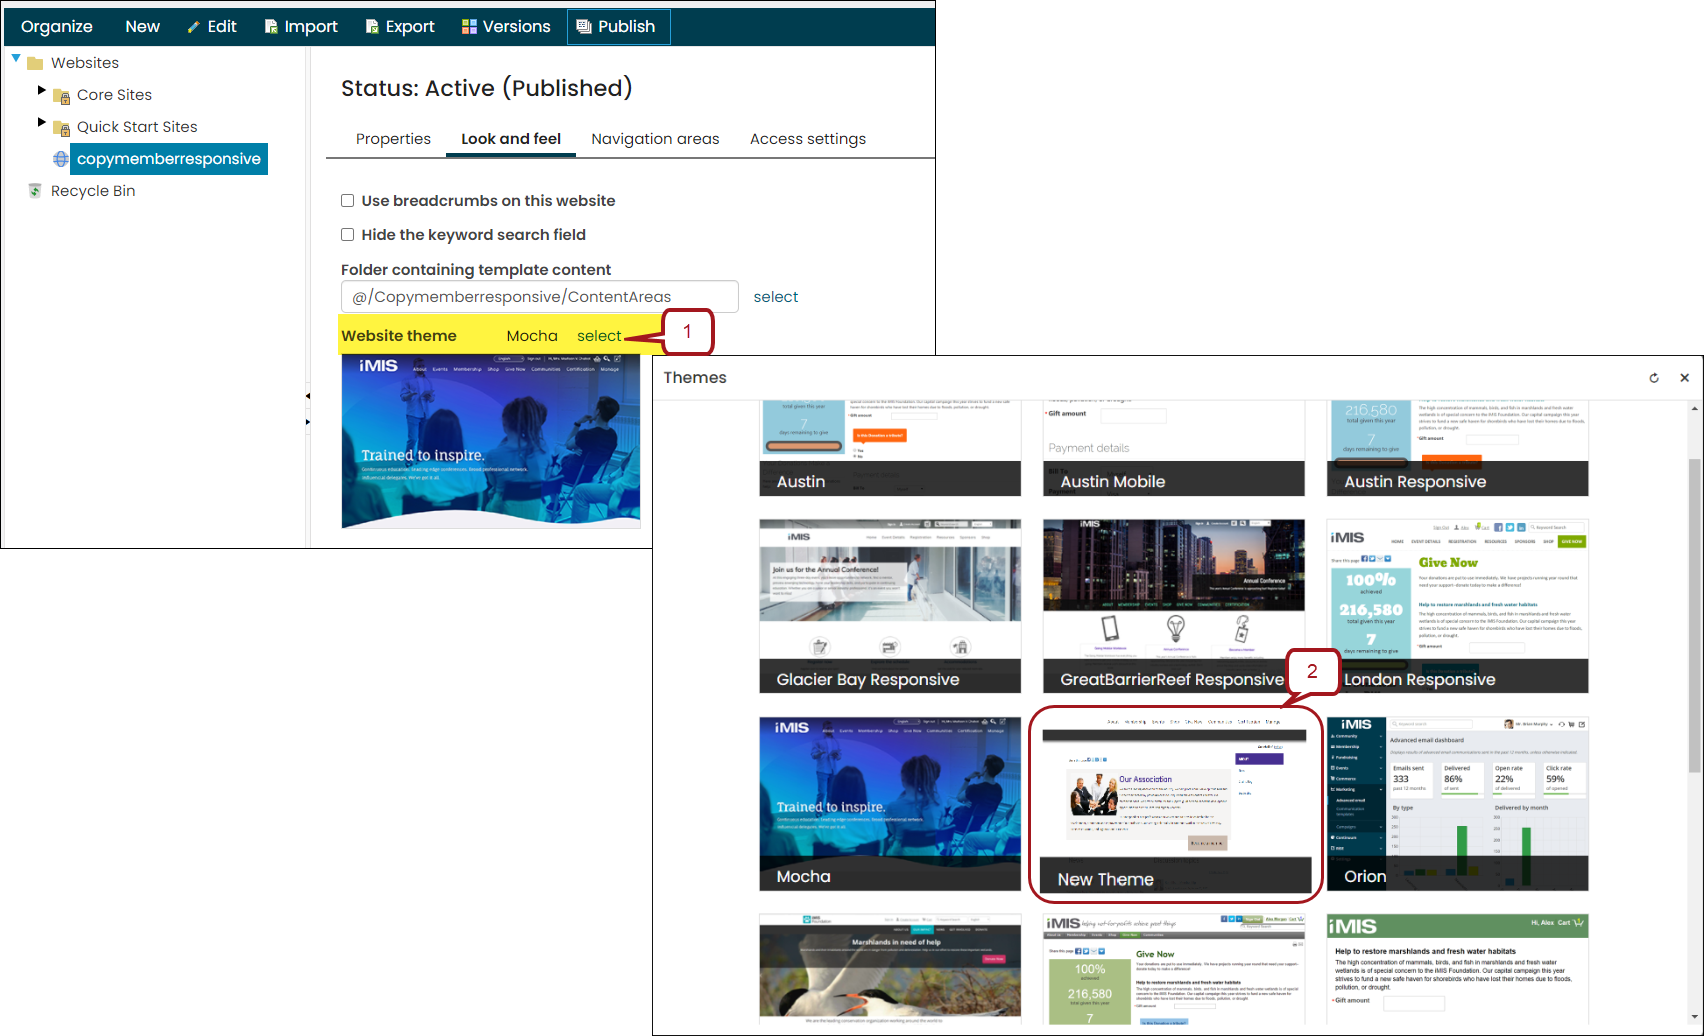
- From Website theme, select the custom theme.
- Click Save.
- Select the website, then click Publish.
