Last updated on: January 27, 2026
Mapping is where the staff user determines what to do with the data in a spreadsheet (iImport) or IQA query (iUpdate). It is often used with iSchedule.
- Column Names - Ensure every column in the spreadsheet or query is distinct and is not repeated, as this can cause issues.
- Map Columns from Spreadsheet Only Once - Each column from the spreadsheet or query is recommended to only be mapped once, as this can cause issues.
- Mapping Columns - Mapping every value is not required (one value is required, but more is recommended).
- iMIS 2017: Business Object and Table Names - You will receive an error if a business object has the same name as a table. Create another business object (or the generated
Csversion) pointing to the same table.
Configuring Mapping
After selecting Insert, Insert w/ Matching Help, Update,Insert / Update, or Delete, the Map screen appears.
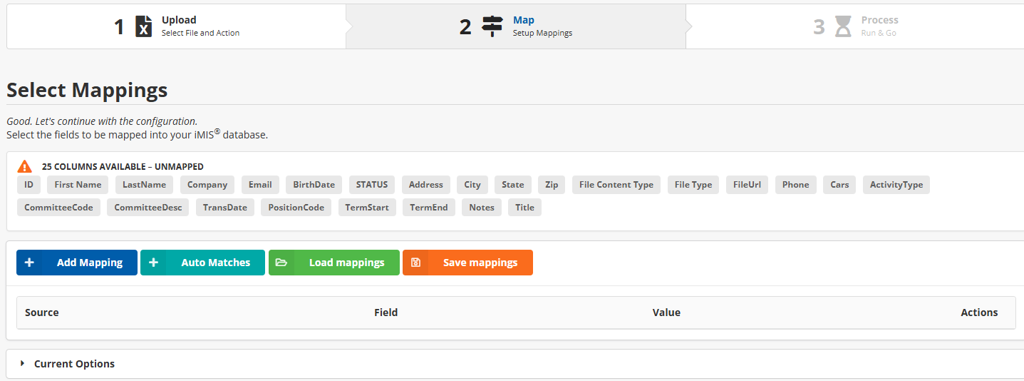
Overview of the Mapping Screen
The Mapping screen's navigation bar shows the current step of the process. Click the Intelligent Query Architect tab (Upload for iImport) to return to the previous step.
The fields available in the spreadsheet are listed. Click on a field name to map it, or click the Add Mapping button.
- Add Mapping - Adds a new field mapping.
- Auto Matches - Attempts to map the input columns to source columns.
- Load Mappings - Loads a list of commonly used mapping templates. See Templates for more information.
- Save Mappings - Saves the current mappings to a template. See Templates for more information.
When the fields are mapped, do one of the following:
- Click Submit to begin the import immediately.
- Click Schedule as Task to save the import as a new task to be executed on a schedule.
Selecting and mapping a field
After clicking a field to map or Add Mapping, the staff user is directed to Add Mapping.
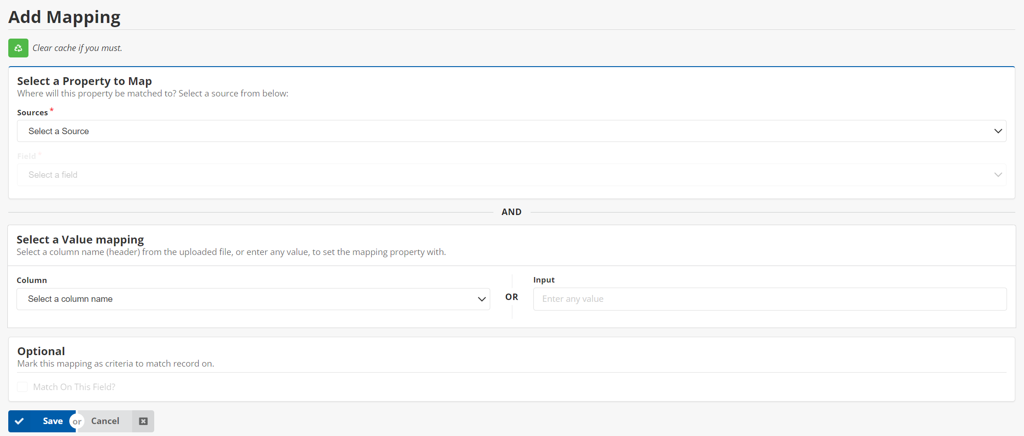
Select the Column from the spreadsheet or IQA query to map to the field above, or enter a hardcoded value for the field. To hardcode true, enter 1/T/True/Y/Yes. To hardcode false, enter 0/F/False/N/No.
- Match On This Field? - Select this checkbox to mark this mapping as criteria to match on.
- Append to Existing Value in Field - If the panel field is multi-select, a panel for appending values appears at the bottom of the screen. To hardcode multi-select fields, the fields should be separated by only a comma (for example,
field1,field2,field3). - Blank Out Field in iMIS - To learn more about how this setting works, see Task Options.
- Other Settings - Learn more about other Task Options.
Using Templates
Templates can be used to save time on repeated tasks. For more information, see Templates.