Last updated on: January 27, 2026
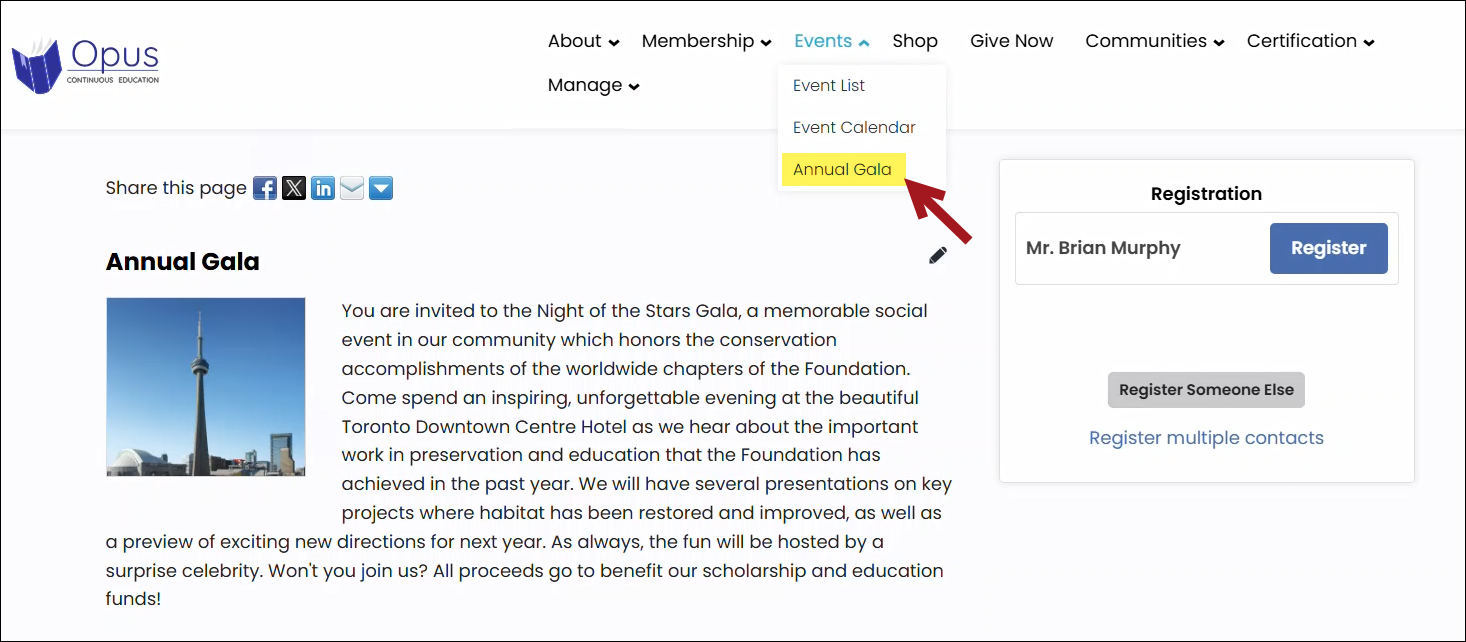
After the event is created, you may want to add it to the public website's sitemap, so that the event is easily accessible from the site's navigation.
In This Article
Adding the event to the sitemap
Do the following to add the event to a public website's sitemap:
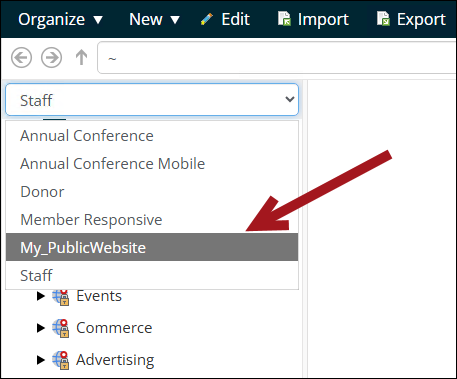
- Go to RiSE > Site Builder > Manage sitemaps.
- From the drop-down, choose the desired public website.
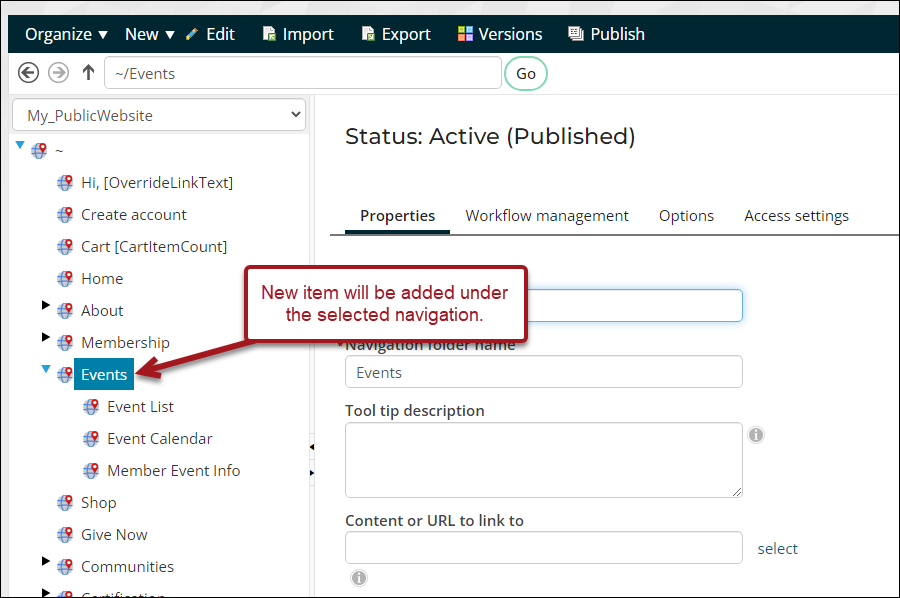
- Select the top-level navigation under which the new sitemap item will be added.
- Click New > Website Navigation Item:
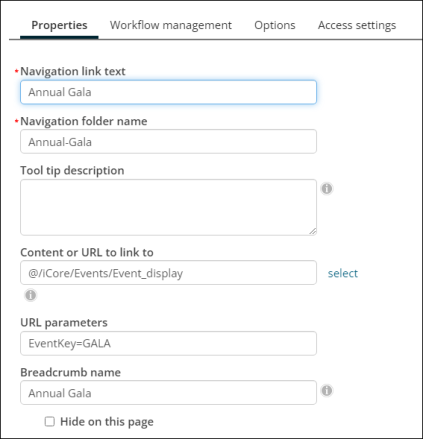
- Navigation link text: Enter the text for the navigation item, such as the name of the event.
- Content or URL to link to: Select the default event display page. Out-of-the-box, this is @/iCore/Events/Event_display. If you have made a copy of the event display content record, choose that page.
- URL parameters: Enter the following, being sure to update EventCode with the actual code for the event you wish to display: EventKey=EventCode
- Click Save.
Example: The Event code for the Annual Gala is GALA, so the following is entered in the URL parameters field: EventKey=GALA
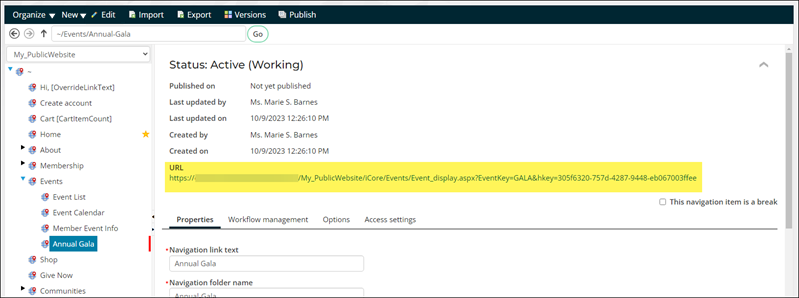
- Expand the Status area, then select the URL.
- Verify the event is correctly appearing. If it is not, ensure the Event code is properly added in the URL parameters field.
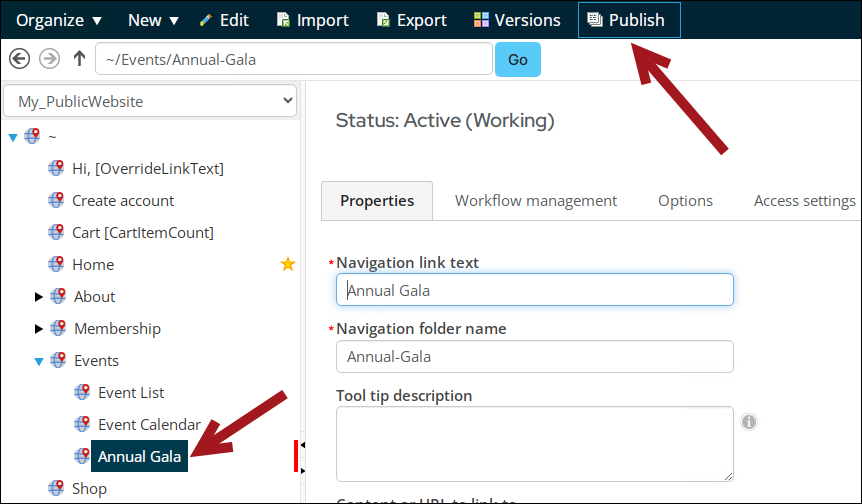
- When ready, Publish the sitemap item.
-
Sharing the direct link to the event
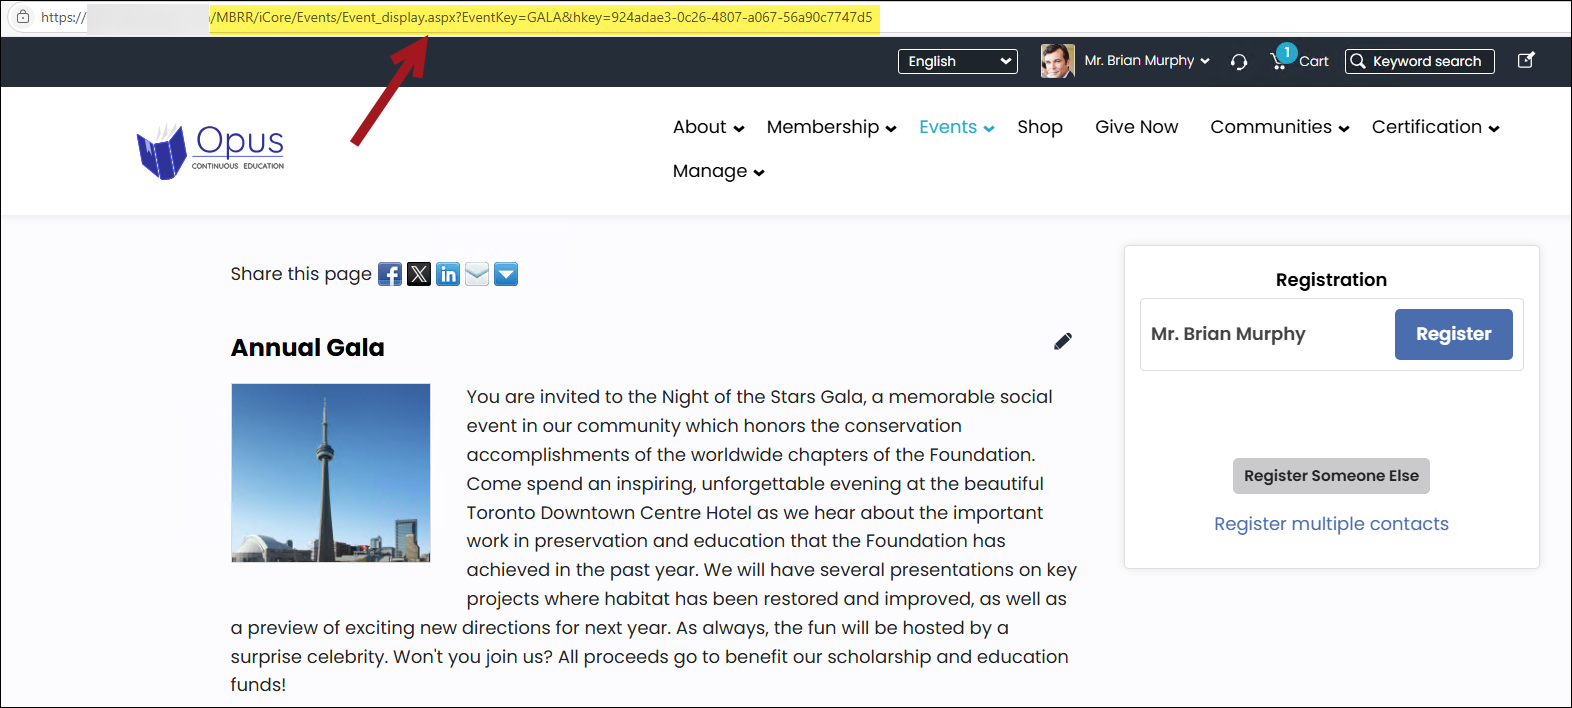
Once the event is publish to the sitemap (RiSE > Site Builder > Manage sitemaps), you can share the URL found under the Status area.
Note: Be sure not to share the Staff site URL, as that link will attempt to take user's directly to the Staff site. Always share the public site URL with non-staff users.
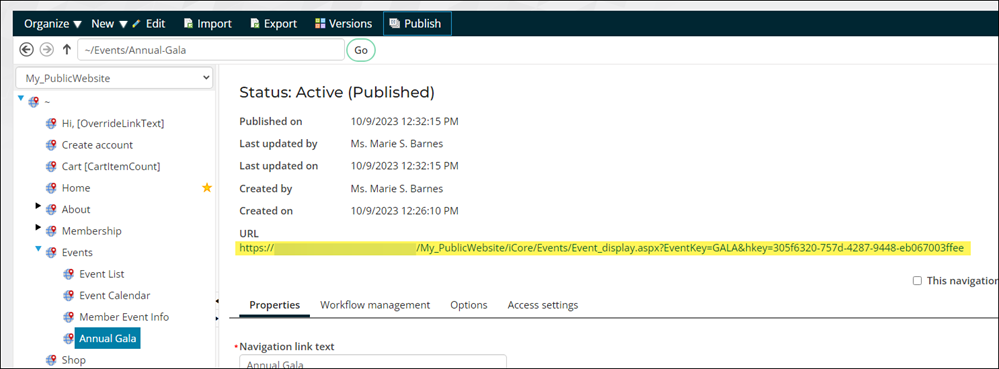
You can also copy the link from the browser's URL if you are viewing the event from the public website.
