Last updated on: June 23, 2026
When a user joins or renews their membership, their primary chapter can be automatically assigned based on their zip code.
In This Article
- Configuring iMIS to assign chapters based on zip code
Associating chapters with zip codes
Adding or editing a contact
Joins and renewals
Configuring iMIS to assign chapters based on zip code
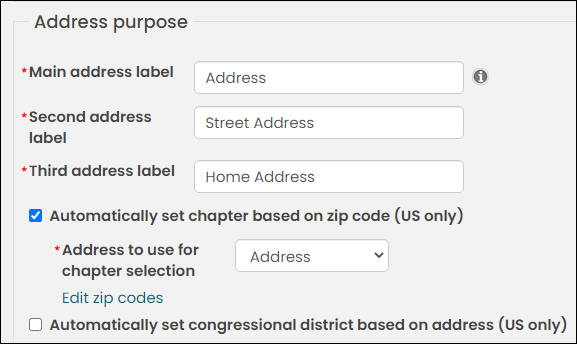
Do the following to enable the Automatically set chapter based on zip code setting:
- Go to Settings > Contacts > System options.
- Scroll down to the Address purpose section.
- Enable Automatically set chapter based on zip code (US only).
- Select the Address to use for chapter selection.
- Click Save.
Associating chapters with zip codes
Do the following to associate a chapter with a zip code:
- If you need to, create the chapters first. See Creating chapters.
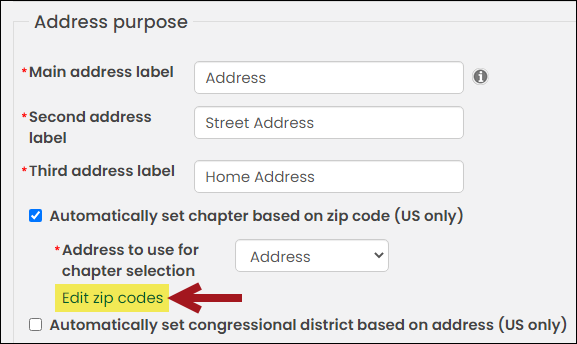
- After chapters have been created, go to Settings > Contacts > System options.
- Scroll down to the Address purpose section.
- If Automatically set chapter based on zip code (US only) is not enabled, enable it.
- Select Edit zip codes.
- From the search fields, locate the zip codes you need to associate with a chapter. For example, if you need to associate all zip codes that begin with "3316" in the city of Miami, enter "3316" in the Zip starts with field and Miami in the City field.
- If there is a zip code missing, you will need to add the zip code by selecting Add new zip code.
- Enable the select all checkbox.
- From the Chapter drop-down in the bottom-right, choose the Chapter you want to associate with the chosen zip codes.
- Click Set Chapter.
The Zip Codes window comes preconfigured with zip codes, cities, states, and county combinations of all of the zip codes in America at the time the data was added. Any new zip code can be manually added by selecting Add new zip code.
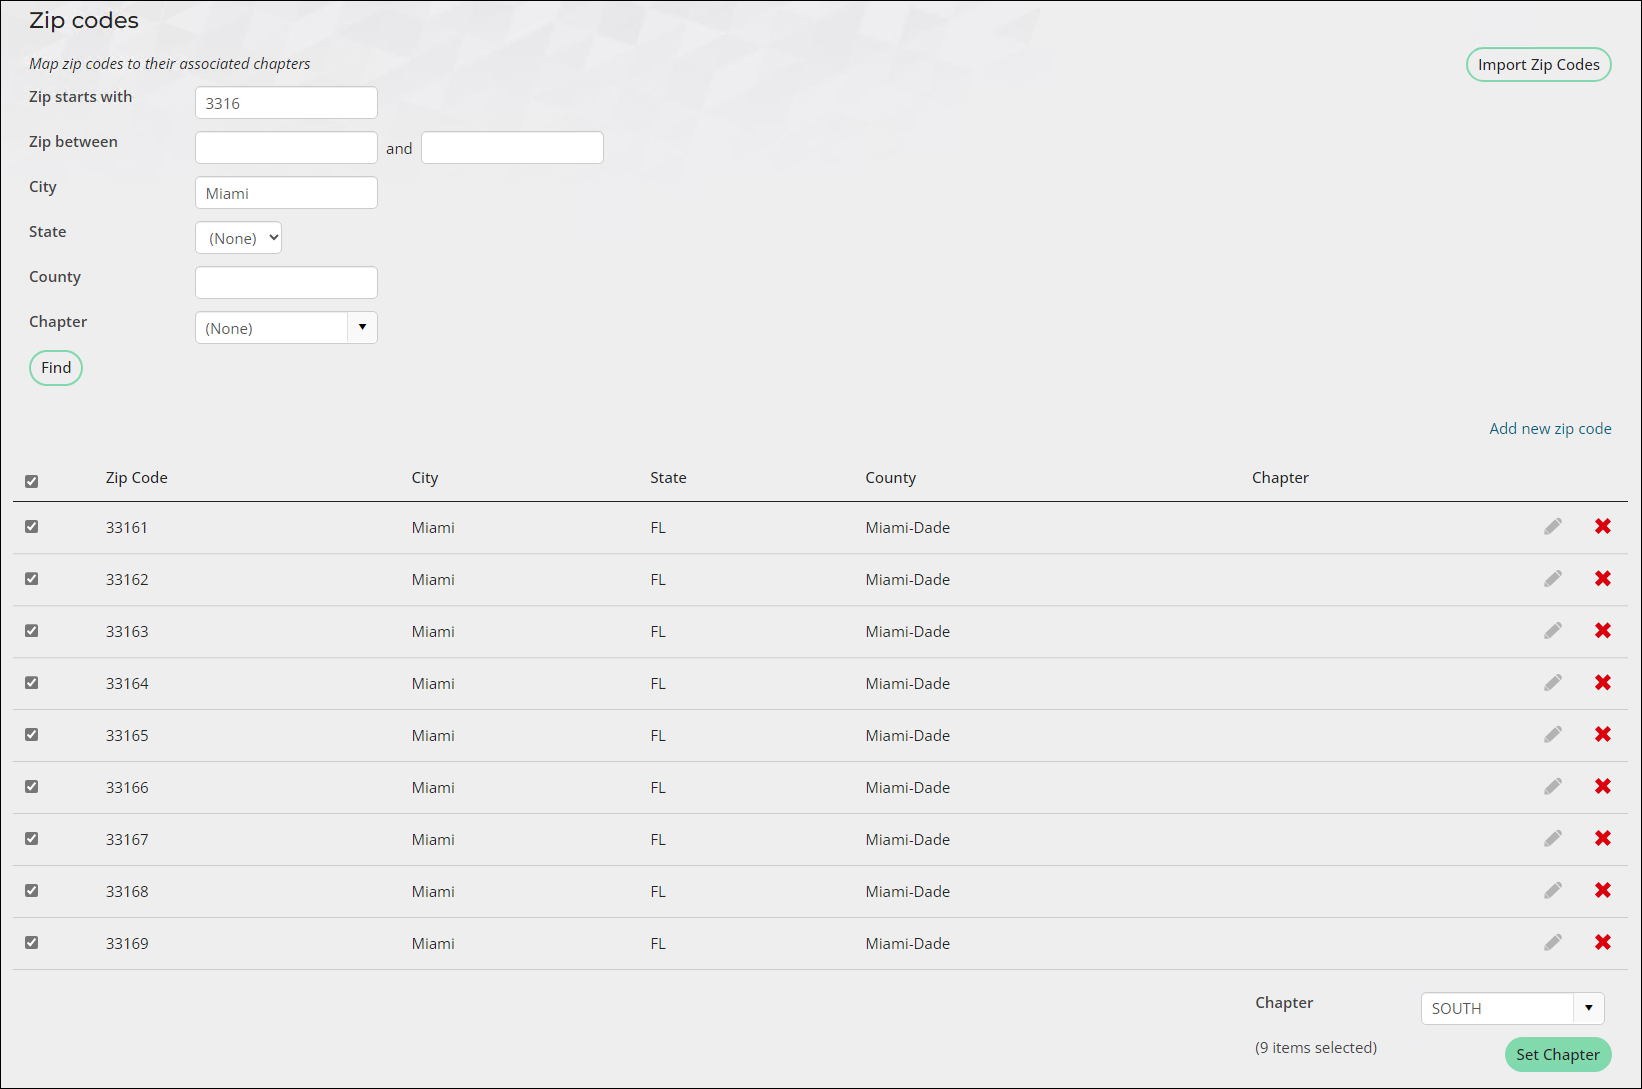
Important! If a chapter is set with a blank zip code field and the Automatically set chapter based on zip code (US only) setting is enabled, all contacts created without an address will be assigned to the set chapter.
Adding or editing a contact
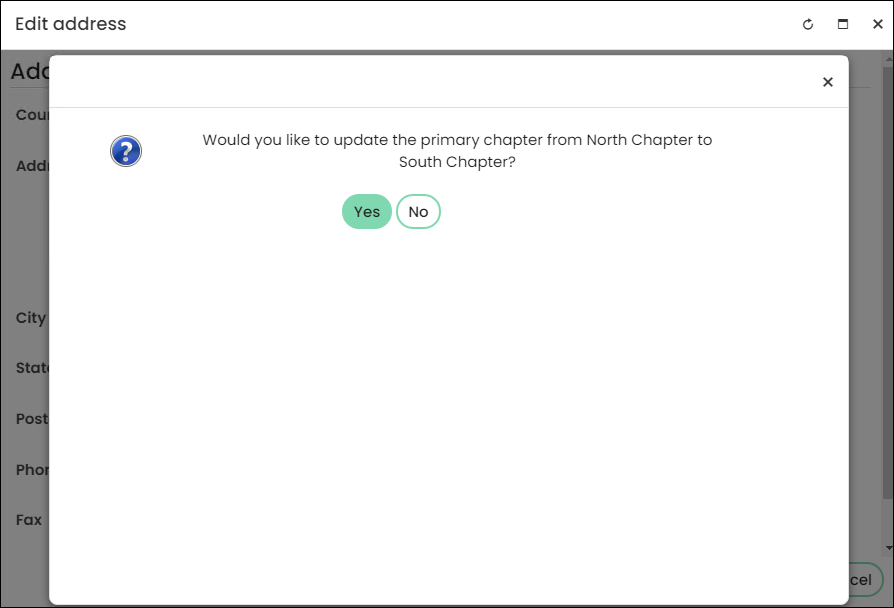
When a new contact is added, the CsContact.Chapter property is automatically populated based on their zip code. When a contact's address is edited and the new zip code is attached to a chapter, a prompt will display to confirm that the user wishes to update the primary chapter.
The user can click No to decline the chapter reassignment. If the user clicks Yes, their membership subscription is updated to reflect the new primary chapter.
Joins and renewals
Joins and renewals without pre-existing chapter assignments will have the primary chapter automatically set based on the address purpose designated for the Address to use for chapter selection setting. If the contact's address purpose matches the address purpose specified in the setting, the chapter will be updated. For instance, if the system option is set to Address and the contact's address purpose used is Home Address, the chapter will not be automatically assigned.
If Include all chapters is enabled and the contact's primary chapter is not included in the billing cycle, the primary chapter will display in the itemized renewal page as the selected chapter. If Include all chapters is not enabled and the contact's primary chapter is not included in the billing cycle, the primary chapter will not display in the itemized renewal page. Only chapters that are included in the billing cycle will display in the itemized renewal page.
For renewals, once a billed chapter becomes inactive because of an address change, the new chapter is preselected as the primary chapter on the itemized renewals page. However, another chapter can be selected from the Chapter Membership Fees drop-down, or it can be removed.