Last updated on: June 19, 2026
It is important that the contact account pages contain the following membership queries:
| Query name | Purpose | Query location |
|---|---|---|
| Subscriptions | Allows staff user to edit subscription data for next billing term. Details the status of the subscription data that drives the billing and the contact’s overall membership and/or subscriber status. |
$/ContactManagement/DefaultSystem/Queries/Advanced/Contact/Financial |
| Non-membership subscriptions | Displays subscription items purchased outside of the renewal process. |
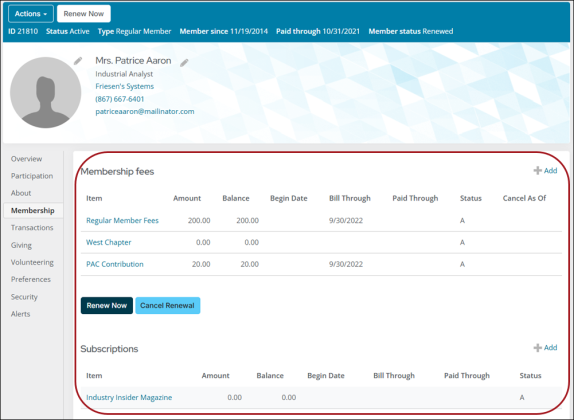
If you are using the out-of-the-box account pages or a copy of the iMIS EMS out-of-the-box account pages, these queries are already located on the Membership tab.
In This Article
- Reviewing and editing subscriptions with the membership queries
Adding the Subscriptions query and related +Add button to the account pages
Adding the Non-membership subscriptions query and related +Add button to the account pages
Reviewing and editing subscriptions with the membership queries
These queries are important, because they are where staff users can review and edit subscription (membership fees) and non-dues subscription items that determine what a member is billed in the next billing term.
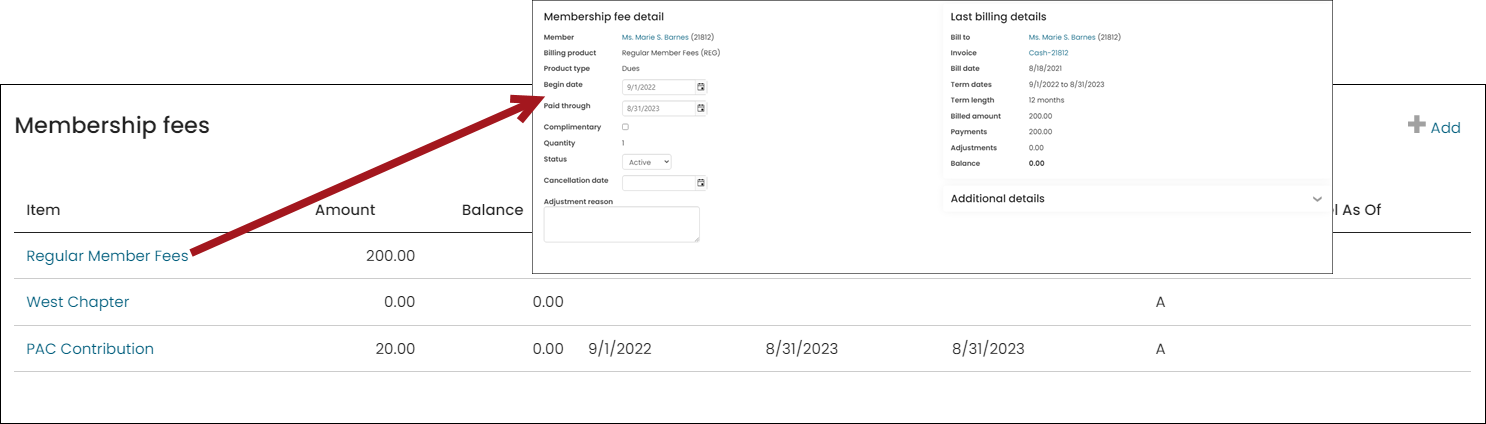
Staff users can update the following using these queries:
- Begin date – The projected begin date for an individual dues or non-dues subscription item. Refers to the first date of a term through which the item has been billed, whether or not payment has been received.
- Paid through – The expiration date of the membership or subscription item, or the period through which the member has paid for the item. Controls the paid-through date for the single line item. Editing this date will not update the member’s overall paid-through date (CsContact.Paid Through).
- Complimentary - When enabled, the member is charged 0.00 for the billing product on their next billing term. For details, see Assigning an item as complimentary for a single member.
- Status - Can be updated to Active or Inactive. Setting an item to Inactive will cancel the subscription item and automatically hide the Cancellation date field. If you are setting the primary fee product to inactive, the member's membership will be cancelled.
- Cancellation date – Enter a date or set the Status to Inactive:
- Entering a cancellation date - Enter a date if you wish to cancel the subscription item on a future date. The night after this date, the subscription line is set to inactive. To cancel the subscription item today, set the Status to Inactive. When the Status is set to Inactive, the Cancellation date field is hidden. Any line item with a Cancellation date will not be billed for the next term, unless the same product is defined in the Customer type. If a member’s invoice was accidentally cancelled, you can clear this date, so that the subscription is no longer cancelled.
- Setting the status to inactive - To cancel the subscription item today, simply set the Status to Inactive. When the Status is set to Inactive, the Cancellation date is hidden.
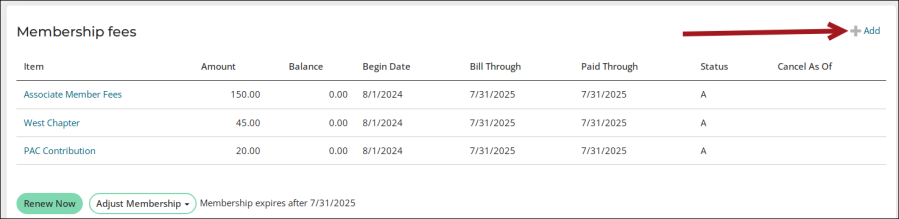
Adding the Subscriptions query and related +Add button to the account pages
The +Add button allows staff users to easily add a new subscription item prior to billing a member for their next term.
To add the Subscriptions query and related +Add button, do the following:
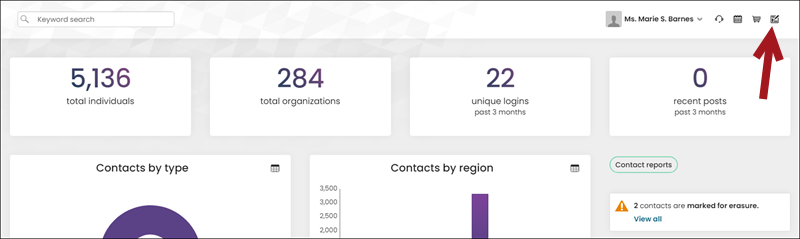
- Enable Easy Edit.
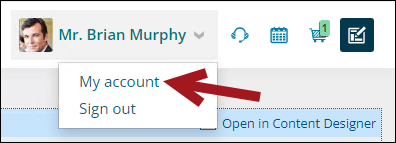
- From the Staff site, navigate to your account page.
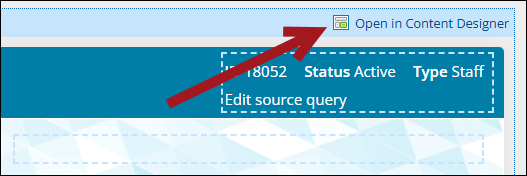
- Select Open in Content Designer.
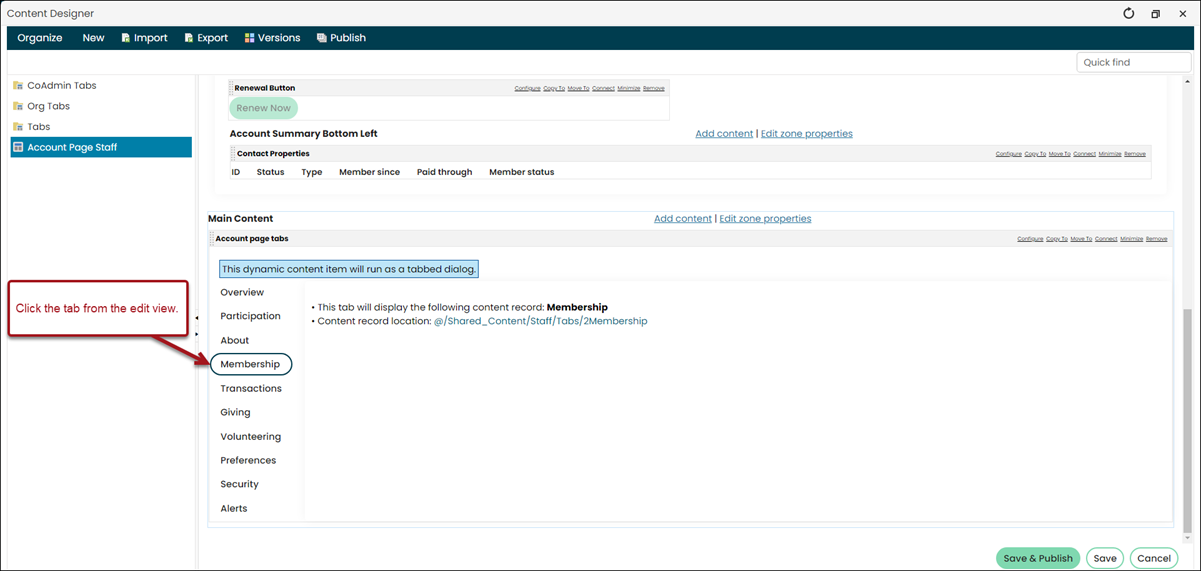
- Determine which tab you want to add the queries to, then click the tab.
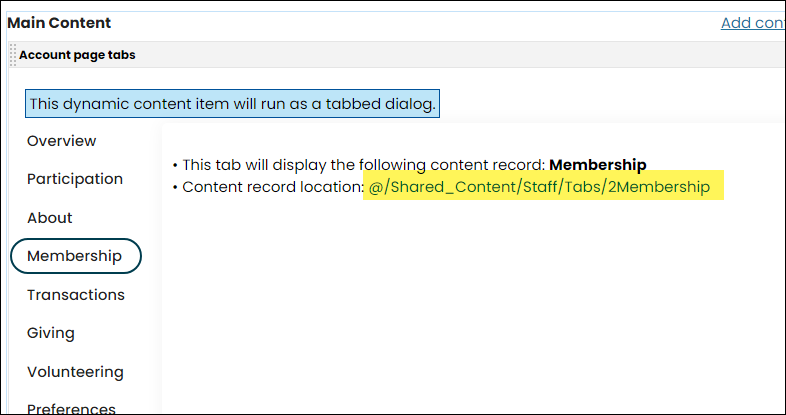
- Click the Content record location link to open the tabbed content for edit.
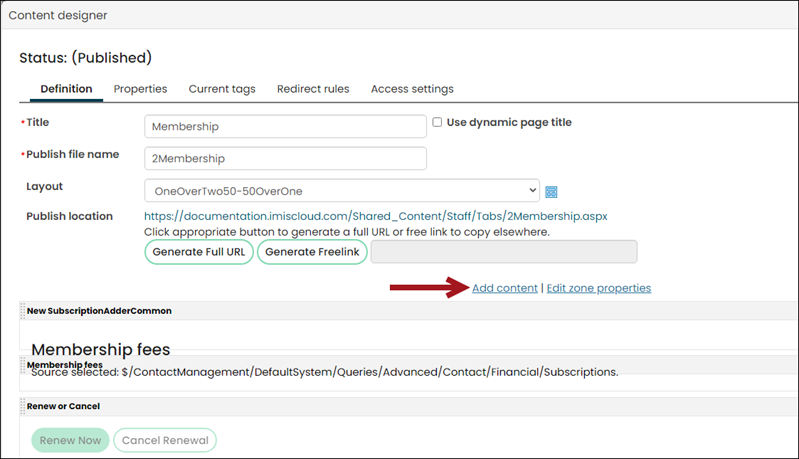
- First, add the +Add button. Select Add content.
- Click the Contact folder, then double-click the Subscription Adder content item.
- Configure the following for the Subscription Adder content item:
- Title: Membership fees
- CSS class: mb-n5 iPartTitleHorizontal
- Product type: Membership
- Click OK.
- Next, add the Subscription query. Select Add content.
- Double-click the Query Menu content item.
- Configure the following for the Query Menu content item:
- CSS class: mt-n5
- Limit users who can view data for other contacts: Enabled
- Open link in a pop-up: Enabled
- Source query or folder path: $/ContactManagement/DefaultSystem/Queries/Advanced/Contact/Financial/Subscriptions
- Leave all other settings at their default values.
Warning! This option is required.
- Click OK.
- Make sure the Subscription Adder content item is right above the Query Menu content item.
- Save & Publish the content record.
Tip: It is recommended that these queries are added to a tab called Membership. This helps to easily locate the information for anyone troubleshooting or looking for the information.


Adding the Non-membership subscriptions query and related +Add button to the account pages
To add the Non-membership subscriptions query and related +Add button, do the following:
- Enable Easy Edit.
- From the Staff site, navigate to your account page.
- Select Open in Content Designer.
- Determine which tab you want to add the queries to, then click the tab.
- Click the Content record location link to open the tabbed content for edit.
- First, add the +Add button. Select Add content.
- Click the Contacts folder, then double-click the Subscription Adder content item.
- Configure the following for the Subscription Adder content item:
- Title: Membership fees
- CSS class: mb-n5 iPartTitleHorizontal
- Product type: Subscription
- Click OK.
- Next, add the Non-membership subscription query. Select Add content.
- Double-click the Query Menu content item.
- Configure the following for the Query Menu content item:
- CSS class: mt-n5
- Limit users who can view data for other contacts : Enabled
- Open link in a pop-up: Enabled
- Source query or folder path: $/ContactManagement/DefaultSystem/Queries/Advanced/Contact/Financial/Non-membership subscriptions
- Leave all other settings at their default values.
Important! This option is required.
- Click OK.
- Make sure the Subscription Adder content item is right above the Query Menu content item.
- Save & Publish the content record.
Tip: It is recommended that these queries are added to a tab called Membership. This helps to easily locate the information for anyone troubleshooting or looking for the information.
