Last updated on: January 27, 2026
Unlike Contact panels, Standalone panels do not associate the table data with a specific contact. Standalone panels are multi-instance only and can be used anywhere in iMIS.
Note: Only staff users and system administrators can create, edit, view, and delete standalone panels. Standalone panels should not be added to any public-facing content records using the Panel Editor content item. Properties and values from standalone panel sources may be used in public-facing IQA queries using the Query Menu content item, and they may be used as drop-down values in other public-facing panel source properties.
The following examples detail the different ways you can create and use standalone panels.
In This Article
- Using a standalone panel in a custom Business Object
Creating a standalone panel to anonymously track feedback
Adding a goals panel to an organization's account page
Using a standalone panel to create pre-defined values for another panel
Using a standalone panel in a custom Business Object
Example: Members in specific states qualify for discounted membership dues. Use a standalone panel to define the states and the correlating prices, then connect the standalone panel to a custom business object property.
Creating the standalone panel
Do the following to create the standalone panel:
- Go to RiSE > Panel Designer > Panel definitions and select Add panel definition:
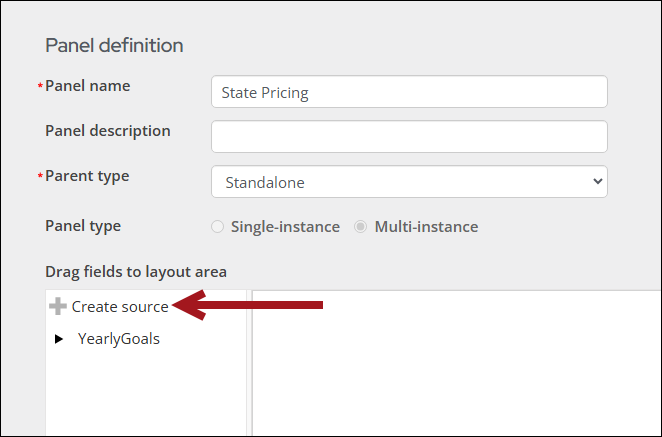
- Panel name: State Pricing
- Parent type: Standalone
- Click Create source and enter StatePricing as the Source name.
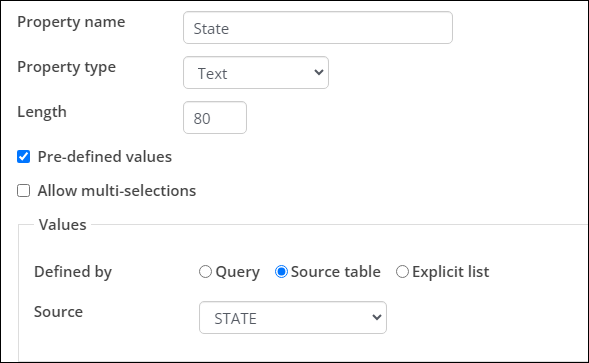
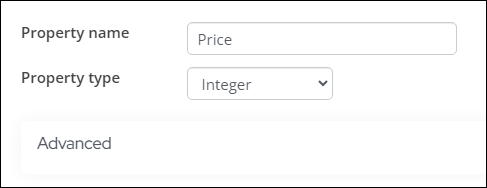
- Add two properties to the new source:
- Property type: Text
- Pre-defined values: Enabled
- Defined by: Source table
- Source: State
- Property type: Integer
- Drag the properties to the grid, then Save & Exit.
| Property | Configurations |
|---|---|
| State |
|
| Price |
|
Adding countries and pricing to the panel
Do the following to add the panel to a content record and populate the table:
- Go to RiSE > Page Builder > Manage content and create a new content record (New > Website Content).
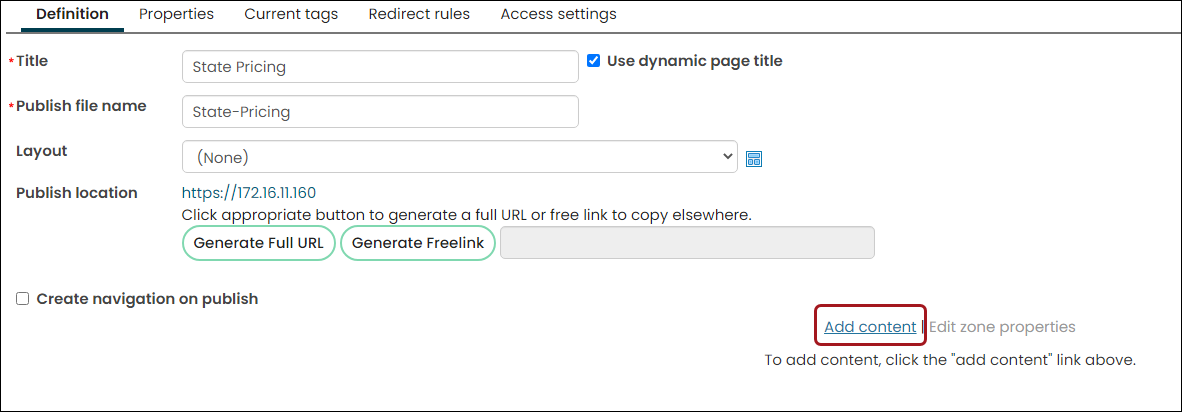
- Give the page a Title the content, then select Add content.
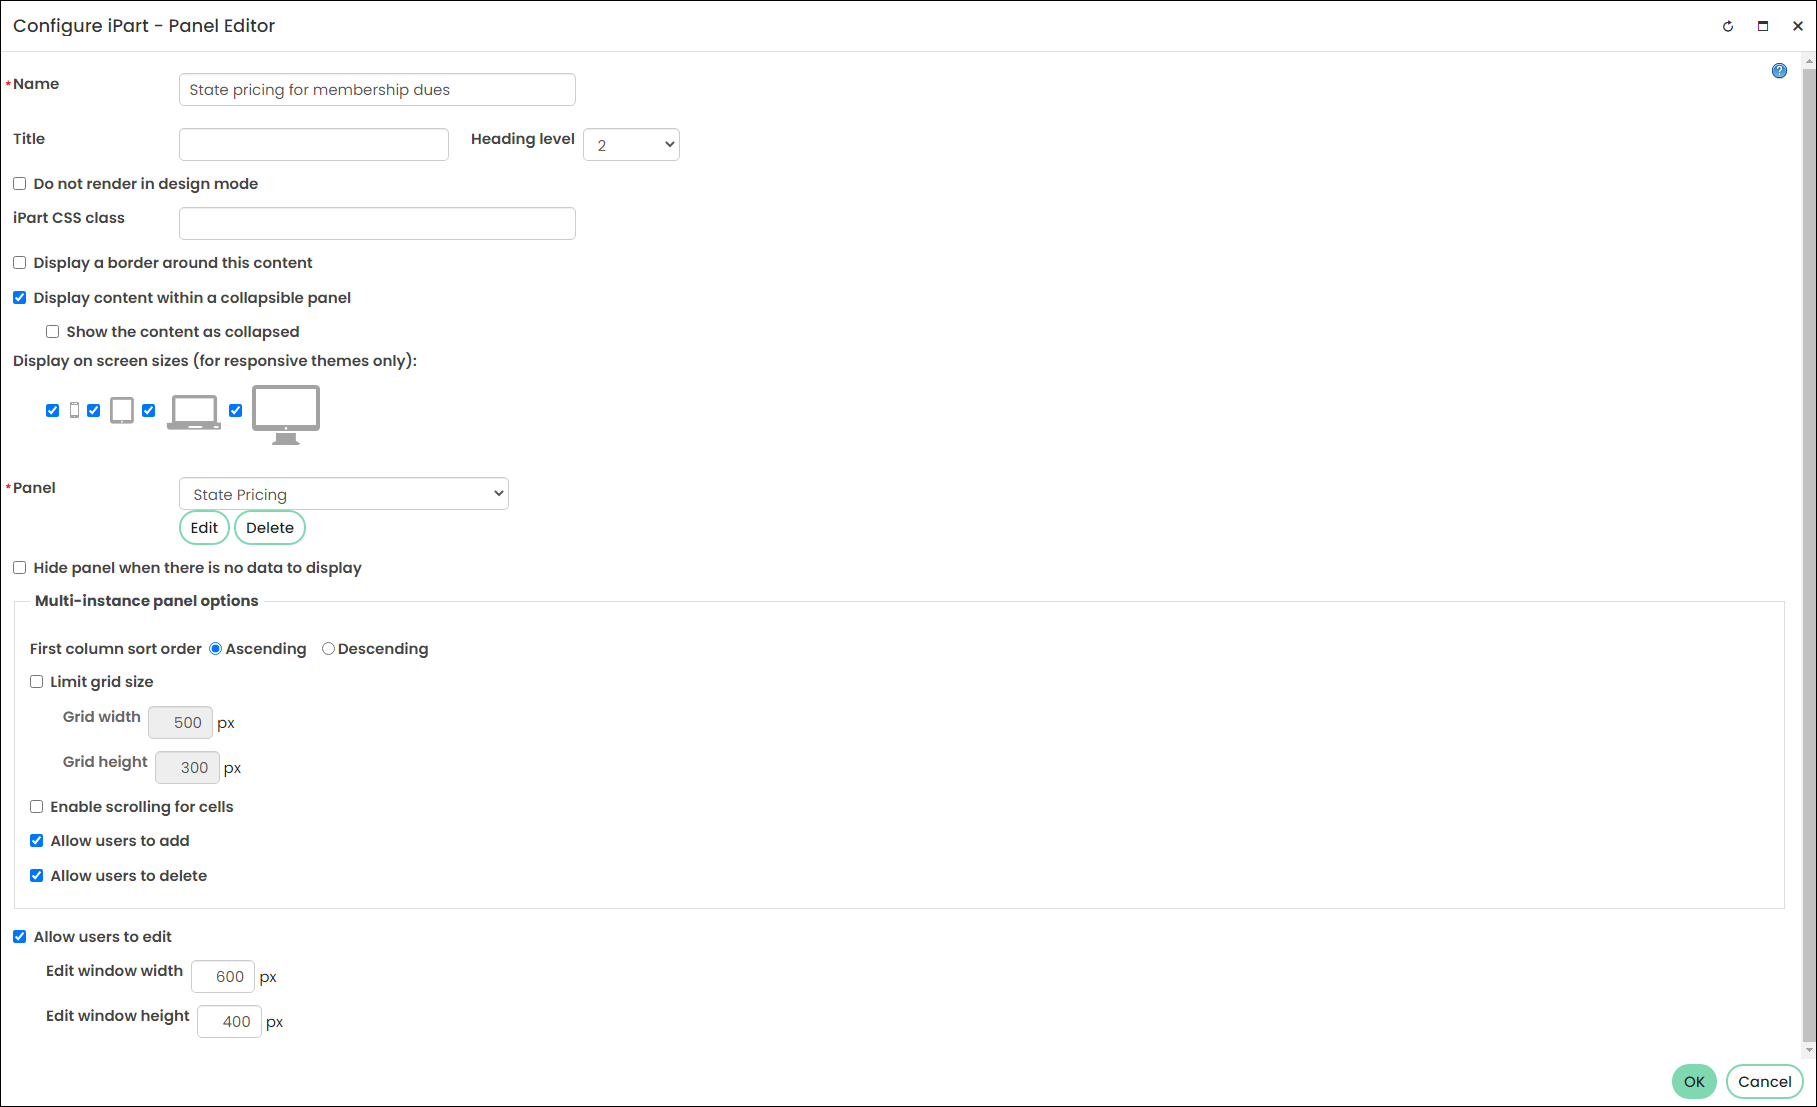
- Open the Content folder, then choose the Panel Editor content item:
- Title: State pricing for membership dues
- Panel: State Pricing
- Allow users to add, Allow users to delete, Allow users to edit: Enabled
- Click OK, then click Save & Publish.
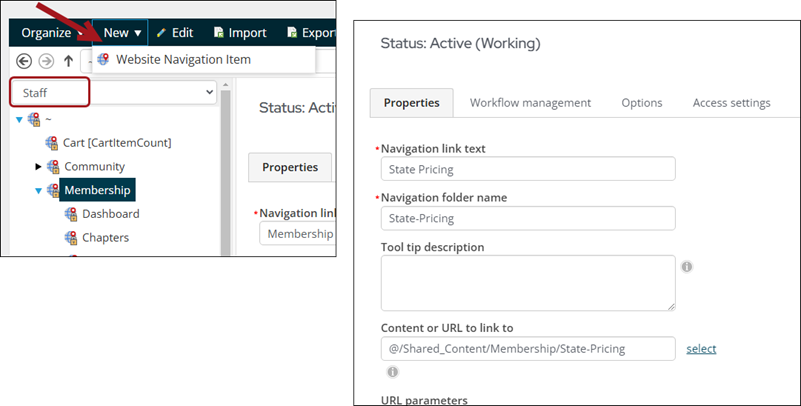
- Go to RiSE > Site Builder > Manage sitemaps and choose the Staff site from the drop-down.
- Click Membership, then click New > Website Navigation Item:
- Navigation link text: State Pricing
- Content or URL to link to: Content record you created in step 1.
- Click Save then Publish.
- Go to Membership > State Pricing and populate the table with the appropriate state pricing rules.
Adding the standalone panel property to a Business Object
Do the following to add the standalone panel as a property in Expression Builder:
- Go to RiSE > Business Object Designer and click New > Design Business Definition.
- Enter a Name, then click Create Object.
- Click the Database tab.
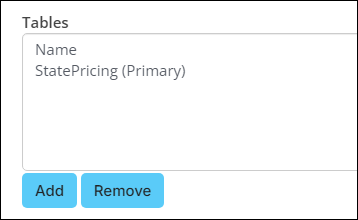
- From the Tables section, click Add.
- Add the Name and StatePricing tables.
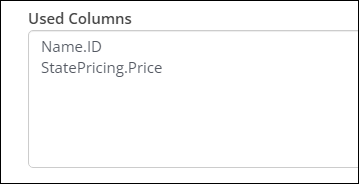
- From the Available Columns section, add the Name.ID and StatePricing.Price properties to the Used Columns section.
- From the Joins section, add the following join: Name.STATE_PROVINCE = StatePricing.State
- Click Save, then click Publish.

Adding the custom property to a billing product
Do the following to add the expression builder property to a billing product to be used for price evaluation:
- Go to Membership > Billing products.
- Open the billing product for edit, or create a new billing product.
- Enable Use special pricing.
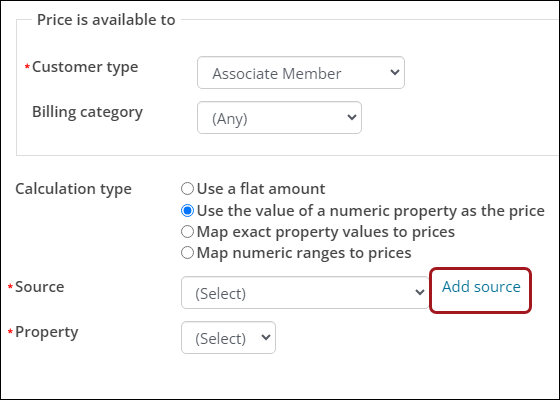
- Select Add new price rule:
- Choose a Customer type.
- (optional) Choose a Billing category.
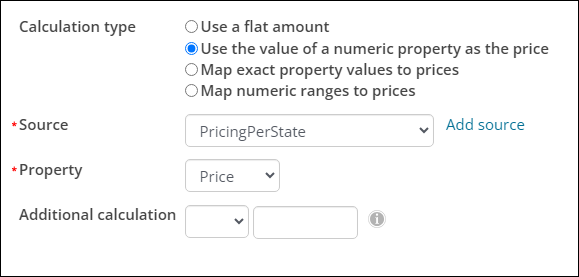
- From Calculation type, choose Use the value of a numeric property as the price.
- Select Add source.
- Choose the Business Object you created in the previous section (PricingPerState).
- From the Property drop-down, select Price.
- Click OK, then click Save.
Creating a standalone panel to anonymously track feedback
This example details how to create a standalone panel so that staff members can anonymously give feedback about a recent annual event.
Do the following to create the standalone panel:
- Go to RiSE > Panel Designer > Panel definitions.
- Select Add panel definition.
- Enter the following details:
- Panel name: Staff survey
- Panel description: Anonymous staff survey about 2019 annual event
- Parent type: Standalone
- Click Create source, then enter Staff_Survey as the Source name.
- Add the following properties to the Staff_Survey source:
- Add a column to the panel layout area.
- Add the properties to the layout area in the desired order.
- Adjust the Label for each property to be a survey format, for example, change the PlanningSatisfaction label to, “Were you satisfied with the planning of the event?”
- Change the styling of the properties to the desired format.
- Click Save & Exit.
- Add the panel to the desired location using the Panel Editor content item. Make sure Allow users to add is enabled in the Panel Editor content item.
- Save & Publish the content record.
| PROPERTY NAME | PROPERTY TYPE |
|---|---|
| PlanningSatisfaction | Yes/No |
| PlanningComments | Text |
| EventSatisfaction | Yes/No |
| EventComments | Text |
| CleanUpSatisfaction | Yes/No |
| CleanUpComments | Text |
| OverallSatisfaction | Yes/No |
| OverallComments | Text |
After the survey is sent to staff users, they can add feedback using the Add an item (+) button.
You can also query the survey data in IQA using the new panel data source you created (Staff_Survey).
Adding a goals panel to an organization's account page
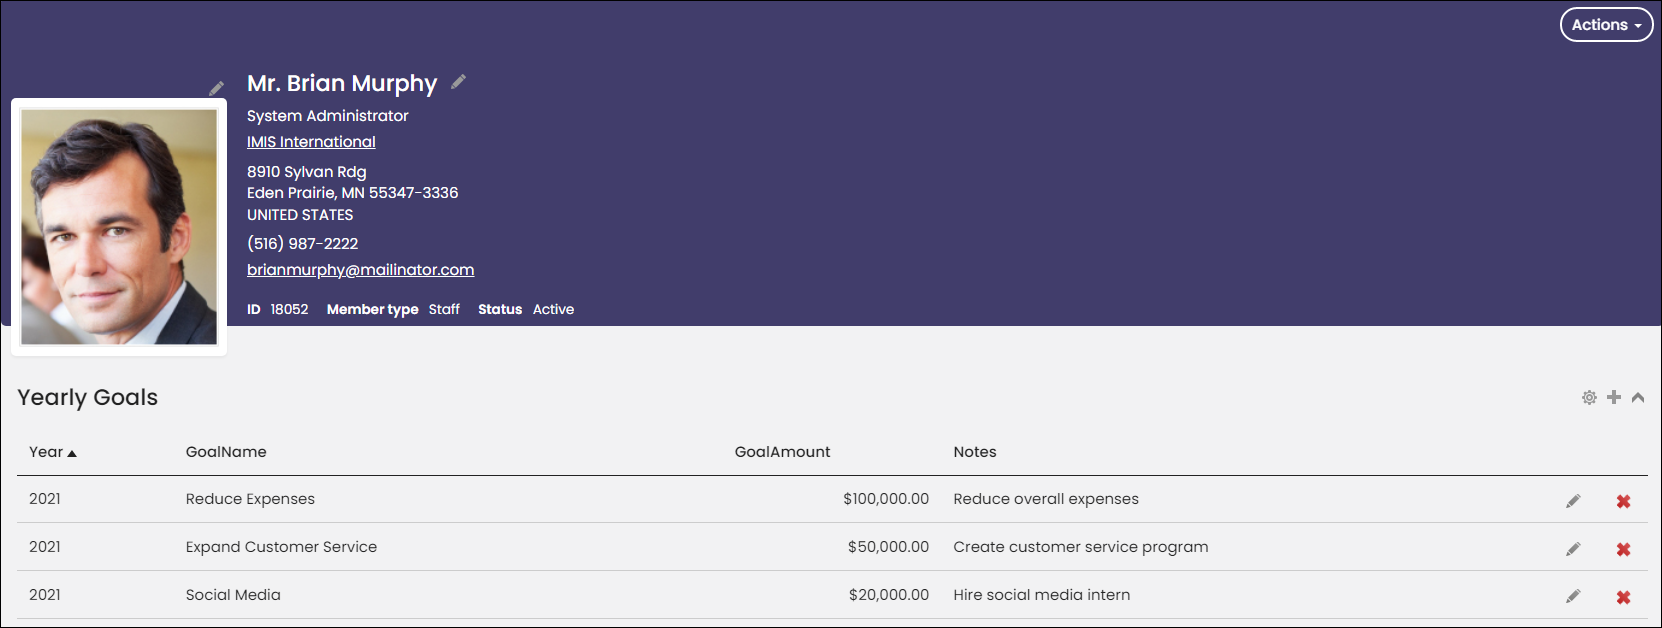
This example details how to create a panel that allows organizations to track their yearly goals.
Do the following to create the goals panel:
- Go to RiSE > Panel Designer > Panel definitions.
- Select Add panel definition.
- Enter the following details:
- Panel name: Company Goals
- Panel description: Goal table for yearly goals that tracks the year, goal, goal progress, and additional notes about the goals.
- Parent type: Standalone
- Click Create source, then enter Company_Goals as the Source name.
- Add the following properties to the Company_Goals source:
- Add the properties to the layout area in the desired order.
- Adjust the Label for each property.
- Click Save & Exit.
- Add the panel to the desired location using the Panel Editor content item. Make sure Allow users to add is enabled in the Panel Editor content item.
| PROPERTY NAME | PROPERTY TYPE |
|---|---|
| Year | Integer |
| GoalName | Text |
| GoalAmount | Currency |
| Notes | Text |
Note: To allow editing and deleting of goals, enable Allow users to edit and Allow users to delete.
After the panel is added to the staff-view of organization account pages, staff users can add their goals to the table using the Add an item (+) button.
Using a standalone panel to create pre-defined values for another panel
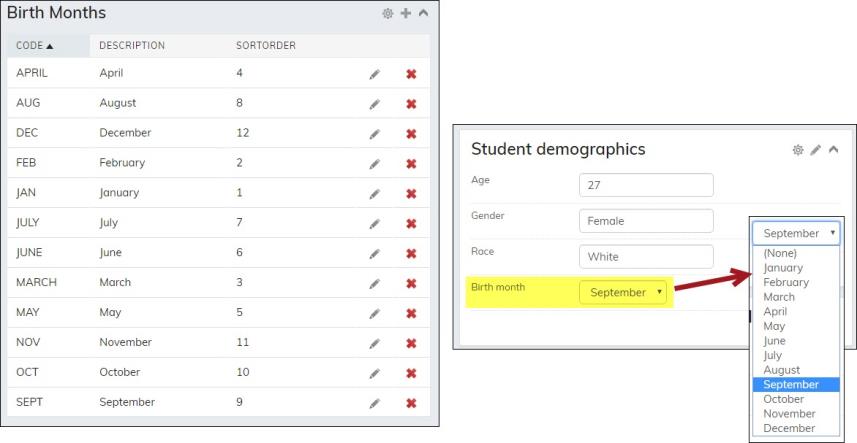
Like General lookup tables, you can use standalone panels to create pre-defined values that will display in another panel or in an IQA query’s display.
Outline
The following is an outline of the steps involved in using a standalone panel as a data source for another panel:
- Create the standalone panel with the description, code, and sort order properties.
- Add the values to the panel.
- Create the IQA query that uses the standalone panel property as its source.
- Add the query as a property to the other panel.
The following example details how to create a Birth month drop-down with the months put in sequential order.
Creating the standalone panel
To create the standalone panel, do the following:
- Go to RiSE > Panel Designer > Panel definitions.
- Select Add panel definition.
- Enter the following details:
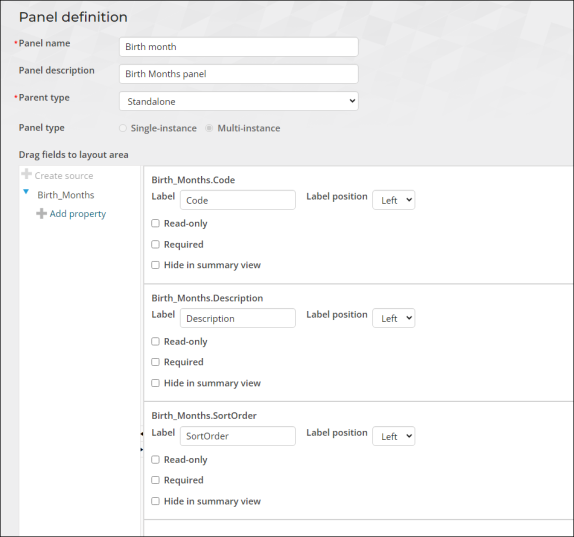
- Panel name: Birth month
- Panel description: Birth months panel.
- Parent type: Standalone
- Click Create source and enter Birth_Months for the Source name.
- Add the following properties to the Birth_Months source:.
- Drag the properties onto the layout area.
- Click Save & Exit.
| PROPERTY NAME | PROPERTY TYPE | NOTES |
|---|---|---|
| Code | Text | |
| Description | Text | The Description property can be any type, but for this example, use Text. |
| SortOrder | Integer | This is an optional property. Use the SortOrder property to sequentially arrange the data in a drop-down. |
Adding the values to the panel
The panel must exist on a content record before you can add values to the panel.
Do the following to add the values to the panel:
- Go to RiSE > Page Builder > Manage content.
- Add the panel to an existing content record or create a new one:
- Select New > Website content.
- Enter the Title. For this example, enter Standalone panels.
- Select Add content and select the Panel Editor (Content folder).
- In the Title field, enter Birth months.
- From the Panel drop-down, select Birth month.
- Enable Allow users to add, Allow users to delete, and Allow users to edit.
- Click OK, then Save & Publish the content record.
- Add the content record to a position in your Staff site sitemap:
- Go to RiSE > Site Builder > Manage sitemaps.
- Select New > Website Navigation Item.
- Enter the Navigation link text. For this example, enter Standalone panels.
- From the Content or URL to link to, select the content record you created in step 2.
- Click Save.
- Position the navigation item to the desired location, then Publish the navigation item.
- Add the values to the panel:
- Navigate to the navigation item you created in step 3.
- Click the Add an item button (+).
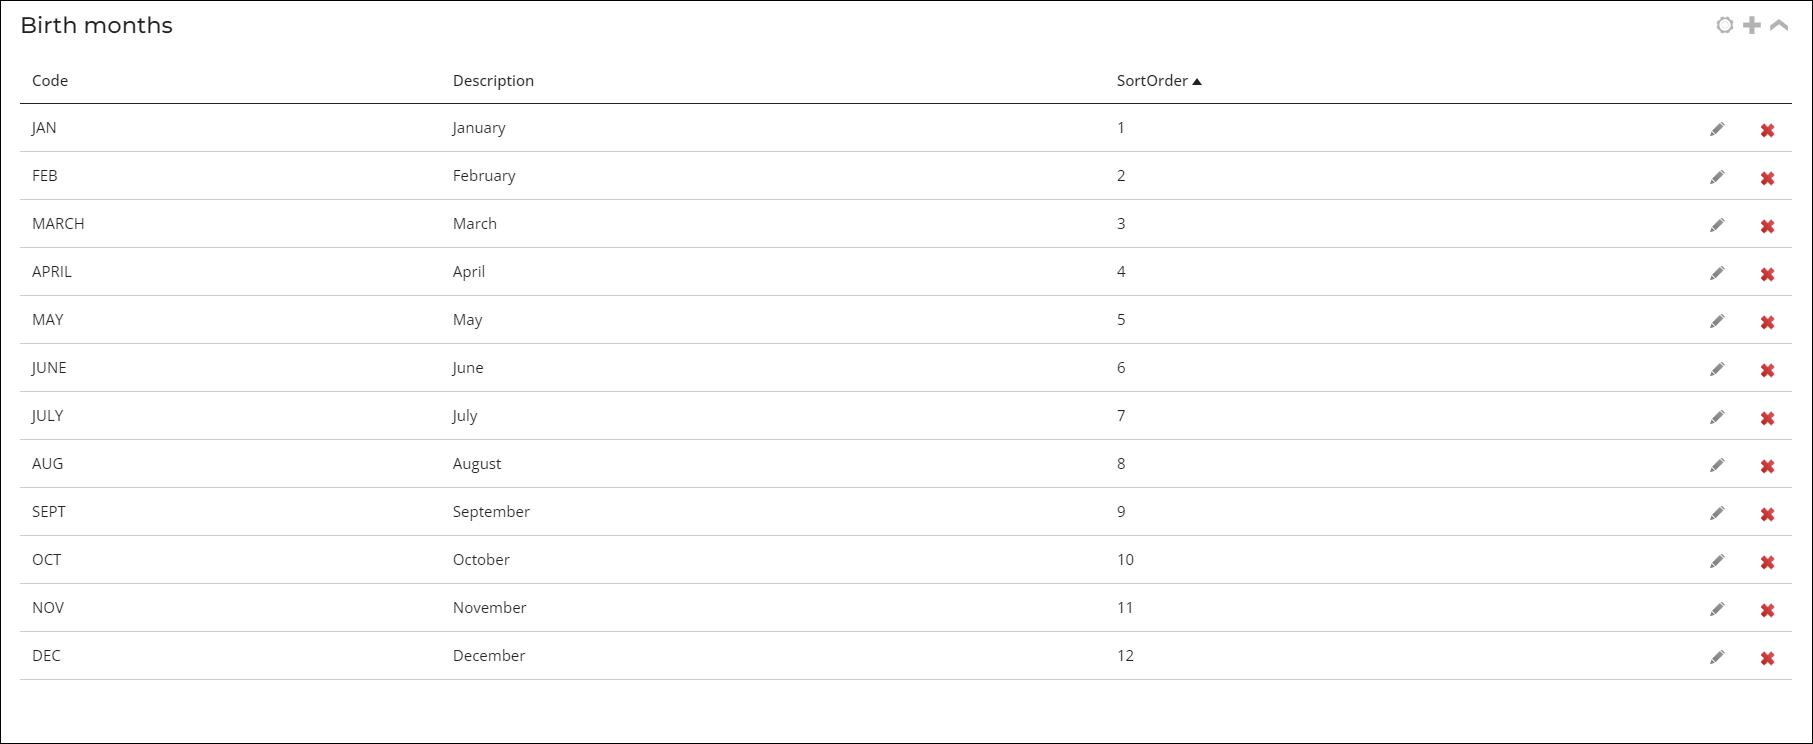
- Enter the Birth month values.
 Click to view table
Table 4: Viewing example birthmonth values CODE DESCRIPTION SORT ORDER JAN January 1 FEB February 2 MARCH March 3 APRIL April 4 MAY May 5 JUNE June 6 JULY July 7 AUG August 8 SEPT September 9 OCT October 10 NOV November 11 DEC December 12
Creating the IQA query
Create the IQA query using the same panel source you created in the Creating the standalone panel section:
- Go to RiSE > Intelligent Query Architect.
- Select New > Query.
- In the Name field, enter Birth months.
- (Sources tab) Select All sources:
- (Display tab) Select the Code, Description, and SortOrder properties.
- Click Apply.
- (Sorting tab) From the Property drop-down, select SortOrder.
- Click Save.
Adding the query as a property to a different panel
Do the following to add the query to a different panel:
- Go to RiSE > Panel Designer > Panel definitions.
- Select the panel or create a new one.
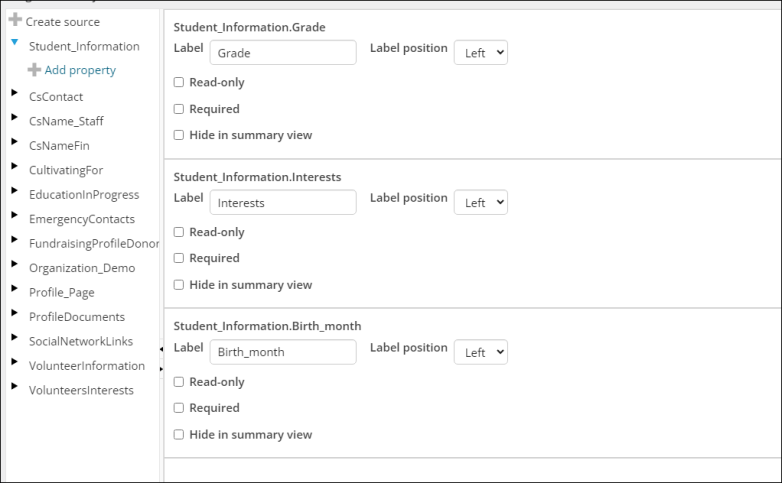
- From the desired panel source, click Add property:
- Property name: Birth month
- Property type: Text
- Enable Pre-defined values:
- From the Query field, click Browse.
- Select the Birth months query.
- From the Data Value drop-down, select Code.
- From the Display Value drop-down, select Description.
- Click OK.
- Drag the Birth_Month property to the layout area.
- Format the Label to Birth month.
- Click Save & Exit.
- Navigate to where the panel is located to view the new Birth month property.
