Last updated on: January 27, 2026
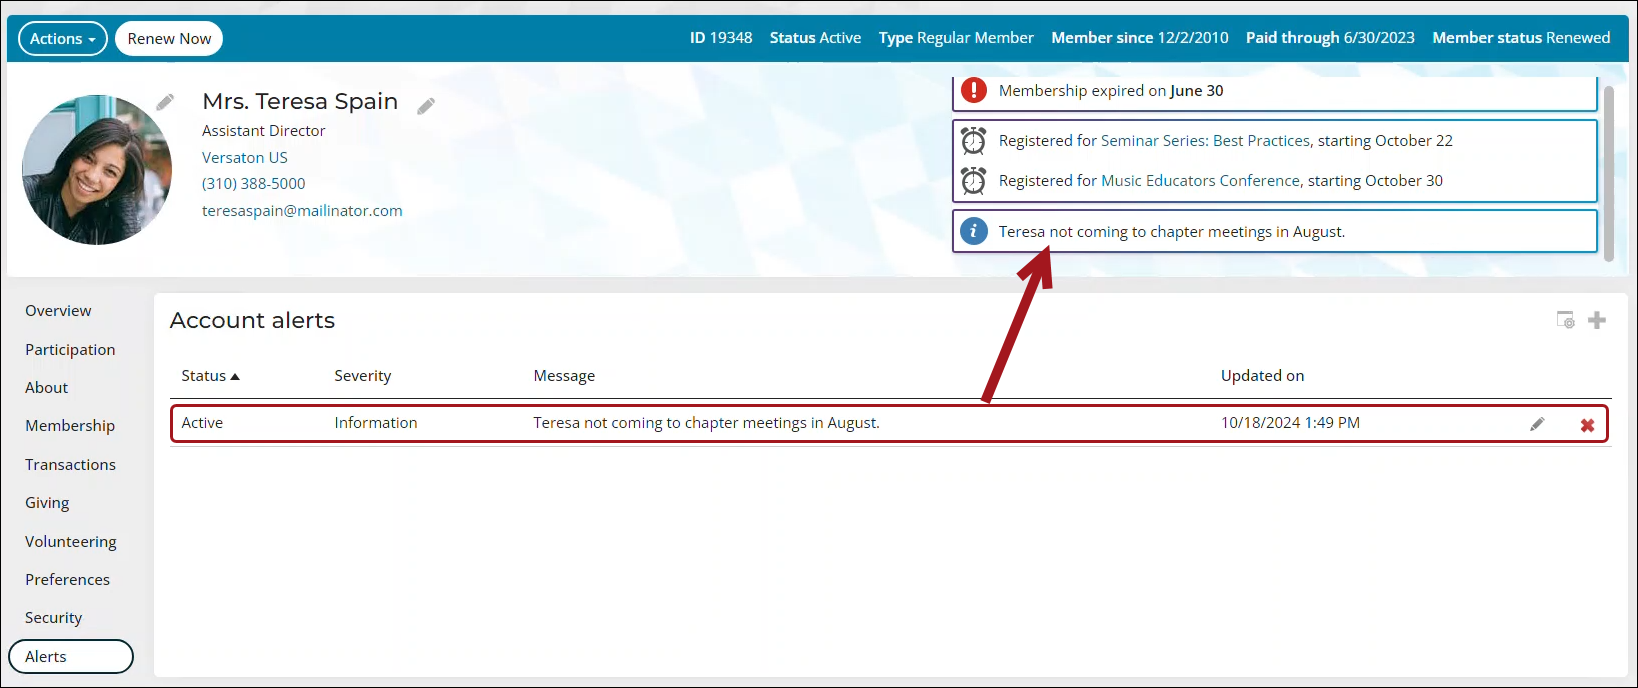
The Alerts tab on the out-of-the-box staff-facing account page enables staff users to add alerts directly to a contact’s account page. These alerts can be used for a variety of reasons and are meant to serve as a way for staff to make quick-and-obvious notes about the contact for other staff users to see.
The alerts are categorized as information, urgent, or warning. Contacts are unable to see these alerts.
In This Article
- Adding an alert to a contact's account page
Reporting on contacts with custom alerts on their account pages
Adding an alert to a contact's account page
Do the following to add an alert to a contact’s account page:
- Navigate to the contact’s account page.
- Click the Alerts tab.
- From the Account alerts panel, click the add icon:
- Select a Status:
- Active – The alert is displayed on the contact’s account page.
- Inactive – The alert is not displayed on the contact’s account page but remains in the Account alerts panel as an inactive alert.
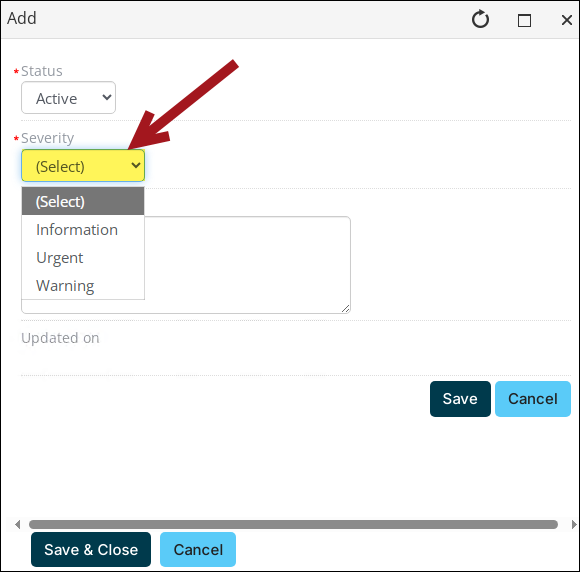
- Select a Severity:
- Information - Creates an alert with a blue information icon.
- Urgent - Creates an alert with a red icon.
- Warning - Creates an alert with a yellow icon.
- Enter the alert’s Message content.
- Updated on is a read-only field that displays the date and time the alert was last updated.
- Click Save & Close.
- Select a Status:
- Refresh the browser to see the alert appear on the account page.
Reporting on contacts with custom alerts on their account pages
The out-of-the-box Alerts tab enables staff users to add custom alerts to a user’s account page. These alerts serve various purposes, providing a quick and noticeable way for staff to communicate important information about a contact to other staff members. Staff can categorize each alert by severity—information, urgent, or warning. Once created, these alerts are recorded in the AccountAlerts business object. To generate reports on AccountAlerts, you can either modify the system queries that use this business object or define custom queries tailored to the needs of your organization.
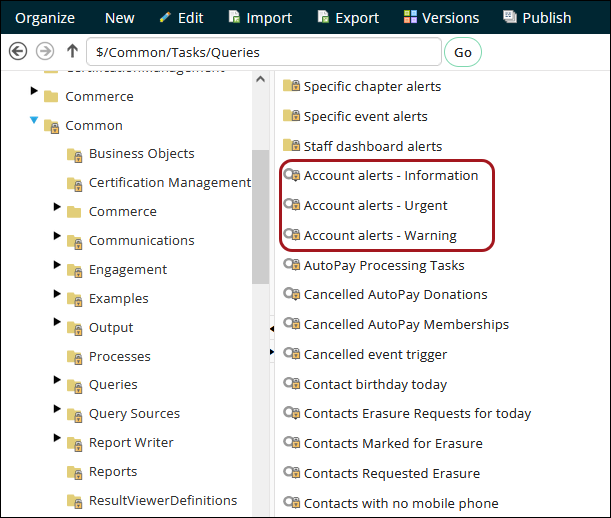
Using the pre-built account alerts queries ($Common/Tasks/Queries), you can create a report that lists all contacts with a custom alert on their account page that matches the specified severity.
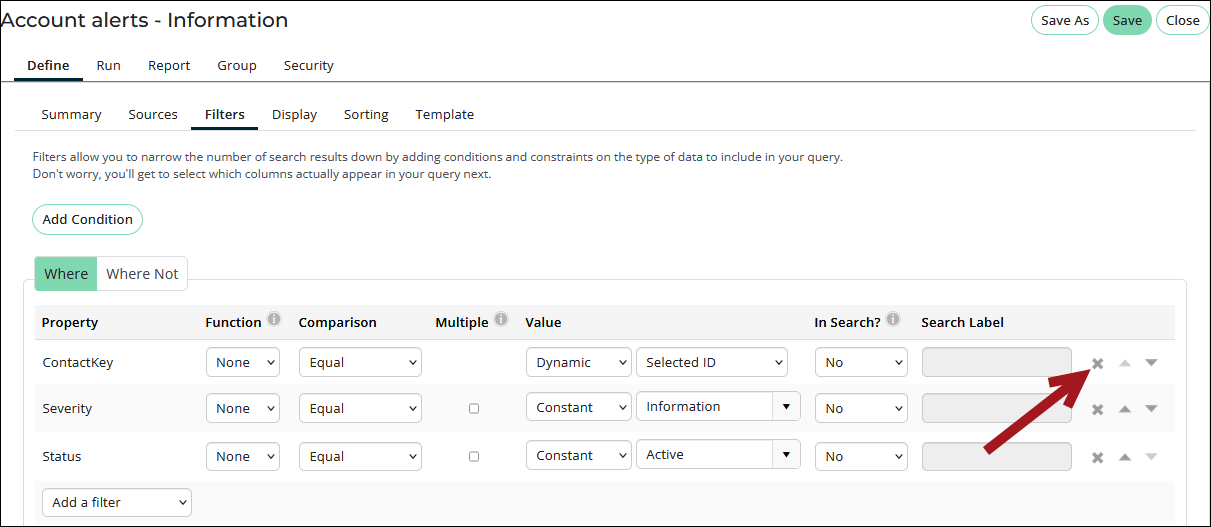
To view the results of these queries for all contacts instead of just the selected contact, create a copy of each query, then remove the dynamic filter for Selected ID (Filters tab) to see all results.
Alternatively, to query all contacts with custom alerts on their account page, do the following:
- Go to RiSE > Intelligent Query Architect > New > Query.
- (Summary tab) Enter a Name for the query.
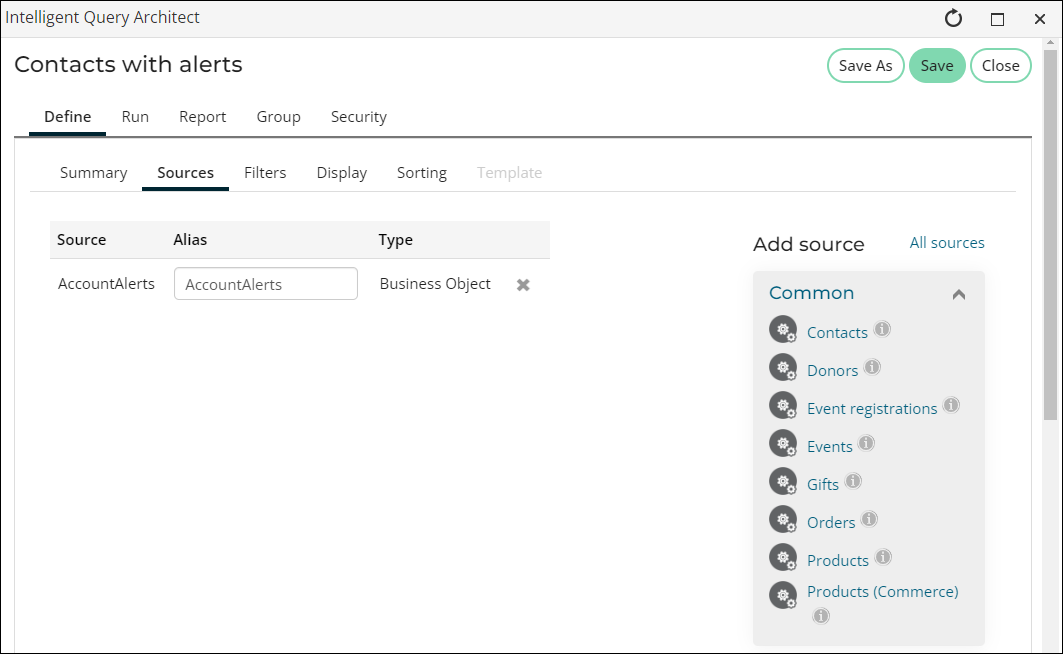
- (Sources tab) Click All sources and select AccountAlerts, then click OK.
- (Filters tab) Filter for alerts with an active status:
- From the Property drop-down, select Status.
- Leave the Comparison set to Equal.
- From the Value drop-down, select Active.

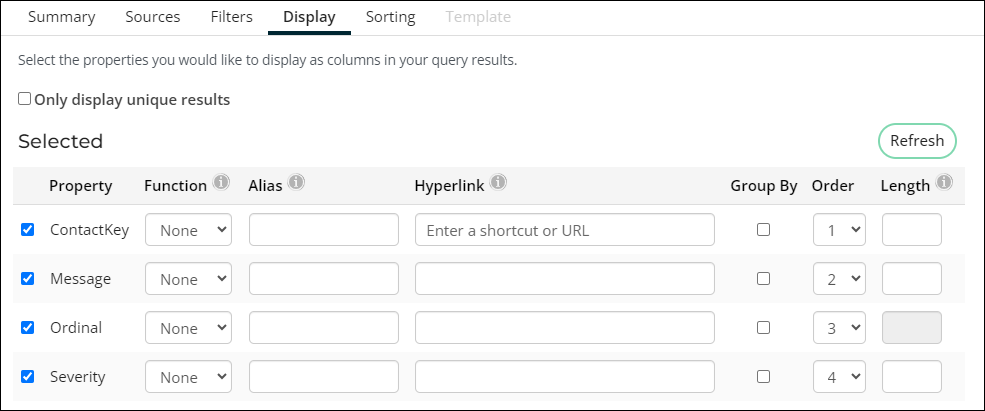
- (Display tab) Select the columns that you want to display when you run the query, such as:
- ContactKey
- Ordinal
- Severity
- Message
- Click Apply.
- Click the Run tab to review the list of all contacts with custom alerts.

- Click Save.
- Select the location where you want to save the query, then click OK.