Last updated on: June 30, 2026
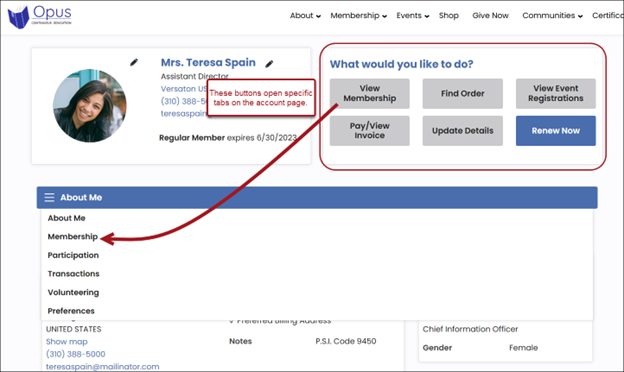
The out-of-the-box public account pages have buttons that allow users to quickly access tabs on the account page:
- The View Membership button opens the Membership tab.
- The Find Order button and the Pay/View Invoice button open the Transactions tab.
- The View Event Registrations button opens the Participation tab.
- The Pay/View Invoice button opens the Transactions tab.
- The Update Details button opens the About Me tab.
- The Renew Now or Join Now button opens the Renew Now page, which is separate from the account page.
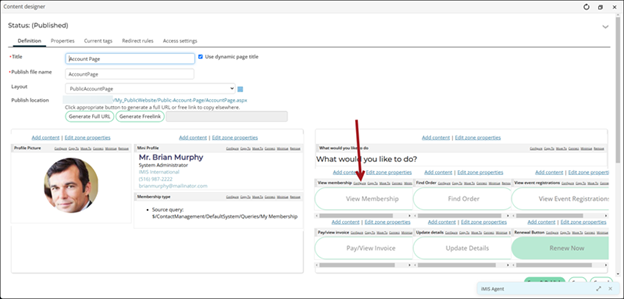
To customize the buttons on the public account pages, do the following:
- Go to RiSE > Page Builder > Manage content.
- Open the custom account page content record. Out-of-the-box, the content record is Account Page.
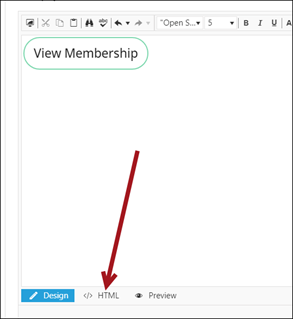
- On the button or content item you want to update, select Configure.
- Click the HTML button.
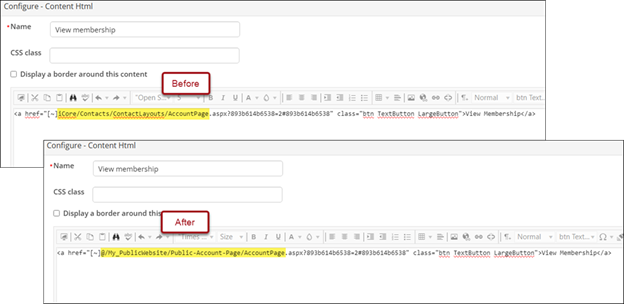
- The HTML contains a path that points to the out-of-the-box public account page. This path must be updated to point to the custom public account page (which is the current page open, so the path is pointing to itself), for example:
- Before: <a href="[~]iCore/Contacts/ContactLayouts/AccountPage.aspx?893b614b6538=2#893b614b6538" class="btn TextButton LargeButton">View Membership</a>
- After: <a href="[~]My_PublicWebsite/Public-Account-Page/AccountPage.aspx?893b614b6538=2#893b614b6538" class="btn TextButton LargeButton">View Membership</a>
Each button that points to a tab will need to be updated with this same path. The difference between each button is the number that follows the equals sign (=) in the URL.
-
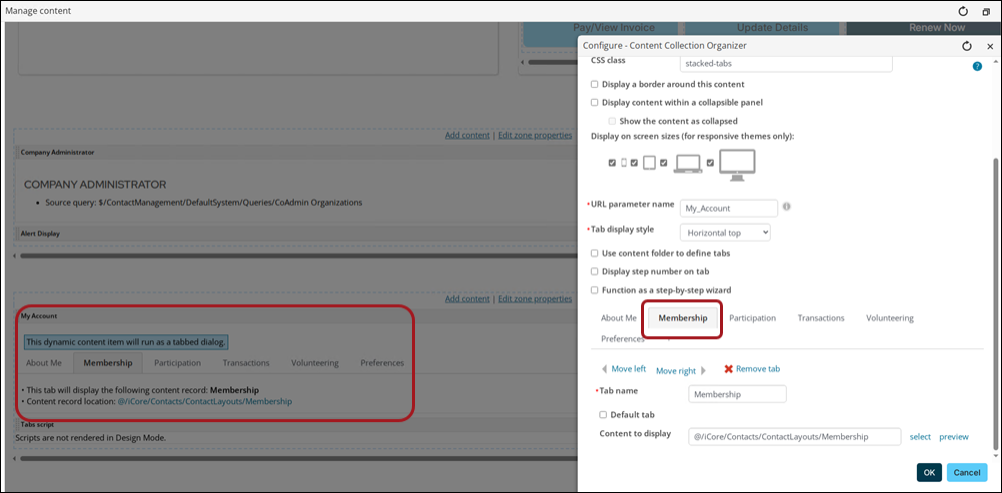
The HTML also contains a string of numbers that follow the content record path. The number following the equals sign (=) in the path designates which tab the button will open. For example, this URL will open the second tab in the specified content record:
<a href="[~]My_PublicWebsite/Public-Account-Page/AccountPage.aspx?893b614b6538=2#893b614b6538" class="btn TextButton LargeButton">View Membership</a>In this example, =2 in the URL designates the second tab, which is the order number of the Membership tab in the My Account content item on the account page.
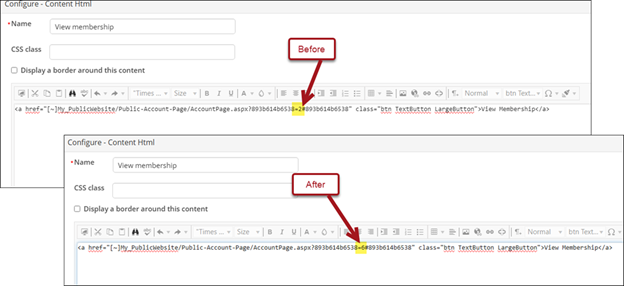
A custom account page may have changed the order of the tabs, so you must update the number to point to the correct tab. For example, if the Membership tab is the sixth tab, update the number to =6.
Note: If you are linking to a tab on the account page, do not remove the ?89b614b6538 string or the #893b614b6538 string from the link, since these strings are required for the link to work. If you are not linking to a tab on the account page, you can remove the additional content after .aspx?893b614b6538.
- Click OK.
-
Continue updating the remaining buttons on the page, being sure to update the following:
- The path in the URL: Update the content record path to point to the custom public account page.
- The tab number in the URL: The number following the equals sign (=) in the path designates which tab the button will open. Be sure to update the number to the correct correlating tab.
- When all buttons are updated, click Save & Publish.
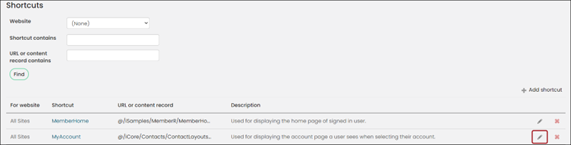
- Ensure the My Account shortcut is pointing to the correct custom account page:
- Go to RiSE > Site Builder > Manage Shortcuts.
- Find the MyAccount shortcut, then click the Edit icon.
- From the URL or content record field, select the custom account page record.
- Click Update.