Last updated on: June 19, 2026
Related videos Training course
The following article outlines how to create a new panel and add the panel to account pages.
In This Article
- Before you begin: Verifying the account pages are editable
Creating a new panel
Adding the panel to an account page
Editing panels on account pages
Before you begin: Verifying the account pages are editable
Before adding a panel to an account page, you must first make sure you are working with custom account pages. By default, iMIS is shipped with out-of-the-box account pages that must be copied before they can be edited.
To determine if you are already working with custom account pages, do the following:
- From the Staff site, navigate to any contact account page.
- Enable Easy Edit.
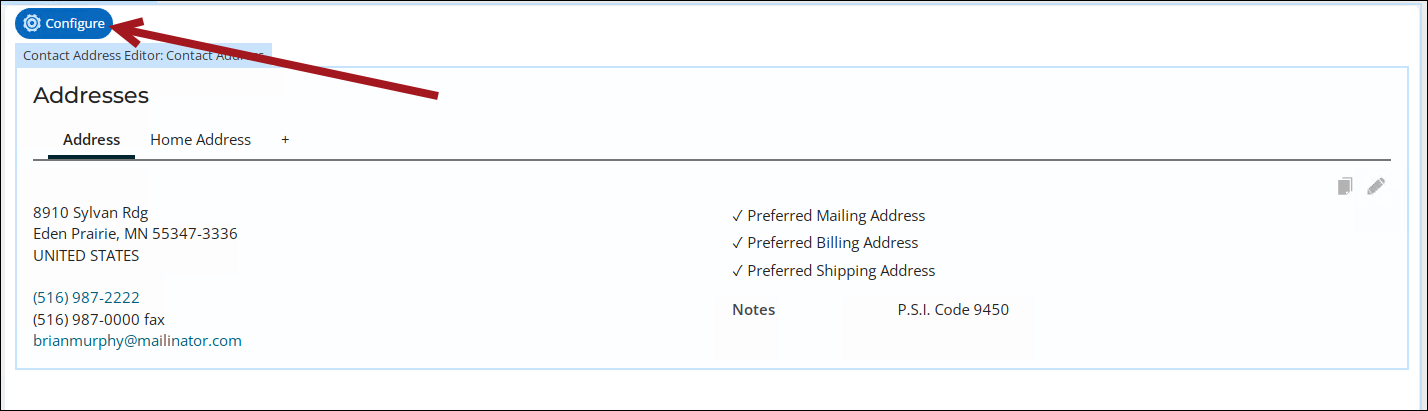
- Verify the account pages are custom:
- Custom: You can edit the content items using the Configure button.
- Not custom: You can see Easy Edit is enabled, but there is no Configure button. This means you are using out-of-the-box content records.
- If the account page is custom, move on to the next section. If the account page is not custom, review the Understanding and modifying account pages article.
Tip: If you need to add the new panel to an individual account page, make sure you are checking an individual account page. If you need to add the new panel to an organization account page, make sure you are checking an organization account page.
Creating a new panel
Do the following to create a new panel using existing sources:
- Go to RiSE > Panel Designer > Panel definitions.
- Select Add panel definition.
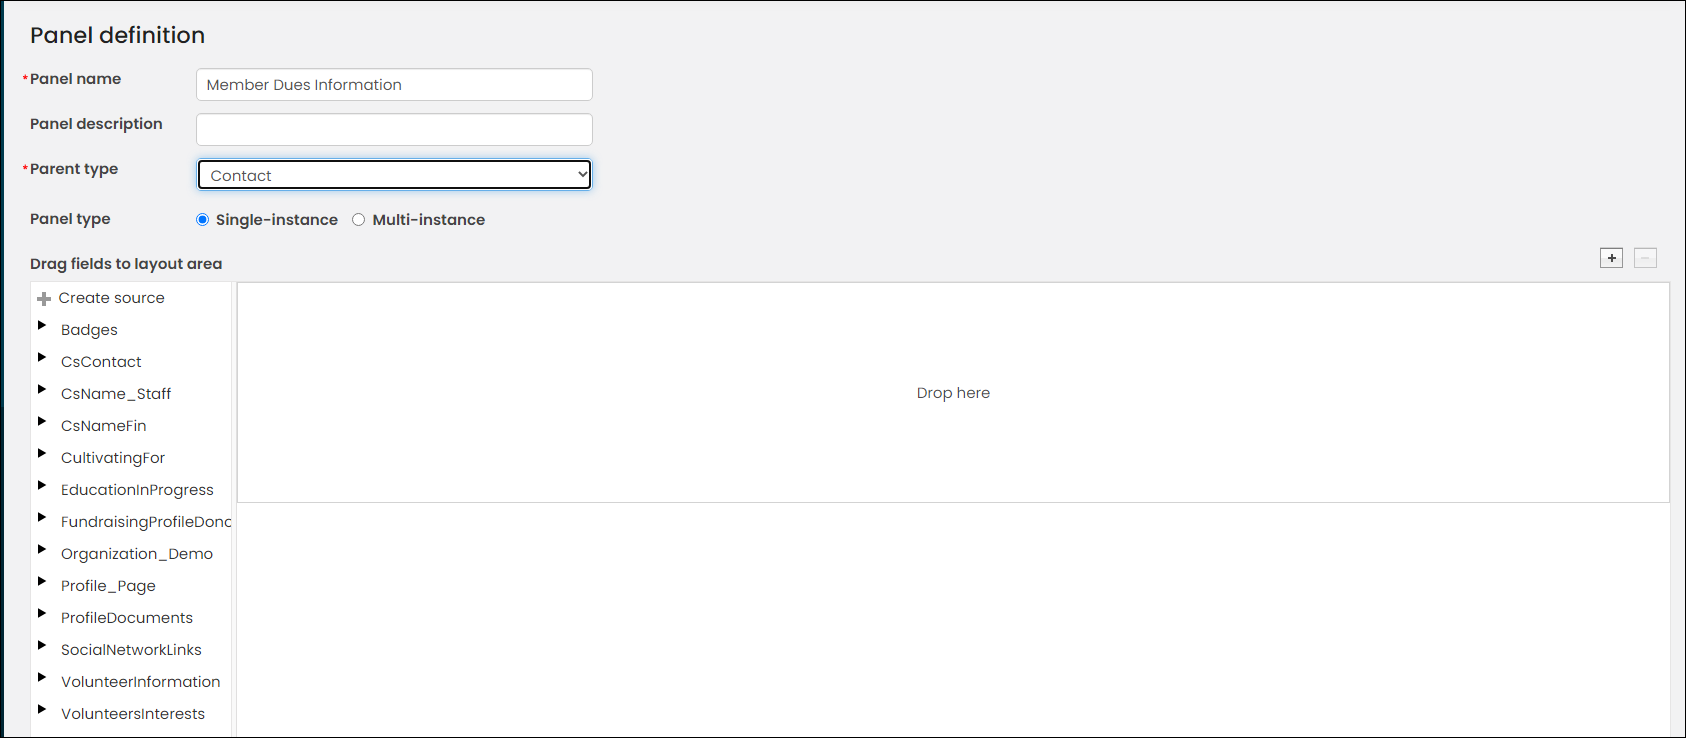
- Define the following:
- Panel name - Enter a name for the panel.
- Parent type - Select Contact.
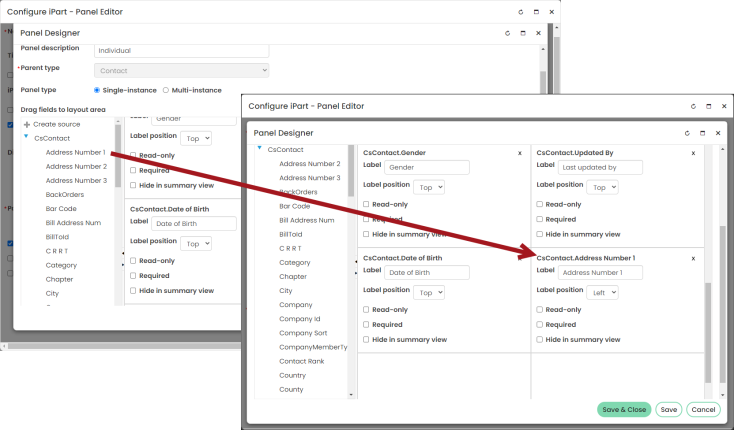
- From the left-side pane, locate the data you need to add to the panel. You can mix-and-match properties from various sources. Drag-and-drop the properties to the panel layout.
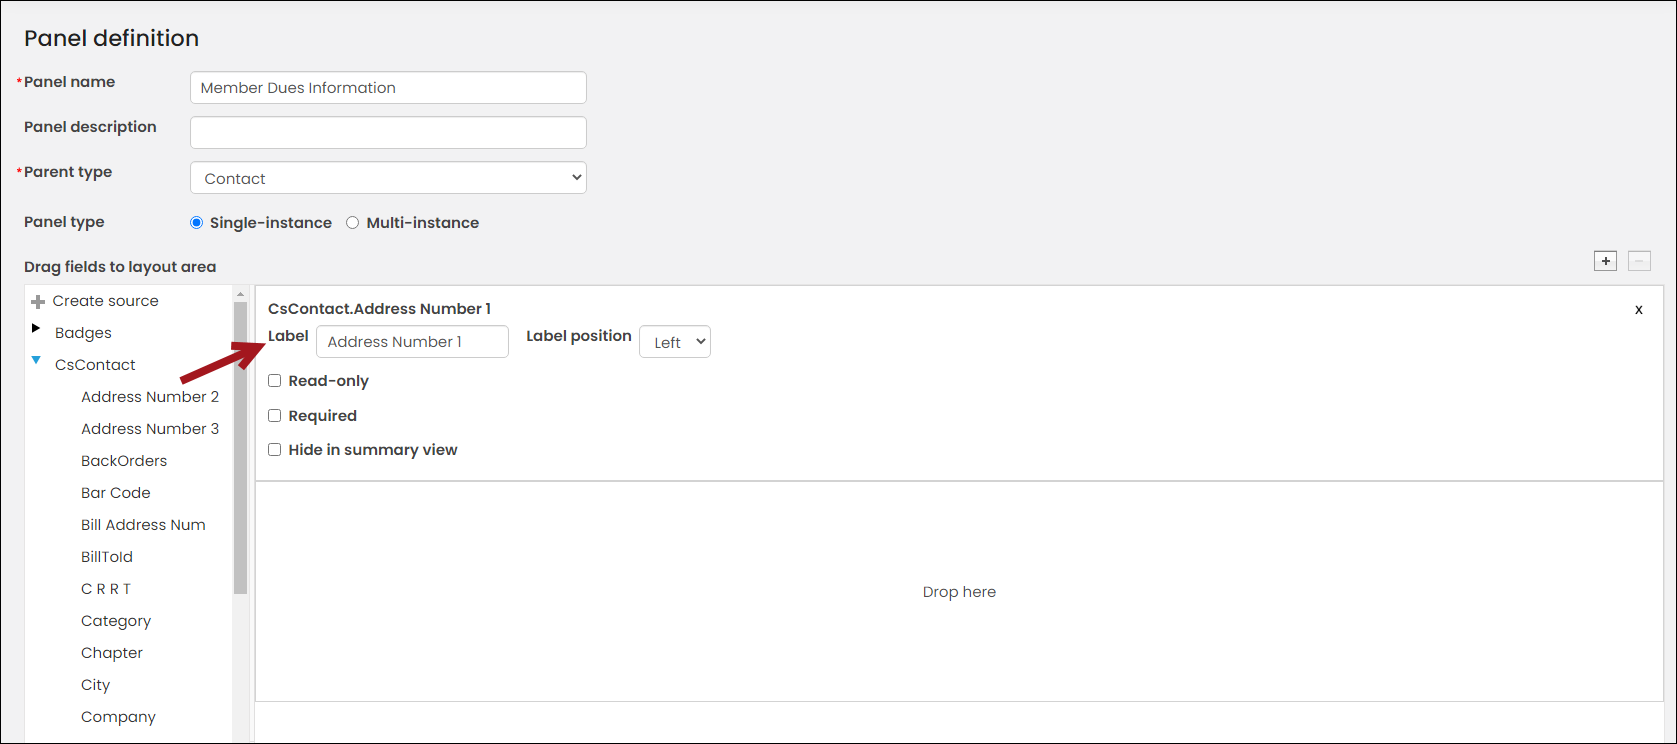
- Update the property Labels to remove underscores or add spaces.
- From the bottom-right corner, click Save & Exit.
Adding the panel to an account page
Do the following to add your new panel to an account page:
- Enable Easy Edit.
- Go to an account page. This can be any individual's (or organization if you are adding the panel to company account pages) account page.
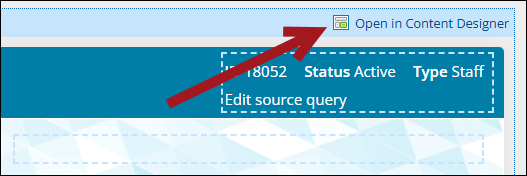
- Select Open in Content Designer.
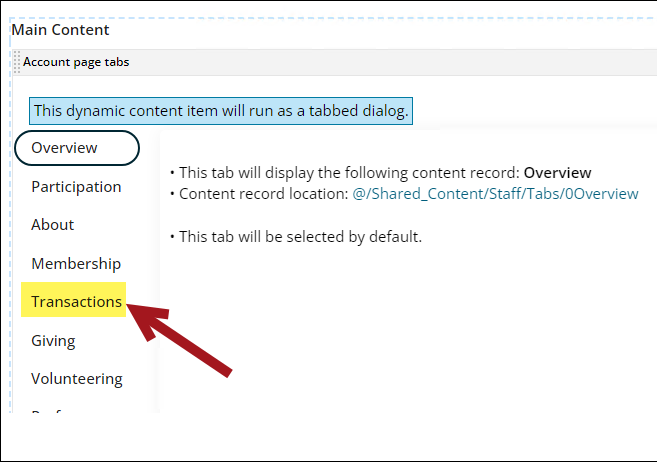
- Click the tab you want to add the panel to. For example, if you want to add the new panel on the Transaction tab, click the Transaction tab.
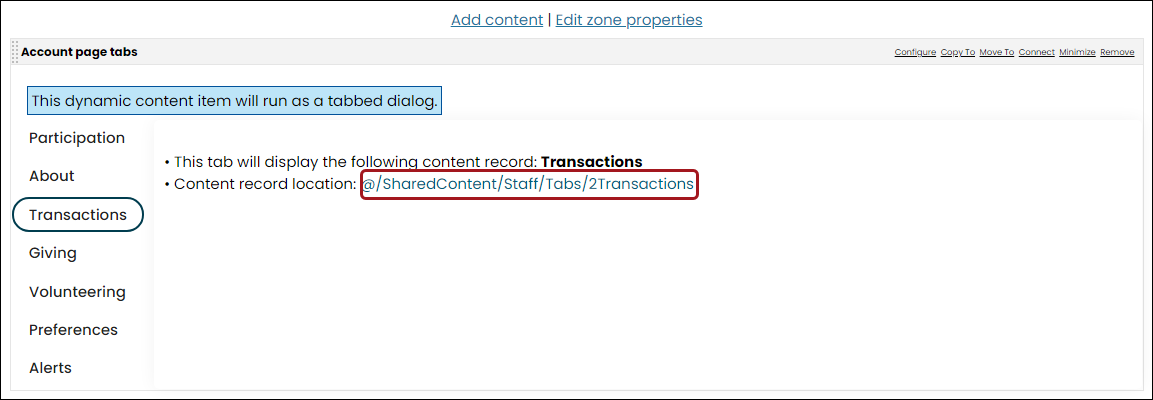
- Click the content record link to open the tabbed content for edit.
- Select Add content.
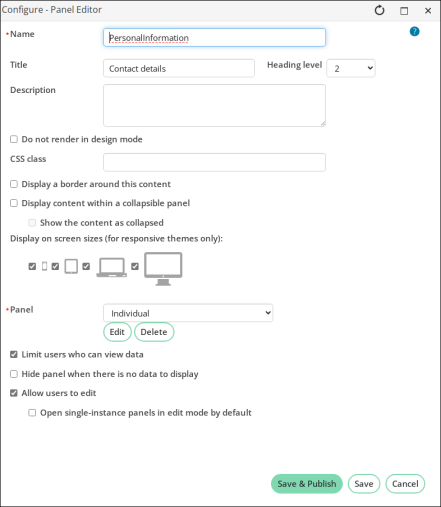
- Click the Content folder, then double-click the Panel Editor content item.
- Enter a Title that appears above the panel.
- From the Panel drop-down, choose the panel you created.
- Enable Allow users to edit.
- Click OK. The panel is added to the page.
- Drag-and-drop the panel to the desired location of the page, or leave it where it is.
- Click Save & Publish.
- Refresh the page and review your new panel. This panel now appears on all individual account pages. For example, navigate to another user's account page and click the Membership tab. The same panel appears.
Editing panels on account pages
When editing panels, you can add or remove properties or change property labels.
Adding and removing properties
Do the following to add or remove properties:
- Go to the account page you want to edit.
- Enable Easy Edit. Content items available for customization are highlighted in blue and have the Configure button available when hovering over the content item.
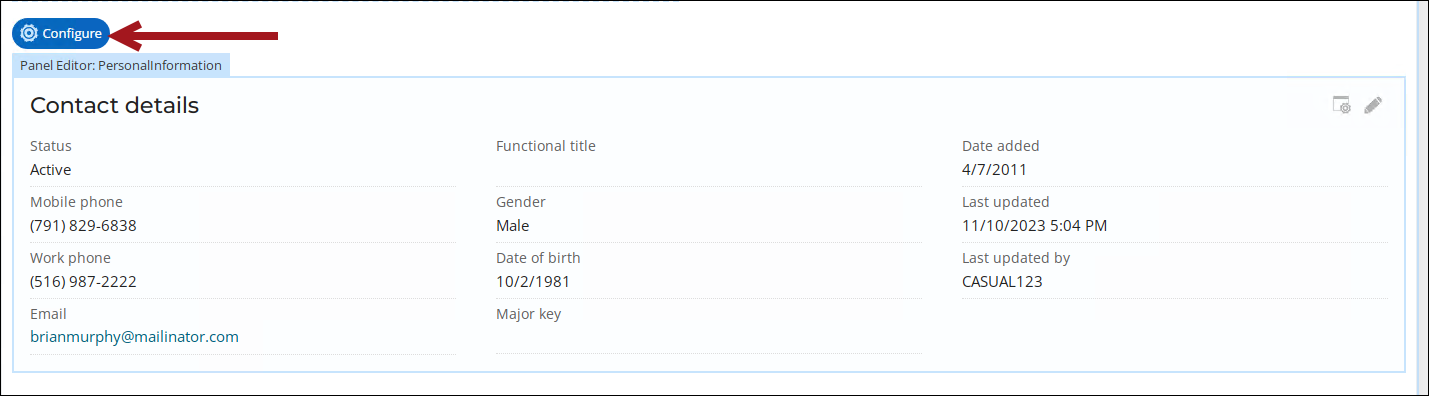
- Hover over the Panel Editor content item, then click Configure.
- Next to the Panel option, click Edit.
-
Click and drag additional properties to the layout area to add new properties.
- Click the X on each property in the layout area to delete unwanted properties.
- Click Save & Close.
- Click Save & Publish.
Changing property labels
Do the following to change a property label:
- Go to the account page you want to edit.
- Enable Easy Edit. Content items available for customization are highlighted in blue and have the Configure button available when hovering over the content item.
- Hover over the Panel Editor content item, then click Configure.
- Next to the Panel option, click Edit.
- Scroll down to find the property Label you wish to change, delete the current label, and type the new one.
- Click Save & Close.
- Click Save & Publish.

If you wish to add a new panel to an account page, see Creating a panel and adding it to account pages.