Media asset management
A media asset is any place where an ad can run, such as:
- Print magazine
- Website
- Newsletters
- Television
- Sponsorship
- Booth
Each media asset has a distinct name and code. The media kit is a public statement of advertising options, when they are available, what they cost, and other details.
Media assets
Media assets are the space in which an advertisement can exist. Create new media assets when you have new advertisement space to sell.
Example: The Annual Conference event is quickly approaching, and sponsors have started inquiring about securing advertisement space on your Annual Conference website homepage and at the actual event. The first step is to create a media asset for your Annual Conference website.
All media orders are associated with at least one media asset. When media orders are created, the item code selected in the media asset is the charged product listed on the invoice.
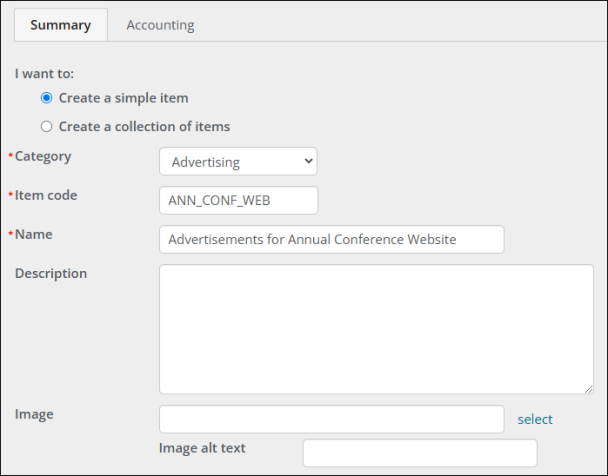
Do the following to create a new Item code for an advertising media asset:
- Go to Commerce > Add product.
- From the Category drop-down, select Advertising.
- Enter an Item code and Name that are descriptive of the media asset.
-
To ensure the advertising product does not appear in search results, set the Ending date to a past date.
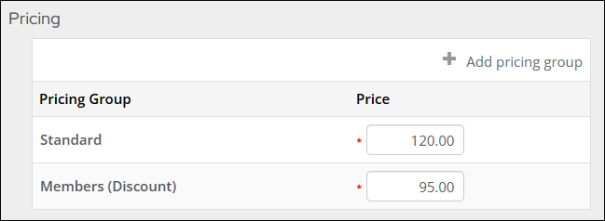
- Enter a Standard price and Members (Discount). These prices do not appear anywhere on the media order.
- Click the Accounting tab and define an Income account, if different than the Default.
- Click Save & Exit.
Important! It is important to review the selected product category (Settings > Commerce > Product categories) to confirm the category is not configured for inventory, shipping, or handling charges. The selected product category can be commissionable, part of a product kit, or taxable.
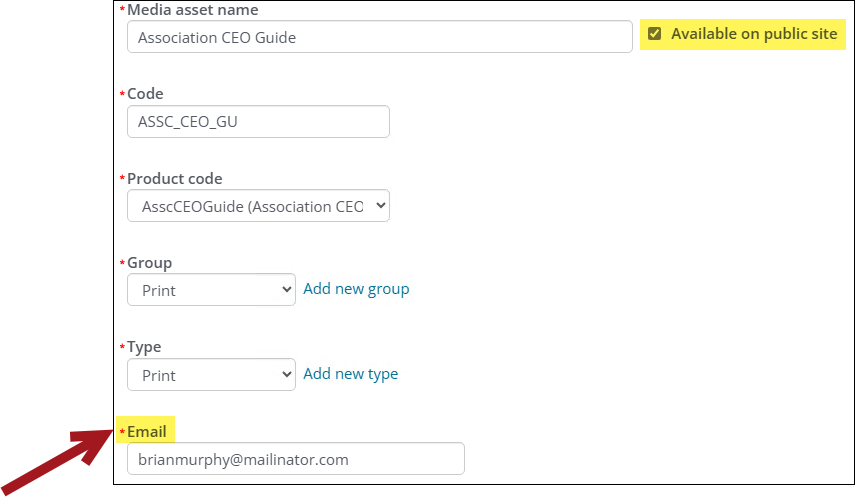
Do the following to create a new media asset:
- Go to Advertising > Settings > Media assets.
- Click Create Media Asset:
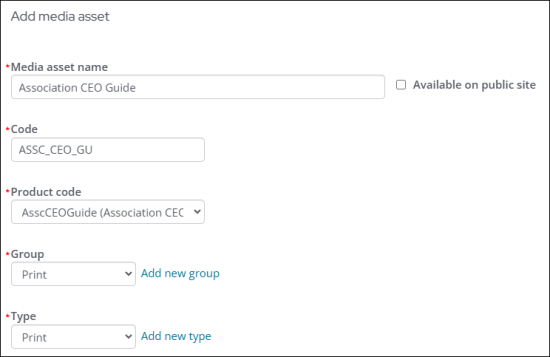
- Media asset - Enter the name of the media asset. The name must be unique.
- Code - Enter the code of the media asset. The code must be alphanumeric and unique.
- Product - From the drop-down, choose the item code. When media orders are created, the product item code is the charged product listed on the invoice. The Product drop-down contains all commerce products with a category of Sales.
- Group - From the drop-down, choose a group. Media assets are grouped in various categories for better overview of data, for example, Print Publications, Digital Entities, or Events. To create a new group, click the add (+) icon, and enter the Name of the group.
- Type - From the drop-down, choose the type, for example, Print, Digital, or Event. To create a new type, click the add (+) icon, and enter the Type name.
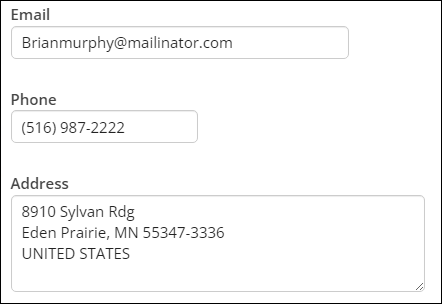
Enter an Email, Phone, and Address that will be added to the insertion order.
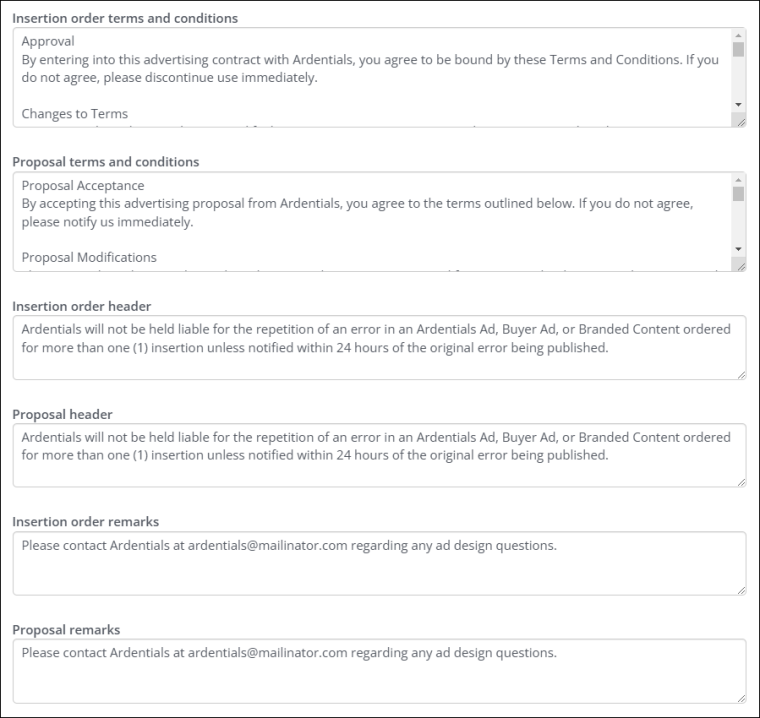
Insertion order terms and conditions – Enter the terms and conditions for the insertion order.
Proposal terms and conditions - Enter the terms and conditions for the proposal.
- Insertion order header – Enter a header for the insertion order.
- Proposal header – Enter a header for the proposal.
- Insertion order remarks – Enter any remarks that need to be added to the insertion order.
- Proposal remarks – Enter any remarks that need to be added to the proposal.
- Upload Logo - Click Upload Logo and select a logo for this media asset. Acceptable file types are .png or .jpg.
- Click Create Media Asset.
- To edit the media asset, click the pencil icon. The same window opens where you can edit details of the media asset.
To delete a media asset, do the following:
Note: You cannot delete media assets used by existing media orders.
- Go to Advertising > Settings > Media assets.
- Click the delete icon.
- Click Yes.
Issue dates
Issue dates are configured for each media asset, so that you can define when an advertisement is running. A monthly magazine contains 12 entries for each of the months the magazine runs. A quarterly magazine only has four dates entered for the year. A weekly newsletter has 52 entries. Most websites are continuously up and have 365 entries for the year.
Example: The 2021 Annual Conference is three days. The marketing team has advertising space available for booths, banners, and various other sponsorships over the course of the three-day event. The issue dates for these three days must be configured, so advertisers can choose which day(s) they want to purchase for their advertisements.
Do the following to create issue dates for a media asset:
- Go to Advertising > Settings > Media assets.
- Locate the media asset, then click the calendar icon under the Issue Dates column. The existing issue dates display.
- Enter the Issue date. This is usually a cover date for a print magazine, flight date for a website, or an event start date for an event.
- Enter the Ad closing date. This is the date when the publisher or website administrator stops taking any new media orders for that issue date.
- Enter a Materials due date. This is the date on which all the media order’s related art work, text, and images are due.
- Enter an Issue name and Issue code, such as September 2021/SEPT2021 for a magazine ad running in September 2023.
- Click Create Issue Date.
- Continue adding issue dates if the advertisement is set to run in more than one issue.
- Click the pencil icon to edit the media asset. The input fields are automatically populated with the issue date's contents. Make changes to the fields, then click Update Issue Date.
Ad adjustments
Ad adjustments are an optional step that allow staff to define any discounts and surcharges, which adjust the rate card cost by decreasing or increasing it. Adjustments appear on orders and invoices.
Example: The Annual Conference Website advertisers can receive a $100 discount if they place the order early. Staff must first create this discount in the Ad Adjustments tab.
To create a new ad adjustment, do the following:
- Go to Advertising > Settings > Media assets.
- Click the Add New link under the Ad Adjustments column for the media asset you want to create the adjustments for. If there are existing adjustments, they are listed in the Ad Adjustments tab.
- Select the Product code for the adjustment. Selecting a product to associate with this adjustment allows you to keep track of the revenue and/or surcharges and how much has been given in discounts. See Creating the product for more information about how to create a product for media assets.
- Enter an Ad adjustment name. This could be the reason for the discount or surcharge.
- Select whether this adjustment is Percent or Amount.
- Select whether this adjustment is a Surcharge or Discount. The Surcharge will increase the price while the Discount will decrease the price.
- From Adjustments target, choose Running Total. The adjustment is applied to the running total to arrive at the final cost.
- Enter the Adjustment value as a positive number:
- If you chose Amount, enter the actual amount of the adjustment.
- If you chose Percent, enter the percentage of the adjustment without the percent sign, for example, enter 10 for an adjustment of 10%.
- Click Create Ad Adjustment. The adjustment appears in the list below.
- Continue creating ad adjustments.
- Click the pencil icon to edit the ad adjustment. The input fields are automatically populated with the ad adjustment's contents. Make changes to the fields, then click Update Ad Adjustment.
Note: No two ad adjustments can be associated with a single product code and must be associated with different product codes which can be defined in Settings > Commerce > Product categories. Associating the same product code with more than one ad adjustment will cause errors if the invoice is adjusted. Shipping, handling, delivery, and tax also cannot be applied when adding new product codes.
Rate cards
A rate card is a document or matrix provided by a publisher featuring the available rates for advertising. The rates are referred to as the Media billing methods. Rate cards have different types of Media billing methods that give you the final cost of an advertisement and decide how to charge for the advertisement.
Example: A publisher offers advertisement space for the monthly magazine at a flat rate. The card with the flat rate must be configured before an order can be entered.
To add a new rate card, do the following:
- Go to Advertising > Settings > Media assets.
- Click the link under the Rate Cards column for the media asset you want to create the rate card for. If there are existing rate cards, they are listed in the Rate cards tab.
- Enter the Rate card name. It is suggested to include the year in the Rate card name, since rate cards can change from year to year.
- Select the Ad type or click the + icon to add a new Ad type.
- Select the Media type.
- Select the Media billing method:
- CPM - Cost per thousand (CPM), is a term used to represent the price of 1,000 advertisement inserts for print advertisements, such as an insert in a magazine (see Web CPM below for the web equivalent). If a magazine publisher charges $20.00 CPM, that means an advertiser must pay $20.00 for every 1,000 inserts of its advertisement. If the advertiser orders 100,000 inserts, the cost of the advertisement is $2,000. Review the following information to understand more about the CPM billing method:
- The "M" in CPM represents the Roman numeral for 1,000.
- Advertisers pay publishers a set fee for every thousand inserts of an advertisement.
- Flat rate - Publishers set their prices at a flat rate, for example $4,000/month for a banner advertisement on the website’s homepage or $3,000/month for a full-page advertisement in the association’s monthly journal. This rate is sometimes the preferred method for publishers and advertisers because it is easier to understand and is a more predictable revenue stream.
- PCI - Per Column Inch is a rate used to determine an advertisement’s cost by the column inch size of the advertisement. The cost entered in the rate card is for every column inch purchased. For example, an advertisement that is 3 columns wide by 6 inches high takes up 18 column inches (3 columns wide multiplied by 6 inches high). Review the following information to understand more about the PCI billing method:
- The PCI rate card must only have one row in the rate card details matrix. If there is more than one row, the media order reflects the bottom row’s values.
- When creating the media order, the price is calculated based on the frequency and the associated prices entered in the rate card details.
- The following is how iMIS calculates PCI media orders:
- Column x inches = Ad size
- Ad size x Rate card cost = Ad cost
- Per word - The advertisement’s cost is determined by the number of words included in the advertisement. This billing method is typically used for classified advertisements, generally dealing with offers or requests for jobs, houses, apartments, used cars, and so forth.
- Sponsorship - Sponsorship advertising is a type of advertising where a company pays to be associated with a specific event. For example, if you are hosting a charity event and have sponsorship banners hanging up around the venue. The advertisement size would be the size of the banner at the event.
- Web CPM - Cost per thousand (CPM), is a term used to represent the price of 1,000 advertisement impressions for web advertisements, such as a banner on a web page (see CPM above for the print equivalent). If a website manager charges $2.00 Web CPM, that means an advertiser must pay $2.00 for every 1,000 impressions of its advertisement. If the advertiser orders 500,000 impressions, the advertisement cost is $1,000. Review the following information to understand more about the CPM billing method:
- The "M" in CPM represents the Roman numeral for 1,000.
- An impression is a metric that counts the number of advertisement views or viewer engagements that an advertisement receives. While an impression measures how many times an advertisement is displayed, it does not measure whether an advertisement is actually seen.
- Booths - Vendor booths are seen at events, conferences, or festivals. Define the size, placement, and cost of the booth in the rate card details.
- Enter the From and To dates. These dates indicate the time period that the rate card is active.
- Click Create Rate Card. The new rate card is added below in the list of rate cards.
- Continue creating rate cards.
- Click the pencil icon to edit a rate card. The input fields are automatically populated with the rate card's contents. Make changes to the fields, then click Update Rate Card.
To create a copy of a rate card and its details within a media asset, do the following:
- Go to Advertising > Settings > Media assets.
- Select the link in the Rate Cards column for the media asset containing the rate card you want to copy.
- Click the copy icon for the rate card.
- The rate card information populates the Add rate cards fields. Enter a unique Rate card name, and edit the remaining fields as necessary.
- Click Create Rate Card.
- The rate card and its details are duplicated. Select the new rate card to review or edit its details. For more information, see Editing and deleting rate card details.
Note: If the Rate card name is not unique, an error occurs, and the rate card does not save. Ensure the Rate card name is unique from other rate cards in the media asset.
Rate card details
The Rate card details tab enables you to define what is available to those who want to purchase an advertisement, such as the available advertisement sizes, frequency, colors, and prices. The combination of these items creates a matrix on the Rate card details tab where the entries can be reviewed and edited within the matrix (table).
Cost per thousand (CPM), is a term used to represent the price of 1,000 advertisement inserts for print advertisements, such as an insert in a magazine.
Example: A magazine publisher charges $20.00 CPM, meaning an advertiser must pay $20.00 for every 1,000 inserts of its advertisement. The $20.00 CPM must be configured in the rate card details before it can be sold in a media order to advertisers. In this example, the publisher offers print CPM in color and black and white. Both colors must be configured with the correlating prices in the rate card detail.
Do the following to define rate card details for the print CPM billing method:
- Go to Advertising > Settings > Media assets.
- Click the link under the Rate Cards column for the media asset you want to edit the rate card for. The existing rate cards are listed.
- Click the Rate Card Name link to open the Rate cards details tab.
- In this example, the print CPM is offered in both color and black & white. You must define the rate card matrix for each color separately:
- Do the following to define the color option:
- From the Ad color drop-down, select or add 4 color. This indicates the insert is to be printed in color.
- Select one or more Ad size values or create a new size. This indicates the available sizes the publisher has for print inserts in color. Example values are Insert - 3 x 5 or Insert - 1 x 2.
- Select one or more Frequency values or create a new frequency. The frequency value for CPM is how often inserts are added to the print medium.
- Click Create Matrix. The rate card detail matrix is displayed in a table format.
- For each Ad size and Frequency defined, there is a Rate box. Define the Rate for the Ad size and Frequency combinations.
- Click Save.
- Do the following to define the black and white option:
- From the Ad color drop-down, select or add B&W.
- Select the same Ad size values as above, or if B&W is offered in different sizes, select those instead.
- Select the same Frequency values as above, or if B&W is offered in different frequencies, select those instead.
- Click Create Matrix. The rate card detail matrix is displayed in a table format.
- For each Ad size and Frequency defined, there is a Rate box. Define the Rate for the Ad size and Frequency combinations.
- Click Save.
- Do the following to define the color option:
- To edit the rate card details, see Editing a rate card detail matrix.
Web Cost Per Thousand (Web CPM), is a term used to represent the price of 1,000 advertisement impressions for web advertisements, such as a banner on a web page.
Example: A magazine publisher charges $3.00 Web CPM for the Home Page Banner and $4.00 for the pop-up window. As a special discount for certain advertisers, the publisher configures an additional frequency for each space type that contains the discounts.
Do the following to define rate card details for the Web CPM billing method:
- Go to Advertising > Settings > Media assets.
- Click the link under the Rate Cards column for the media asset you want to edit the rate card for. The existing rate cards are listed.
- Click the Rate Card Name link to open the Rate cards details tab.
- From the Ad color drop-down, select or add a value that indicates the advertisement can be in any color.
- Select one or more Ad size values or create a new size. This indicates the available sizes the publisher has for the website, such as homepage banner, content pop-up, and so forth.
- Select one or more Frequency values or create a new frequency.
- Click Create Matrix. The rate card detail matrix is displayed in a table format.
- For each Ad size and Frequency defined, there is a Rate box. Define the Rate for the Ad size and Frequency combinations.
- Click Save.
- To edit the rate card details, see Editing a rate card detail matrix.
Publishers set their prices at a flat rate, regardless of impressions. This rate is sometimes the preferred method for publishers and advertisers because it is easier to understand and is a more predictable revenue stream.
Example 1: Print media asset
Example: The publisher charges $3,000/month for a full-page advertisement in the association’s monthly journal.
Do the following to define rate card details for the Flat Rate billing method:
- Go to Advertising > Settings > Media assets.
- Click the link under the Rate Cards column for the media asset you want to edit the rate card for. The existing rate cards are listed.
- Click the Rate Card Name link to open the Rate cards details tab.
- From the Ad color drop-down, select or add a value that indicates the available color of the advertisement. In this example, the journal is always printed in color, so the 4 color option is selected.
- Select or add an Ad size of Full Page.
- Select or add a Frequency.
- Click Create Matrix.
- For each Ad size and Frequency defined, there is a Rate box. Define the Rate for the Ad size and Frequency combinations.
- Click Save.
- To edit the rate card details, see Editing a rate card detail matrix.
Example 2: Digital media asset
Example: The publisher offers pop-up advertisements on various web pages for $1,000 per month, with the option for the advertiser to purchase one or two months at a time. The rate card detail must be configured before the pop-up advertisements can be sold.
Do the following to define rate card details for the Flat Rate billing method:
- Go to Advertising > Settings > Media assets.
- Click the link under the Rate Cards column for the media asset you want to edit the rate card for. The existing rate cards are listed.
- Click the Rate Card Name link to open the Rate cards details tab.
- From the Ad color drop-down, select or add a value that indicates the available color of the advertisement. In this example, the pop-up only has one color option called Any color.
- Select or add an Ad size. In this example, the pop-up window is the size.
- Select or add a Frequency. In this example, the publisher offers the pop-up advertisements for one or two months at a time, so the Frequency values are 1 and 2.
- Click Create Matrix.
- For each Ad size and Frequency defined, there is a Rate box. Define the Rate for the Ad size and Frequency combinations.
- Click Save.
- To edit the rate card details, see Editing a rate card detail matrix.
Per Column Inch is a rate used to determine an advertisement’s cost by the column inch size of the advertisement. The cost entered in the rate card is for every column inch purchased.
Example: The Association Monthly Journal offers PCI advertisement space for each month’s issue, and a new rate card needs to be configured for the September issue.
Do the following to define rate card details for the PCI billing method:
- Go to Advertising > Settings > Media assets.
- Click the link under the Rate Cards column for the media asset you want to edit the rate card for. The existing rate cards are listed.
- Click the Rate Card Name link to open the Rate cards details tab.
- From the Ad color drop-down, select or add a value that indicates the available color of the advertisement. In this example, the journal prints in color only.
- For the Ad size, select or add a Column x Inch value. The PCI rate card must only have one Ad size in the rate card details matrix. If there is more than one Ad size, the media order reflects the Ad size defined at the bottom of the rate card detail matrix.
- Select or add a Frequency of 1.
- Click Create Matrix.
- In the Rate field, enter the 1 column x 1 inch rate.
- Click Save.
- To edit the rate card details, see Editing a rate card detail matrix.
Note: This example uses only one frequency; however, there can be an unlimited number of frequencies with the PCI billing method. When creating the media order, the price is calculated based on the frequency and the associated prices entered in the rate card details
The Per Word billing method cost is determined by the number of words included in the advertisement. This billing method is typically used for classified advertisements, generally dealing with offers or requests for jobs, houses, apartments, used cars, and so forth.
Example: The Association Monthly Journal offers Per Word advertisement space for each month’s issue. The base Per Word advertisement is 100 words for $50.00, with each additional word costing $0.75.
Important! There are specific values for Ad size and Frequency that must be created in the matrix. Be sure to review the steps below before creating a Per Word billing method.
Do the following to define rate card details for the Per Word billing method:
- Go to Advertising > Settings > Media assets.
- Click the link under the Rate Cards column for the media asset you want to edit the rate card for. The existing rate cards are listed.
- Click the Rate Card Name link to open the Rate cards details tab.
- From the Ad color drop-down, select or add a value that indicates the available color of the advertisement. For Per Word, the color is typically black and white.
- (Important!) There are only two acceptable Ad size entries for Per Word, and the order of the entries is important. The first entry is the base number of words entered as X Words, for example, 100 Words. The second entry must be entered exactly as Additional Word.
- (Important!) The Frequency must be set to 1.
- Click Create Matrix.
- In the Rate fields, enter the rates for the base word count and each additional word.
- Click Save.
- To edit the rate card details, see Editing a rate card detail matrix.
Example: When entering a media order, the Ad size, Frequency, and Rates appear in a sentence below the Classified text box.
Sponsorship advertising is a type of advertising where a company pays to be associated with a specific event.
Example: The charity event offers sponsors the option to purchase banners that are displayed at the event based on their sponsorship level. Gold sponsors are offered banners at a lower rate than silver and bronze sponsors, with bronze sponsors being offered the highest rate.
Do the following to define rate card details for the Sponsorship billing method:
- Go to Advertising > Settings > Media assets.
- Click the link under the Rate Cards column for the media asset you want to edit the rate card for. The existing rate cards are listed.
- Click the Rate Card Name link to open the Rate cards details tab.
- There is not a specific Ad color associated with sponsorships, so simply adding Sponsorships as the value is acceptable.
- From the Ad size field, select or add the sponsorship levels. For example, Bronze, Silver, and Gold.
- The Frequency must be set to 1.
- Click Create Matrix.
- In the Rate fields, enter the rates for each sponsorship level.
- Click Save.
- To edit the rate card details, see Editing a rate card detail matrix.
Vendor booths are seen at events, conferences, or festivals. Define the size, placement, and cost of the booth in the rate card details.
Example: The charity event offers sponsors the option to purchase booth space in varying sizes. The booth sizes and their associated rates are configured in the rate card details matrix.
Do the following to define rate card details for the Booth billing method:
- Go to Advertising > Settings > Media assets.
- Click the link under the Rate Cards column for the media asset you want to edit the rate card for. The existing rate cards are listed.
- Click the Rate Card Name link to open the Rate cards details tab.
- There is not a specific Ad color associated with booths, so simply adding Booths as the Ad color value is acceptable.
- When defining a media order for the Booth rate card, the media order only detects one Ad color value. It is not recommended that more than one Ad color is added for Booth rate cards.
- From the Ad size field, select or add the booth sizes. For example, Corner Booth, Center Booth, 10 x 10 Booth, and so forth. The Ad sizes appear in the Booth drop-down of the new media order.
- When entering a media order, the Ad size values appear in the Booth drop-down.
- The Frequency must be set to 1. The Frequency drop-down does not appear in the media order details, so the value must be set to 1.
- Click Create Matrix.
- In the Rate fields, enter the rates for each booth space.
- Click Save.
- To edit the rate card details, see Editing a rate card detail matrix.
Editing and deleting rate card details
The Rate card details tab contains a matrix of rates for each ad color, size, and frequency combination for reviewing and editing.
Example: A magazine publisher would like to add a size to their color print CPM offering.
Do the following to edit the rate card detail matrix for the color print CPM offering:
- Go to Advertising > Settings > Media assets.
- Click the link in the Rate cards column.
- Select the Rate Card Name to open the Rate cards details tab.
- Select the Ad color of the matrix you wish to edit.
- Select or add Ad size values as needed. For example, Insert – 5x7.
- Select or add Frequency values as needed.
- Click Update Matrix.
- Review and adjust the rates for the Ad size and Frequency combinations. For example, enter 30 for the Insert – 5x7 size.
- Click Save.
To delete a matrix, do the following:
Note: You cannot delete matrixes used by existing media orders.
- Go to Advertising > Settings > Media assets.
- Click the link in the Rate cards column.
- Select the Rate Card Name to open the Rate cards details tab.
- Select Delete matrix.
- Click Delete.
To delete Ad sizes or Frequencies from a matrix, do the following:
Note: You cannot delete Ad sizes and Frequencies used by existing media orders.
- Go to Advertising > Settings > Media assets.
- Click the link in the Rate cards column.
- Select the Rate Card Name to open the Rate cards details tab.
- Select the Ad color associated with the matrix you wish to adjust.
- Click the delete icon to remove an Ad size or Frequency.
- Click Update Matrix.
- Click Save.
Inventory management
For an advertisement size or any issue, you can set up how many set spaces are available, so that you do not sell more space than you actually have. Use the inventory management system to define how much space is available on the home page of a website. When placing an order and the maximum inventory limit is reached, a message is displayed for staff users.
Example: The Association Monthly Journal only has space for four full-page advertisements for each month's issue. The publishing team creates inventory for four full-page advertisements, so no one oversells the full-page space.
To create or update inventory, do the following:
- Go to Advertising > Settings > Media assets.
- Click the icon under the Inventory column for the media asset you want to create inventory for. If there is existing inventory, it is displayed in the form of advertisement size with issue dates.
- From the Issue date field, select the dates that the media assets are scheduled to run.
- From the Ad size field, select the advertisement sizes that are available for each issue date.
- Depending on whether the inventory entry is new or existing, click Create Matrix or Update Matrix. A table displays with the ad sizes and correlating issue dates.
- From the empty values in the table, enter or update the inventory counts as numbers.
- Checking the box Apply to all issues will repeat the inventory numbers from the first issue date to all the other issue dates in the matrix.
- Click Save.
- To edit inventory, click Update Matrix and click OK from the pop-up. The matrix table values become editable. Click Save.
Note: Certain media choices have limits while others do not. For example, there is no limit on the number of full page ads that can be sold in a print magazine, but there is a limit (1) when it comes to the Back Cover, since there is only one back cover. The same might be true for the Center Spread, if it is truly in the center of the magazine. Web ads are limited too, since there is only a certain amount of space on each page.
Note: When left blank, the inventory value is automatically set to 9999 upon save.