Last updated on: June 23, 2026
Staff users can configure the types of communications that can be sent by your organization. This enables you to enforce the preferences of members who do not want to receive certain types of communications, and to also comply with various anti-spam laws.
To be compliant with specific spam legislation (for example, Canada's Anti-Spam Law or the CAN-SPAM Act) you must configure these communication preferences. Please refer to the specific spam legislation that you are trying to be compliant with in order to understand which communication preferences you should enable.
In This Article
- Adding a new communication template
Setting the Communication preference user messages
Changing contact Communication preferences
Adding a Communication Preferences Link
Allowing users to unsubscribe with one click
Viewing a log of communication preferences selections
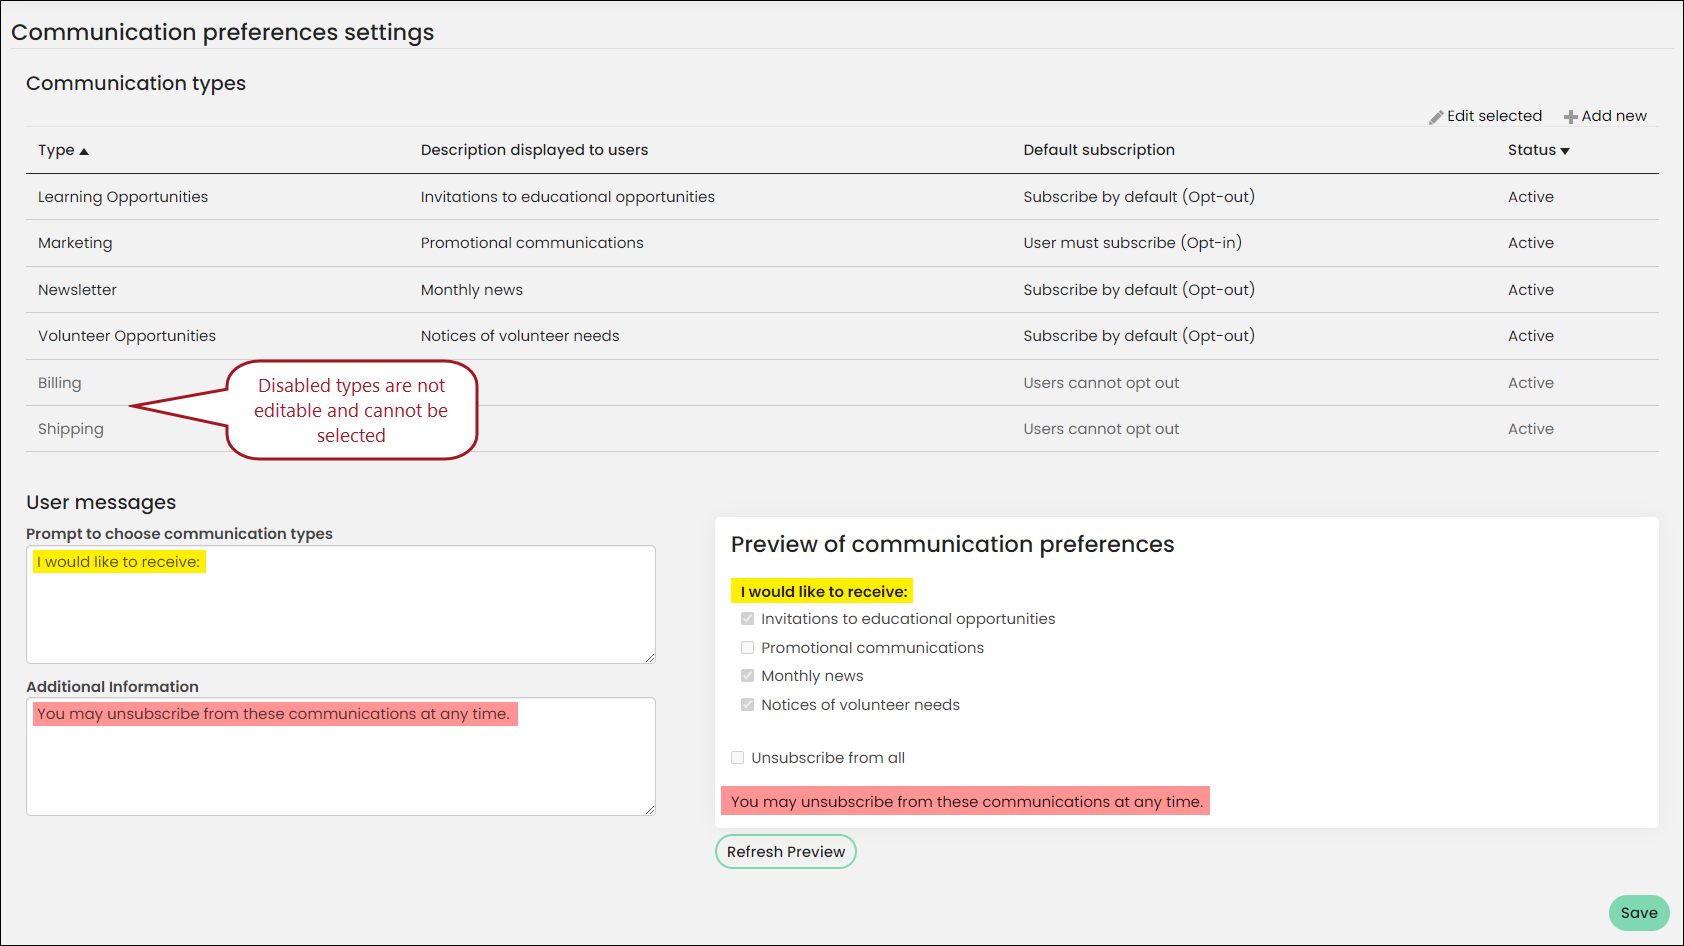
Adding a new communication type
To add a new communication type:
- Go to Settings > Contacts > Communication preferences.
- Click Add new.
- Enter a communication Type.
- Provide a description of the communication type.
- Define the subscription properties of the communication type:
- User must subscribe (Opt-in) — Users will not receive communications unless they subscribe.
- Subscribe by default (Opt-out) — Users will receive communications until they choose explicitly to no longer receive communications.
- Select the status of the communication type:
- Active — the subscription properties for the communication type are applied.
- Inactive — the subscription properties for the communication type are not actively applied.
- Click Save.
Note: System-defined Types (Primary, Shipping, and Billing) cannot be edited.
Setting the Communication preference user messages
When you configure communication types, your users will have the option to opt in or out of email communications you send from their account pages. See Changing contact communication preferences for more information.
You can define the content of the communication preference dialogue.
- Go to Settings > Contacts > Communication preferences.
- From the User Messages section, enter the text you would like to display to your users. You can leave these fields blank.
- Click the Refresh Preview button to see your changes.
- Click Save.
Changing contact Communication preferences
Staff users can adjust contact communication preferences from account pages on the Staff site. This enables users to subscribe, unsubscribe, or edit their email preferences at any time.
- As a staff user, locate the desired account page and navigate to the Preferences tab.
- Select the boxes associated with communication type you would like to opt in or out of.
- Click Save.
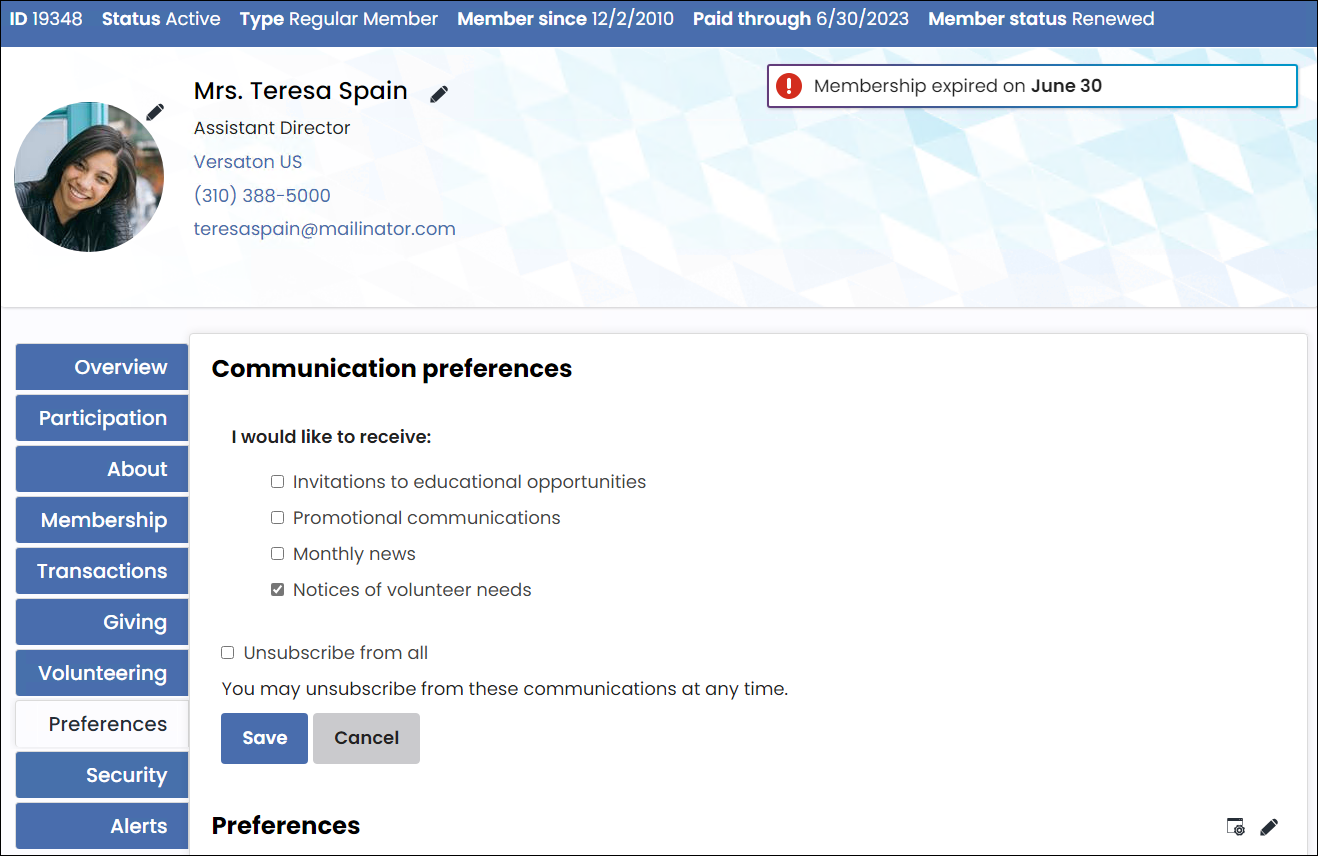
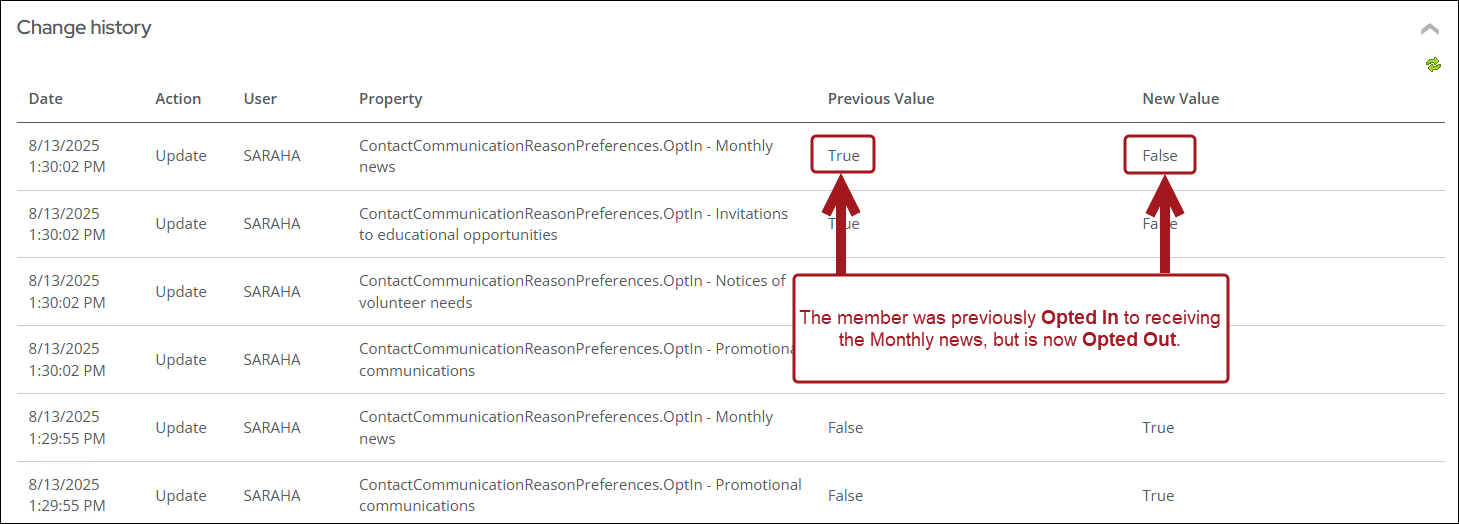
Staff users can view updates to Communication preferences in the Change history.
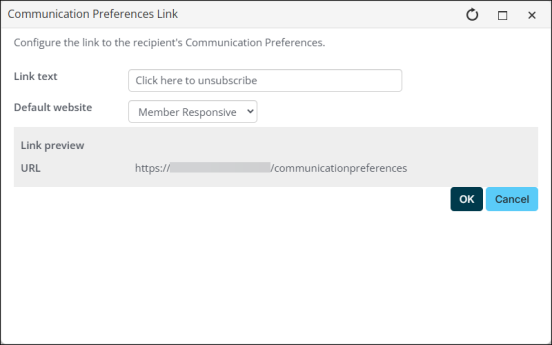
Adding a Communication Preferences Link
The Communication Preferences Link allows users to select communication types to opt in and out of. Communication types can be defined from the Header tab of a communication template. For more information, see Creating a new communication template.
To include a subscription preferences hyperlink in your email, select Communication Preferences Link from the Body tab of the communication. This link will enable users to manage their email subscriptions directly, without logging in to your site.
Note: Your query must include contacts in order for the subscription preferences link to work.
- Provide the hyperlink text to appear in the email.
- Select a website from the drop-down. This is the website where users will manage their communication preferences.
- The link preview displays the hyperlink that will be inserted into the email. Once the link has been inserted into the email body, you can adjust it through the hyperlink designer or directly in HTML mode. Do not adjust any of the query parameters and always test any changes to the URL.
Note: Ensure that the URL is accessible outside of your corporate network. If the hostname portion of the URL is localhost, or an internal server name, then the link will not work when your recipients try to click it. We recommend that you click the link to verify that you are taken to the correct page.
The hostname for your website is determined by a setting in RiSE. To set the hostname, go to RiSE > Site Builder > Manage websites. Select the website. On the Properties tab, the Website base URL(s) setting determines the hostname.
Warning! Testing the link inside your corporate network does not confirm it will work when accessed over the internet. Be sure to test the link from a device not connected to the network.
Allowing users to unsubscribe with one click
Communication types that support unsubscribing automatically include the necessary criteria for email clients like Google to generate a one-click unsubscribe button within their interface. This button allows recipients to opt-out of email lists with a single click, reducing the chances of emails being marked as spam. If a recipient unsubscribes via the unsubscribe button, their communication preferences reflect that they have opted out of future communications with the same type.
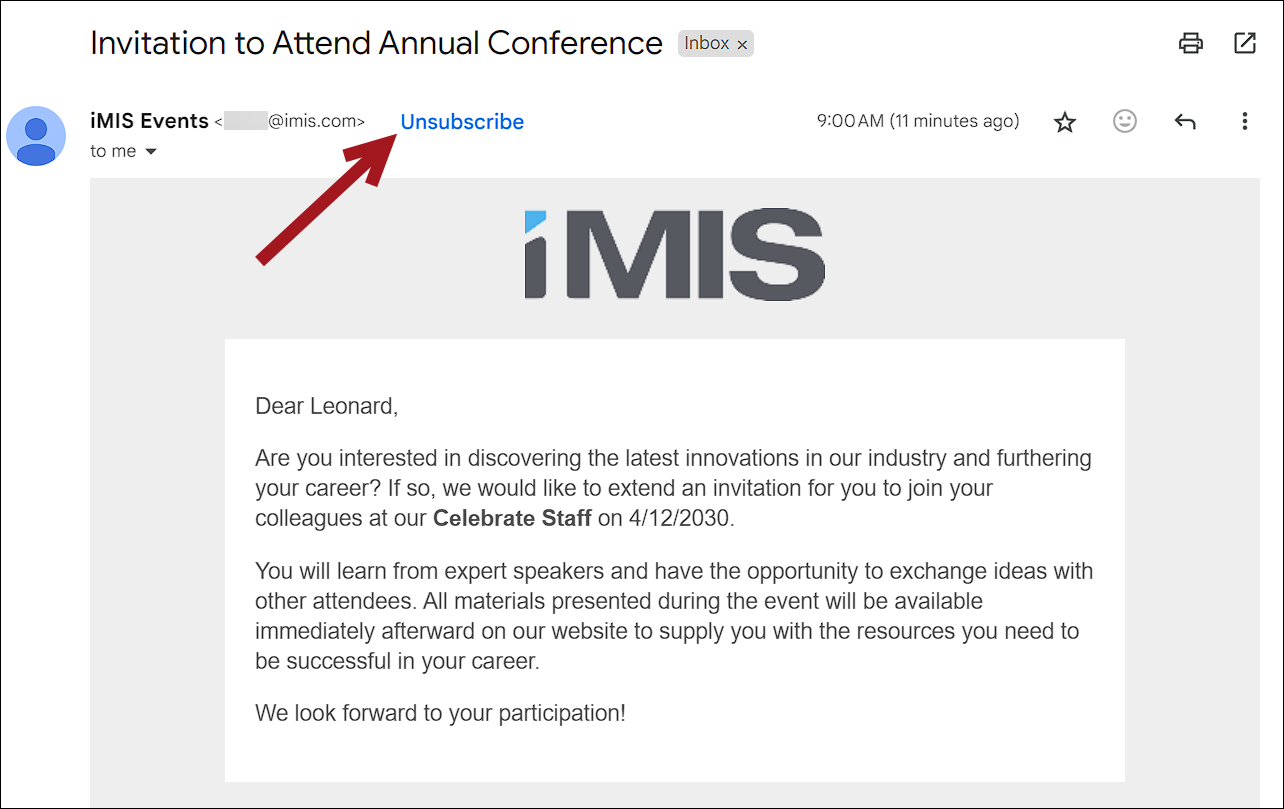
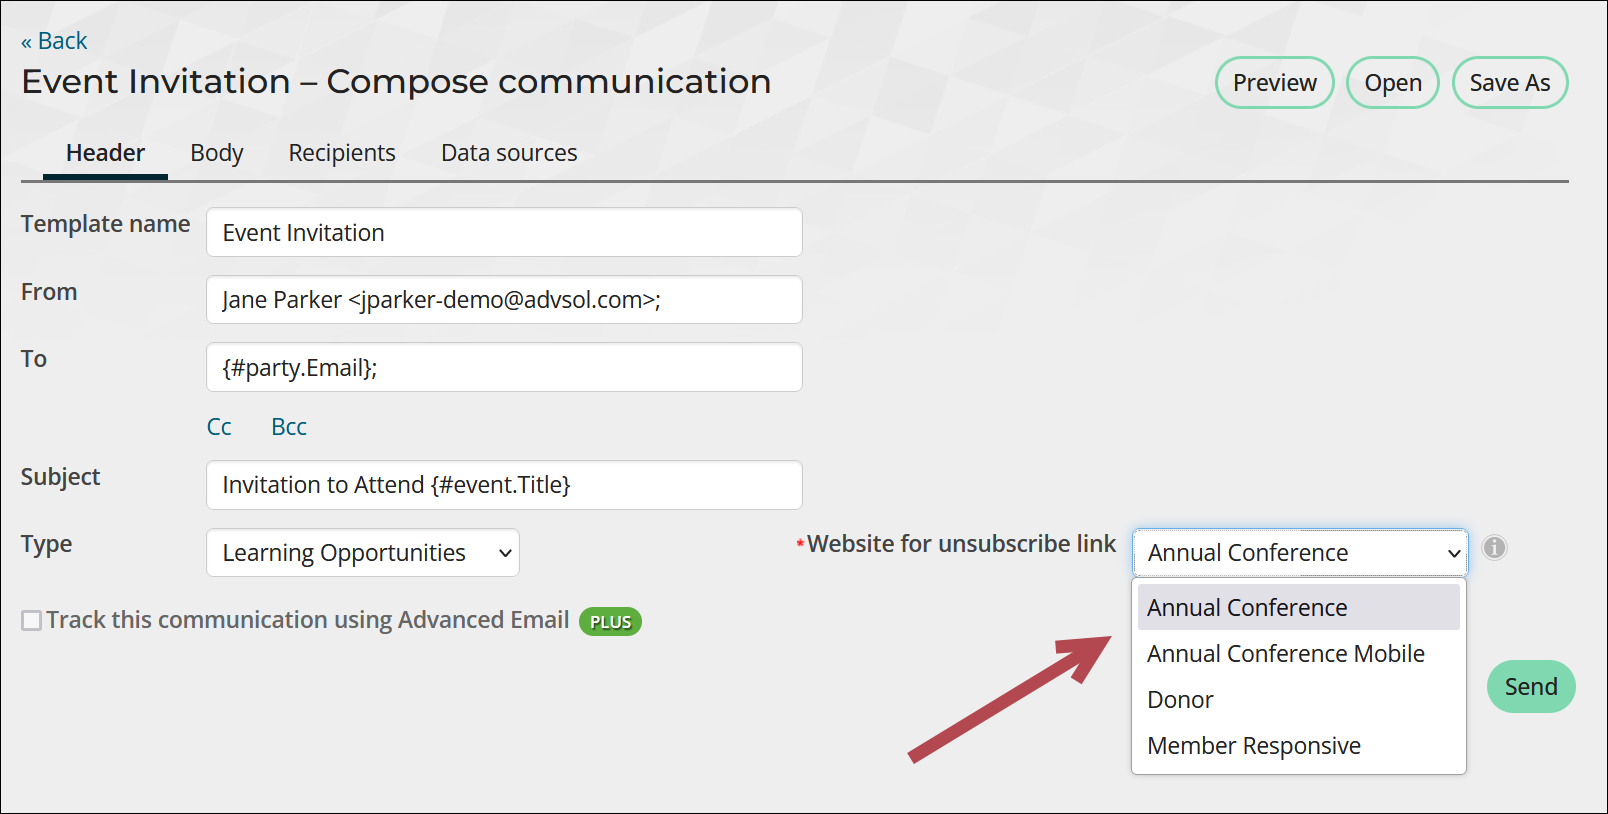
To ensure communications contain the necessary one-click unsubscribe headers, select a communication Type that supports unsubscribing from the Header tab of the communication template. If your organization manages multiple public sites, select a site to host the unsubscribe link from the Website for unsubscribe link drop-down.
Important! This feature is supported for all communications except Advanced Email.
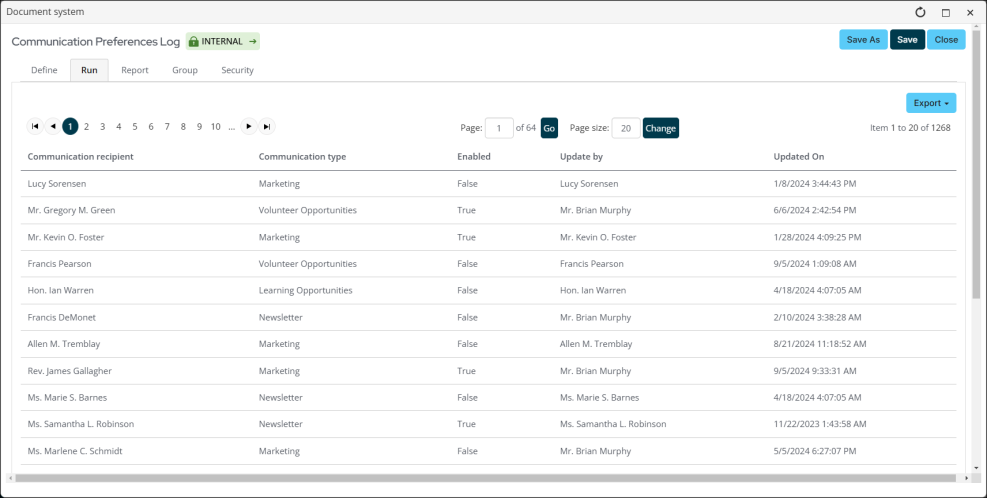
Viewing a log of communication preferences selections
Staff users can run the Communication Preferences Log query to view a log of contacts’ communication preferences selections. The query results will show any changes in a user's communication preferences.
- Go to RiSE > Document system > Samples > Communication Preferences.
- Run the Communication Preferences Log query.
- (optional) To print the log, export it to the appropriate format.
Alternatively, Staff users can view updates to a specific members Communication preferences in the Change history.