Last updated on: January 27, 2026
iMIS Change Notifications allow you to trigger iWorkflow processes when data changes occur in iMIS, such as when a contact record is updated or created. Review the following to configure change notifications in iMIS and create an iWorkflow that responds to those events.
Creating the endpoint URL
Do the following to create the endpoint URL:
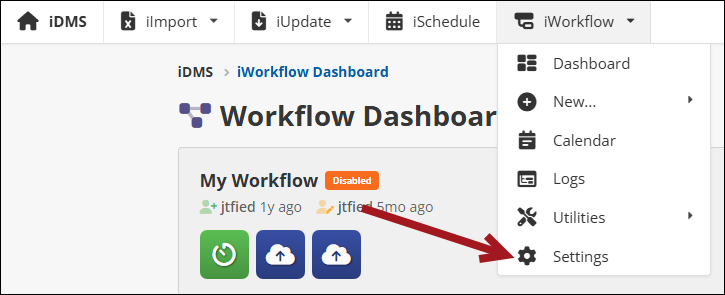
- From the Cloud Dashboard, click iWorkflow.
- From the navigation, click iWorkflow > Settings.
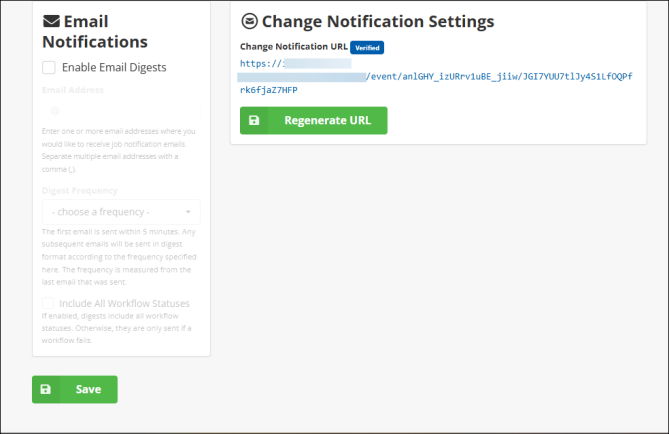
- Click Regenerate URL. This generates the required URL for iMIS.
- Click Save.
Adding the endpoint URL to iMIS
Do the following to add the endpoint URL to iMIS:
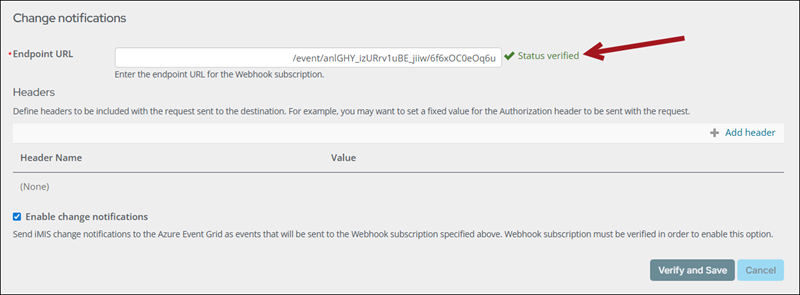
- From iMIS, go to Settings > Change notifications.
- Enter the generated URL from iWorkflow into the Endpoint URL field.
- Click Verify and Save.
- Confirm the status is verified.
Creating the change notification in iWorkflow
Do the following to create the change notification iWorklow:
- From the Cloud Dashboard, click iWorkflow.
- Click +New Workflow... and choose Blank Workflow.
- Choose iMIS Change Notification.
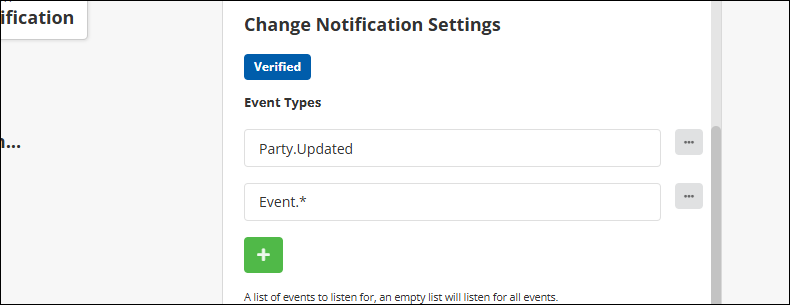
- Add the desired event types. This consists of the entity name and action, separated by a period. For example, Party.Updated. You can also use a wildcard value for the action in order to capture all events for specific entity, for example Event.* To capture all change notification events, leave the Event Types empty.
- Enable Include Full Record to include the Subject (entity) data in the payload.
- Optionally enter a Metadata Output Property. This specifies the property where HTTP request metadata, such as the request host and headers, is stored. The webhook request body is always available, regardless of this setting.
- Click Save.
Note: For a list of the entities and actions that can be captured, see Change Notifications.