Last updated on: May 26, 2026
To test an email before it is sent to the full recipient list, you can send it to staff only or to a smaller subset of the recipient list.
Note: If any emails bounce, check to see if the email contains invalid characters. For more information, see Regular expression to validate email addresses.
In This Article
- Sending an email to yourself
Sending an email to staff only
Sending an email to a small group of recipients first
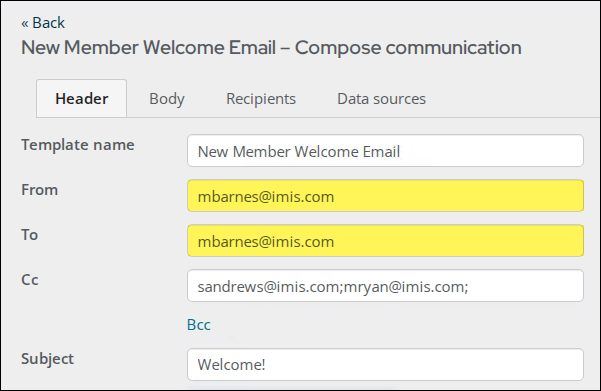
Sending an email to yourself
To test a communication by sending it to yourself first, you can simply update to To field in the email header with your email address.
You can add additional email addresses to the CC and BCC fields.
Note: When sending a Standard email using the iMIS mail service, the same email address cannot appear in more than one of the To, Cc, or Bcc fields. If an address is repeated, it will be included only once, with precedence given in the order of To, Cc, and then Bcc.
Note: When sending a Standard email using the iMIS mail service, the same email address cannot appear in more than one of the To, Cc, or Bcc fields. If an address is repeated, it will be included only once, with precedence given in the order of To, Cc, and then Bcc.
Sending an email to staff only
If you want to test an email before sending en masse by sending the email to only staff, then you must configure the recipient query to only return staff users.
Do the following to add a filter to the recipient query:
- Open the recipient query for edit.
- Click the Sources tab:
- Select All sources.
- Search for and add the UserData source.
- Join UserData with an existing contact business object, for example: NetContactData.Id = UserData.Id
- Click the Filters tab:
- From the Property drop-down, choose [UserData] Is Staff.
- Set the Value to Yes.
- (optional) To narrow the results to a smaller group of staff users, continue adding filters.
- Click Save.
- Preview the communication template to ensure the template looks correct. Also, ensure only staff users are being returned as the recipients.
- Click Send Now when you are ready to send the template to staff users.
- Gather and implement feedback from staff users.
- When ready to send the communication to the full list of contacts, remove the UserData source from the recipient query. Be sure to save the query.
Sending an email to a small group of recipients first
You may want to see how an email performs with a small group of recipients before sending it to the large group of recipients. In this example, we will modify the recipient query to only send the email to contacts that have last names beginning with A, B, C, and D.
Do the following to edit the recipient query:
- Open the recipient query for edit.
- Click the Filters tab:
- From the Property drop-down, choose Last Name.
- From the Comparison drop-down, choose Less Equal.
- In the Value field, enter E.
Note: This will not include recipients with an "E" last name. Only those with A-D last names are returned.
- Save the query.
- Preview the template to ensure everything still looks correct. Verify the recipients are only those with last names A-D.
- Click Send Now when you are ready to send the template.
- When you are ready, modify the filter to Greater Equal, so that everyone else (E-Z last names) receive the email. Send the email after the recipient query has been modified.