Last updated on: April 23, 2026
Note: You must be a system administrator to access Intelligent Query Architect (IQA).
The Group tab in an IQA query allows users to create a group that automatically refreshes the query to determine the members of the group by the query results. By assigning members to this dynamic group, users can create a group, for example, that includes only active members of a certain member type.
Important! It is recommended to exercise caution when using dynamic group views (those beginning with vlqa) in custom business objects, as they may lead to poor performing queries, or may present problems if the dynamic groups are changed in the future.
Important! There is no strict limit on the number of dynamic groups that can be created in iMIS. However, ASI recommends limiting the number of dynamic groups that refresh daily to no more than 30. Daily-refreshing dynamic groups can affect queries, security groups, sitemap items, and other system components. Exceeding this recommended threshold may negatively impact overall system performance.
In This Article
Creating a Group
Go to RiSE > Intelligent Query Architect and select New > Query.
Note: Do not put slashes (/) in IQA names. Doing so will cause errors when importing. To avoid these errors, update all existing IQA queries with slashes in their name and update any content items or reports associated with the queries.
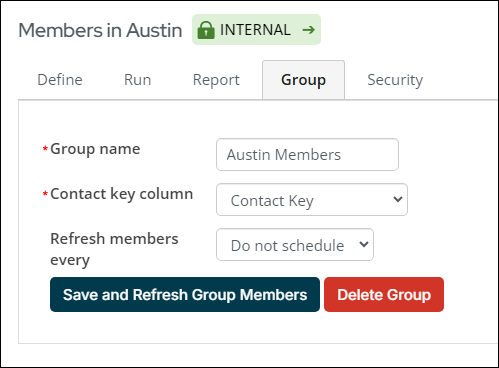
Once the query name and sources are defined, select the Group tab and define the following:
- Group name: The group name must be unique and is validated when the group is created or published. The following are important notes to consider when entering a new group name:
- Group names cannot be similar to an existing group, and must be unique once all special characters are removed. For example, the group name North Chapter Members and North - Chapter Members are too similar because the hyphen (-) used does not make the group names unique.
- Do not name the group IsStaff, as this is an iMIS reserved word.
- Contact key column: This drop-down lists all available columns in the query defined by the query sources. From the display tab, if an alias is defined and contains either Contact Key or ContactKey, the drop-down list defaults that aliased property. If an alias is not defined, the default will be the first property containing the word ContactKey.
- Refresh members every: Select from the available scheduled tasks to determine how frequently the group is refreshed.
Note: After creating or updating a group, a warning message might state:
No members were found from the query results. If this occurs, make sure you have a business object that includes a column called Contact Key. For example, the Net Contact business object to be included in your query. In some cases, no members were found because of the improper selection of the Contact key column, or incorrect aliasing of the Contact Key display.
Once you Save the query, click Create Group to create a new group.
Finding and editing a Group
Groups can be edited directly from the query definition (RiSE > Intelligent Query Architect), or from the group landing page. You must be a system administrator or staff user with reporting privileges in order to find and edit groups.
Do the following to locate and edit the group from the group landing page:
- Go to Community > Groups.
- From Select a query, choose Dynamic groups.
- Search for and open the group page.
- From the top panel, select the Source query.
- Make the desired changes to the query.
- Click the Group tab.
- Click Save and Refresh Group Members.
- Click Close.
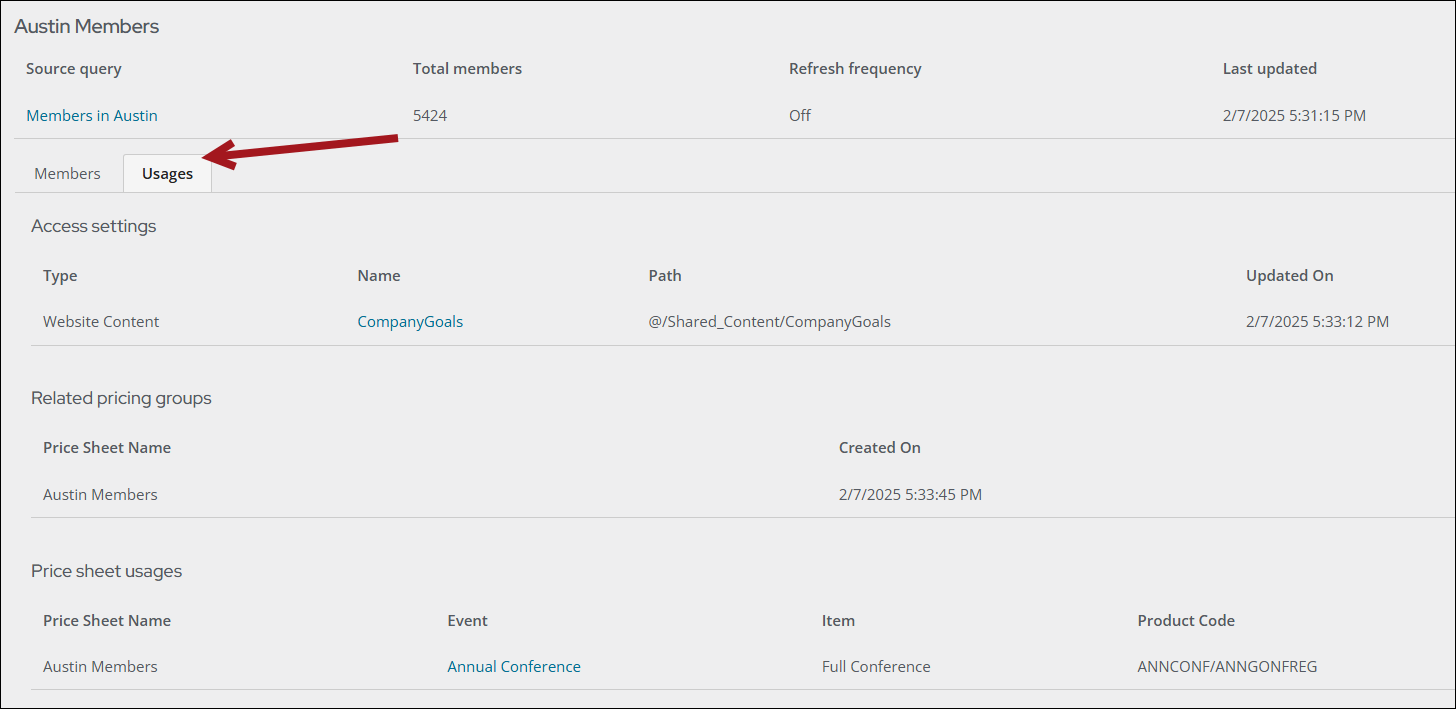
Viewing dynamic group usages
View where dynamic groups are being used by doing the following:
- Go to Community > Groups.
- Use the Select a query drop-down and select Dynamic groups or use the Group name contains field to search for a specific group.
- Click Find.
- Select the Group name.
- Click the Usages tab.
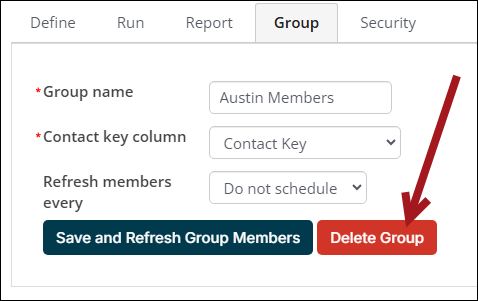
Deleting a Group
Groups can be deleted directly from the Group tab of an IQA. You must be a system administrator or staff user with reporting privileges in order to delete a group.
Do the following to delete a group:
- Go to RiSE > IQA.
- Choose an existing IQA that is associated with a dynamic group.
- Click the Group tab.
- Click Delete Group.
Important! Deleting a group is a permanent action and deletes all prices defined using those pricing groups. Deleting a group also removes Access Settings that were using the group to secure content or navigation.