Last updated on: January 27, 2026
In This Article
Before you begin
Review the following information before creating a template to display query data:
- The maximum number of results to display is 120.
- Use the ContactProfileImage business object to display profile pictures.
- If a source is removed from the query and one of the source’s properties is being used in the Template, the property is not automatically deleted from the Template content and must be manually deleted.
- Properties that use the built-in functions (Count, Max, Min, Avg, Sum) are respected, and the resulting values are displayed in the template.
- The following are currently not supported in the Query Template Display:
- Subtotal properties
- Optional query filters
- Exporting the query results directly from this iPart
Using placeholders in the Template tab
In communication templates, you can use placeholders to insert dynamic data—such as a contact’s name, ID, or invoice number—directly into your message content. This allows you to dynamically add information, without needing to manually add each contact's name, for exmaple.
Placeholders are written inside curly braces { } and represent data from a query. The general format is:
{datasource[.property...] [attributes]}
- datasource — The name of the data source or query alias. When you use a query in a communication template, you can assign it a short alias so you do not have to use the full query name. For example, if your alias is Party, you can reference it as
#party. - property — (optional) A specific field or property to display. You can chain properties using dot notation (for example,
.Address.City). If the property is a collection, use [i] notation to reference a specific item (for example,.Address[1]). - attributes — (optional) Formatting options that modify how the data appears:
- uppercase — Converts the value to uppercase.
- lowercase — Converts the value to lowercase.
- format — Applies a format to non-string values (for example,
format="d"). - noencode — Displays HTML markup instead of plain text.
Using aliases in placeholders
When you add a query to a communication template, assign it an Alias—a short name used in placeholders. You can reference any property from the query results using this format:
{#alias.Property}
For example, if your query alias is Party and you want to display the recipient’s first name, use: {#party.FirstName}
Creating and displaying the template
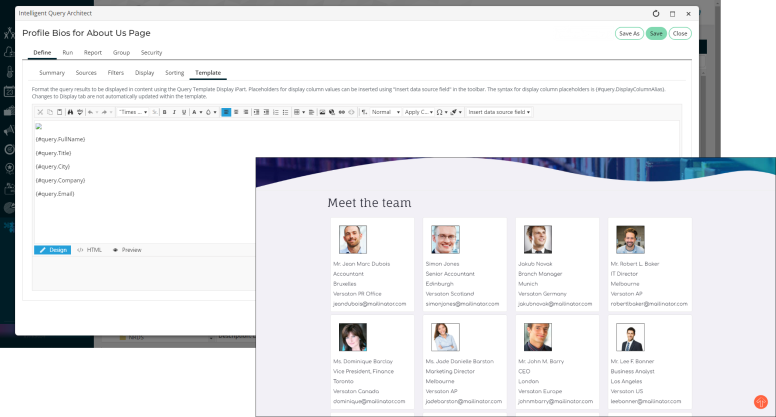
Create the query using the Template tab in IQA, then display the template using the Query Template Display content item.
Creating the query
Do the following to create the query:
- Go to RiSE > Intelligent Query Architect > New > Query.
- Name the query, then click the Sources tab.
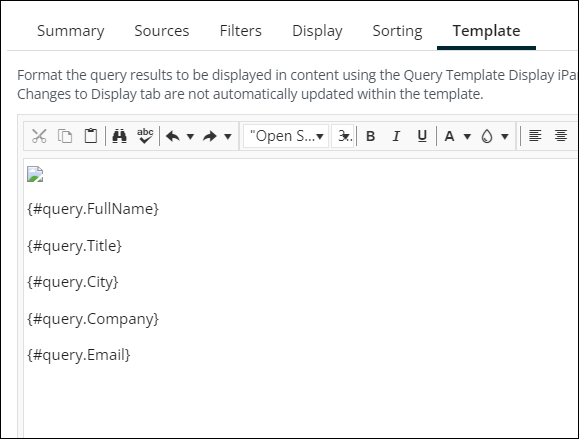
- Create the query. The properties selected on the Display tab are the only properties available through the Template tab.
- Click the Template tab.
- Use the Insert data source field drop-down to begin adding the query display properties necessary in the template.
- Use the HTML tab to insert custom CSS or HTML to format the template data.
- When the template data is ready, Save the query.

Note: The Template tab accepts bootstrap card containers. See Cards Bootstrap for more information.
Note: See Displaying profile pictures in a query Template for details.
Displaying the query template
Do the following to display the query template:
- Create a new content record or open an existing content record (RiSE > Page Builder > Manage content).
- Select Add content, then open the Utility folder.
- Add the Query Template Display content item to the content record.
- Configure the content item:
- Limit users who can view data for other contacts - (enabled by default) If this option is enabled, only authorized users can view information for contacts other than themselves. This prevents other users from changing the ID in the URL to access another contact's data. Authorized users include staff and Company Administrators for a group that the contact belongs to. Disable this option to allow all users to view information for other contacts, such as for a public profile. If this option is disabled, the system security settings determine whether a user must be logged in to view information for other contacts.
- Source query – Click select and browse to the IQA query. The query must have content defined in the Template tab of the query definition.
- Display in cards – Displays the query content in a container that resembles a card. See the Cards Bootstrap documentation for more information about cards. When this option is not enabled, the query content is displayed in a simple list.
- Display in columns - Displays the information in multiple columns instead of a single column.
- Number of columns – Select the number of card columns to display on each page.
- Rows per page – Enter the number of data rows to display on each page.
- Pager position – The pager is a set of controls that moves the pages of results either forward or backward. Select where the pager is located:
- Left - Select to show paging controls on the bottom left of the page.
- Center - Select to show paging controls in the bottom center of the page.
- Right - Select to show paging controls at the bottom right of the page.
- Use simple pager - Enable to hide the page numbers.
- Hide when there are no results – Enable this option to hide the content item when the query specified returns no results.
- No results tab – Message displayed when the query specified returns no results. If Hide when there are no results is enabled, this tab is disabled.
- Header tab – Messaged displayed above the query results.
- Footer tab – Messaged displayed below the query results.
- Click OK, then Save & Publish the content record.
Note: Results are limited to a maximum of 120. If the column-by-row calculation is greater than 120, the Rows per page value is automatically modified to a value that returns 120 or less.
