Last updated on: June 23, 2026
Review the examples to better understand how to utilize query templates.
Note: When queries are copied (Save As), the template data is not copied. It must be manually recreated in the copied query.
In This Article
- Supported image types using the query template
Displaying product images in a query template
Displaying profile pictures in a query template
Displaying cards of data using conditional functions
Creating a restricted-access button on website content
Supported image types using the query template
Images displayed in a Query Template Display content item must come from thumbnail or URL-based fields (for example, vBoCsProduct.THUMBNAIL_URL). Image fields created using a panel editor file upload property (varbinary) are not supported and will display as broken images when used in a query template.
| Supported | Not Supported |
|---|---|
| Thumbnail or URL-based image fields | Panel editor file upload properties |
| Fields that resolve to a file path or URL | Varbinary fields used as query aliases |
Displaying product images in a query template
This example details how to display commerce product images in the query template. Do the following:
- Go to RiSE > Intelligent Query Architect > New > Query.
- Name the query Product Thumbnails.
- (Sources tab) From the Add source area on the right-side, select Products.
- (Display tab) Scroll down to the bottom of the query window:
- Enter the following information in the Custom section:
- SQL Expression: REPLACE(vBoCsProduct.THUMBNAIL_URL,'~','')
- Alias: Image
- Click Add.
- Enter the following information in the Custom section:
- (Display tab) Continue adding the desired display columns.
- Click Save.
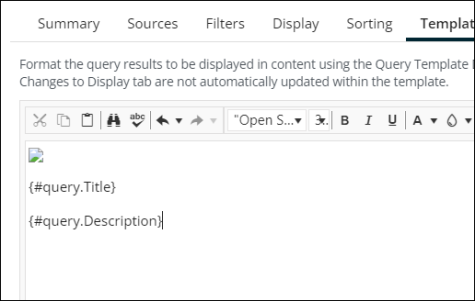
- Click the Template tab.
- Insert the Image data source.
- Click the HTML tab.
- Update the data source to the following: <img src= "{#query.Image}">
- Click back to the Design tab. The image property will look like a broken image.
- Continue adding data sources to the Template tab.
- Save the template. Add the query to content using the Query Template Display content item. See Displaying the query template.

Displaying profile pictures in a query template
To display user profile pictures, you must use the ContactProfileImage business object and one of the properties with “File Path” in the name.

Do the following to display profile pictures using the query Template tab:
- From the query Display tab, make sure you have one of the following ContactProfileImage properties selected:
- Thumbnail File Path
- Thumbnail Large File Path
- Image File Path
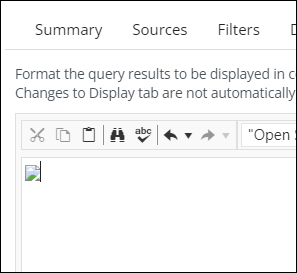
- From the Template tab, insert the image data source.
- Click the HTML tab.
- Update the data source so that the syntax reads like the following: <img src=" {#query.ThumbnailLargeFilePath}">
- Click back to the Design tab. The image property will look like a broken image:
- Continue adding data sources to the Template tab.
- Save the template. Add the query to content using the Query Template Display content item. See Displaying the query template.


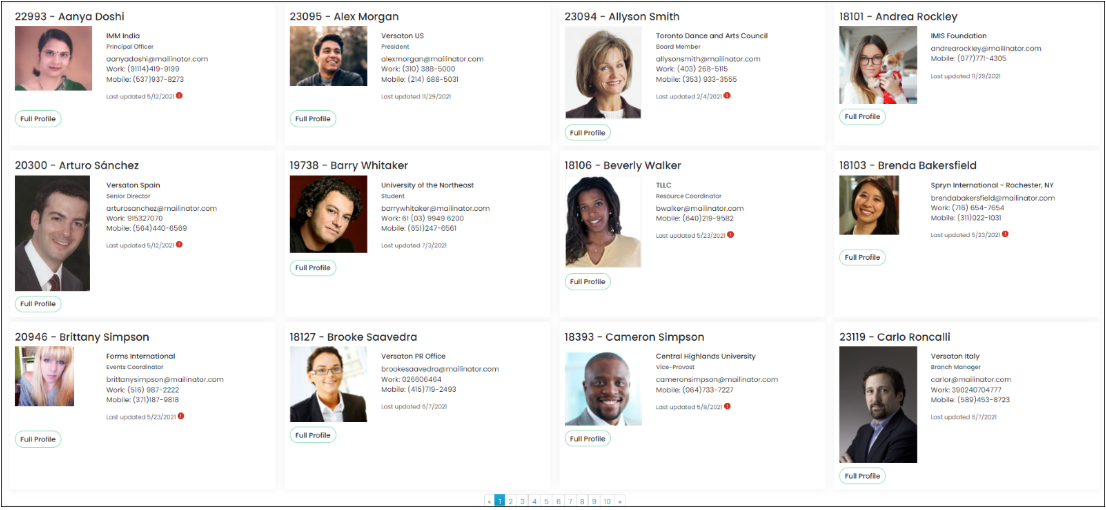
Displaying cards of data using conditional functions
Example: The staff users need a quick view of the members’ information, such as ID, name, company, email, phone numbers, and the last-updated date. In this view, staff users also need an indicator for those who have not had any data updated on their profiles in the last year.
Do the following:
- Create a query using the NetContactData and ContactProfileImage business objects.
- Add the following properties to the Display tab:
- Image File Path
- Full Name
- ID
- Title
- Home Phone
- Mobile Phone
- Work Phone
- Company
- Last Updated
- Is Company
- From the Template tab, add the following conditional statement:
- Save the query.
- Add the Query Template Display content item to a content record. See Displaying the query template.
<div class="container-fluid">
<h2 class="display-5 fw-bold">{#query.ID} - {#query.FullName}</h2>
<div class="mb-3" style="max-width: 540px;">
<div class="row g-0">
<div class="col-md-4">
<img src="{#query.ImageFilePath}" alt="" class="img-fluid rounded-start">
</div>
<div class="col-md-8">
<div class="card-body">
{if ISFALSE(#query.IsCompany)}<h5 class="card-title">{#query.Company}</h5>{/endif}
{if ISNOTNULLOREMPTY(#query.Title)}<h6 class="card-subtitle mb-2 text-muted">{#query.Title}</h6>
{/endif}
<p class="card-text">
{if #query.Email NEQ ''}{#query.Email}</br>{/endif}
{if LENGTH(#query.HomePhone) GT 0}Home: {#query.HomePhone}</br>{/endif}
{if LENGTH(#query.WorkPhone) GT 0}Work: {#query.WorkPhone}</br>{/endif}
{if LENGTH(#query.MobilePhone) GT 0}Mobile: {#query.MobilePhone}</br>{/endif}
</p>
<p class="card-text">
<small class="text-muted">Last updated {#query.LastUpdated}</small>
{if (DAYSBETWEEN(#query.LastUpdated, Now) GT 365)} {/endif}
</p>
</div>
</div>
</div>
</div>
<a href="Party.aspx?ID={#query.ID}" class="btn btn-primary btn-lg" role="button" aria-disabled="true">Full Profile</a>
</div>
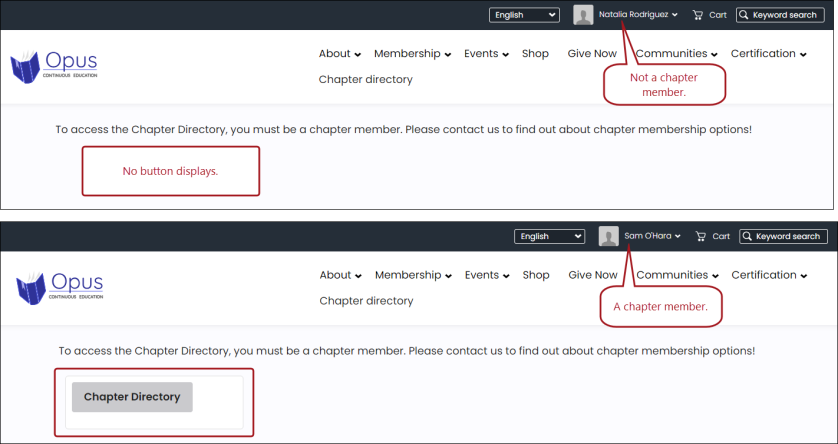
</div>Creating a restricted-access button on website content
In some cases, you may wish to restrict access to content for certain member types. For example, you may only want Chapter members to access the chapter directory on your website. In this scenario, you can create a custom query and use the Query menu content item to create a button that only qualified users have access to.
Creating the custom query
Do the following to create a query that identifies qualified members:
- Go to RiSE > Intelligent Query Architect > New > Query.
- Name the query.
- (Sources tab) Add the following sources:
- NetContactData
- Chapter
- (Sources tab) Creating a custom join where NetContactData.Chapter = Chapter.Chapter Code.
- (Filters tab) Create the following filters:
Table 1: Filter configurations Property Function Comparison Multiple Value In Search? [NetContactData] Chapter None Equal Enabled Constant East Chapter, West Chapter, North Chapter, South Chapter No [NetContactData] Is Member None Equal Constant Yes [NetContactData] Status None Equal Constant Active [NetContactData] Id None Equal Dynamic Selected ID No - (Display tab) Add the desired display columns.
- Save the query to a non-system folder.
- (Template tab) Do the following:
- From the HTML tab, enter
<p><a href="link" target="_blank" class="TextButton">Button Text Here</a></p>. - Replace "link" with the URL of the page to redirect to. For example, https://<yourwesbite>.com/ContactManagement/Directory.aspx.
- Replace “Button Text Here” with the text to display.
- From the HTML tab, enter
- (Security tab) Set the Access mode to Authenticated Users Full Control.
- Save the query.
Adding the button to content record
After creating the query, add the query to a content record using the Query Template Display content item, which exposes the button.
Do the following to add the button to the content record:
- Go to RiSE >Page Builder > Manage content.
- From a shared content folder, click New > Website Content.
- Add a Title.
- Select Add content.
- Open the Utility folder.
- Select the Query Template Display content item and click OK.
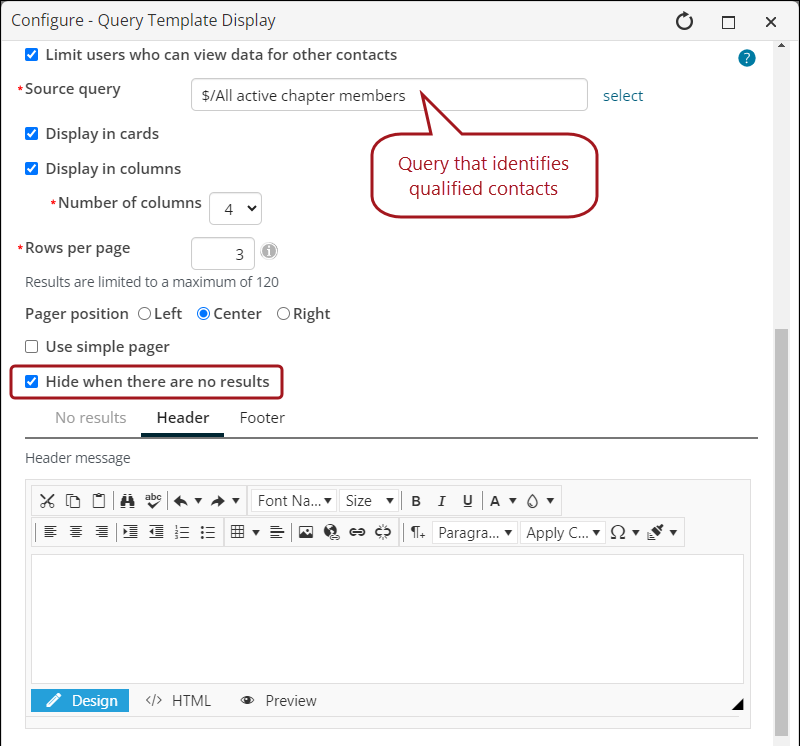
- From the Source query field, add the query you just created.
- Enable the Hide when there are no results checkbox.
- Click OK.
- Click Save & Publish.
Now, only chapter members have access to the directory. When a non-chapter member navigates to the content record, they do not see the button.