Last updated on: June 08, 2026
Scheduled reports automatically send up-to-date PDF reports to contacts at specified intervals, allowing regular distribution of information such as event registration updates, new member reports, or donor summaries.
In This Article
- Before you begin
Types of scheduled reports
Sending a scheduled communication with an attached report
Creating a scheduled report task
Understanding the communication log
Before you begin
Review the following prerequisite tasks:
- Ensure you are licensed for Process Automation – Premium to create custom scheduled tasks. Contact your AiSP or CPIL for details.
- Verify the Default publishing server is enabled (RiSE > Maintenance > Publishing servers); if this publishing server is disabled, scheduled tasks will not run.
- Define the report to use in the scheduled task. The report must be a standalone SSRS report or a Report Writer report. IQA-based reports are not supported in communication templates or process automation.
Types of scheduled reports
To send scheduled reports, use one of the following methods:
- Send a scheduled communication with an attached report - This method involves creating a communication template with an attached report and a scheduled task to send the communication. It allows for both static report attachments, identical for all recipients, and dynamic attachments, personalized for each recipient.
- Send a scheduled report directly - Use this method to automatically run a report and send it as a PDF attachment to specific contacts or email addresses without customized email text.
Sending a scheduled communication with an attached report
Do the following to send a scheduled communication with an attached report:
- Create a communication template with an attached report:
- For SSRS reports, see Creating a communication with an attached SSRS report.
- For Report Writer reports, see Attaching a Report Writer report to a communication template.
- Create a task to send the communication with the report attached. For more information, see Sending scheduled communications.
Creating a scheduled report task
Do the following to create a scheduled report task:
- Go to RiSE > Process automation.
- Select Add new task.
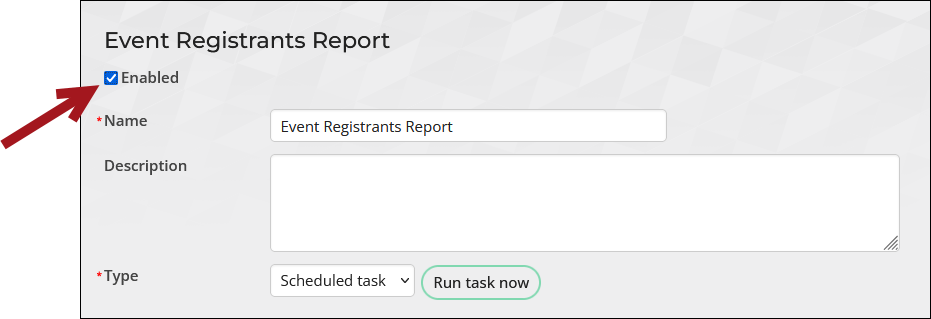
- Enter a Name that indicates the purpose of the task.
- Select Scheduled task as the task Type.
- (Triggers tab) Create Triggers that tell the task when to run:
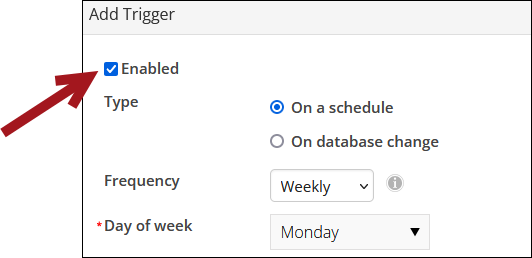
- Select Add trigger.
- Select On a schedule as the Type.
- Define the schedule:
- Select the Frequency(e.g., daily, weekly, monthly) and specify the days or times.
- Define the Start date and time.
- (optional) Define the End date and time.
- To activate the trigger, select Enabled.
- Save the trigger.
- (optional) (Conditions tab) Specify Conditions that must be met in order for the task to run. For more information, see Defining the conditions.
- (Actions tab) Define the action the task performs when it runs.
- Select Add action.
- Select Run a report as the action Type.
- Define the action details:
- Report - Select a standalone SSRS report (not IQA-based) or Report Writer report.
- Email from address - Enter the sender’s email address.
- Email results to - Enter at least one recipient for the email. Select existing contacts or enter email addresses separated by semi-colons.
- Email subject - Enter the subject of the email you want to send.
- Email body - Enter the body of the email you want to send.
- Save the action.
- (optional) (Data sources tab) Create and manage query data sources for the task. For more information, see Adding data sources.
- To activate the task, select Enabled.
- Save the task.
- (optional) Click Run task now to instantly execute the task.

For more information, see Creating a trigger.
For more information, see Defining the action.
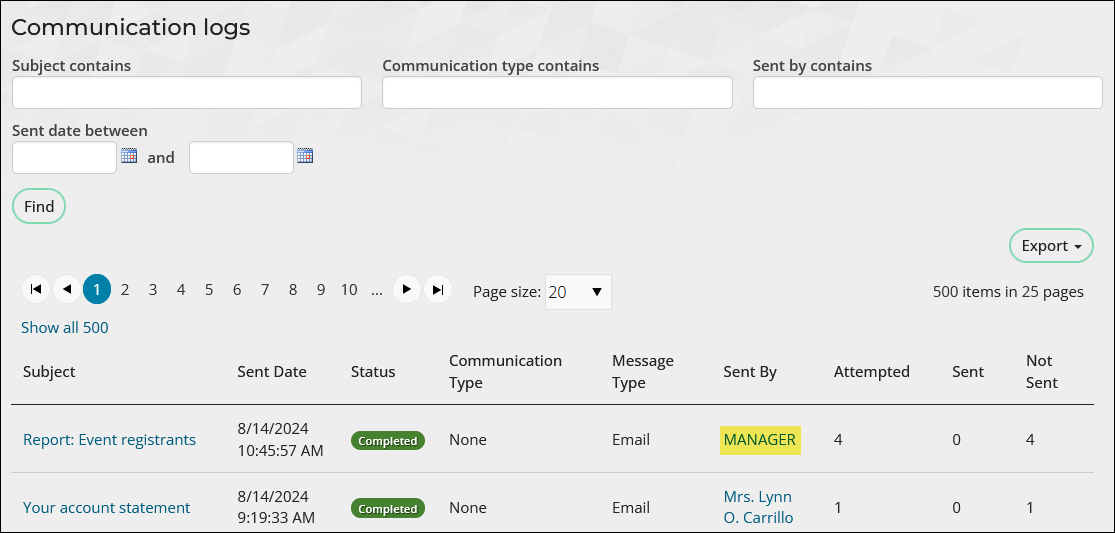
Understanding the communication log
When using the Run a report action type, communications are logged against the system MANAGER account, rather than the specified Email from address. Communication logs for these actions are only intended to be viewed from the list of logs (RiSE > Process automation > Logs tab) and not from a contact's account page.