Last updated on: May 07, 2026

Note: To complete the steps in this example, you must be licensed for Process Automation - Premium.
You can configure a process automation task to send an automatic email any time a panel data source has changed. The data source must be created with Panel Designer to trigger the automated task.
Example: Each member is required to fill out their emergency contact information. When a member updates their primary emergency contact, the staff user in charge of the emergency contact information is automatically notified.
Do the following to send an automatic email based on a change to a panel data source:
- Create the data source using Panel designer.
- Add the panel to contact account pages.
- Create the recipient query.
- Create the communication template.
- Create the Process Automation task that sends the email.
In This Article
- Create the data source using Panel Designer
Add the panel to contact account pages
Create the recipient query
Create the communication template
Create the Process Automation task that sends the email
Create the data source using Panel Designer
For iMIS to recognize the data change, the data source must be created in Panel Designer. See Creating panel sources.
Do the following to create the data source using Panel Designer:
- Go to RiSE > Panel Designer > Panel definitions.
- Select Add panel definition.
- Define the following properties:
- Panel name - Emergency contacts
- Parent type - Contact
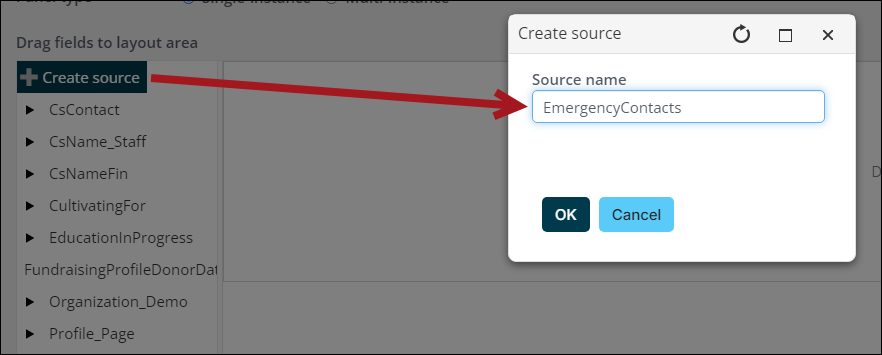
- Select Create source and enter a Source name. For this example, enter EmergencyContacts.
- Click OK.
- Select Add property and enter the following Property name and Property type:
- Property name - Primary Contact Name
- Property type - Text
- Click Add & Continue.
-
Repeat the process to define the rest of the properties for the Emergency Contacts panel:
- Click Save & Close.
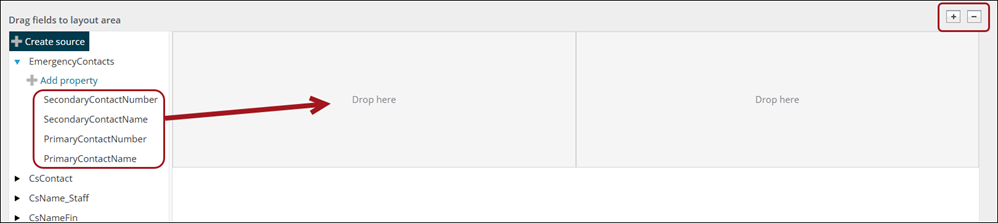
- Click and drag the properties in the Drop here area and arrange as needed. Click the plus or minus icons to add or subtract columns.
- Click Save & Exit.
| Property name | Property type |
|---|---|
| PrimaryContactNumber | Text |
| SecondaryContactName | Text |
| SecondaryContactNumber | Text |
Add the panel to contact account pages
Contacts can enter information into the Emergency contact panel after the panel is added to the contact account page. See Creating a panel and adding it to account pages.
Do the following to add the Emergency contact panel to contact account pages:
- Go to RiSE > Page Builder > Manage content.
- Locate the page you use for contact account pages. Out-of-the-box, the pages are in the following locations:
- Staff account page: The staff account page can only be seen by staff users. Add the panel to this content record if you only want staff users to use this panel. The staff account page is located at @/iCore/Contacts/ContactLayouts/Staff/Tabs.
- Public account page: The public account page is accessible by public users. Add the panel to this content record if you want public users to have access to this panel. The public account page is located at @/iCore/Contacts/ContactLayouts.
- Open the desired page for editing.
- Add the panel:
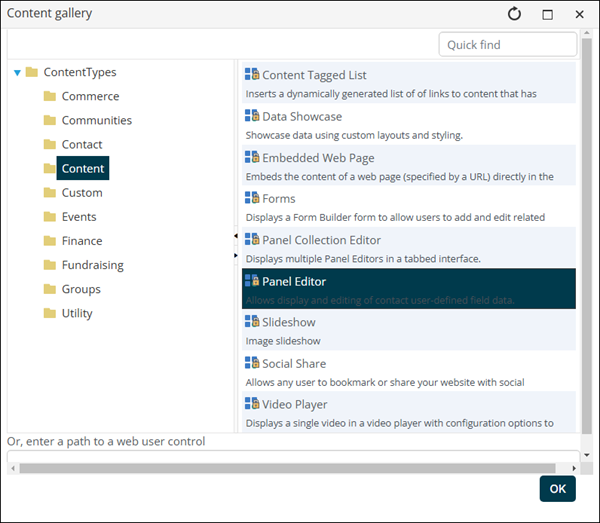
- Select Add content.
- From the Content folder, select Panel Editor.
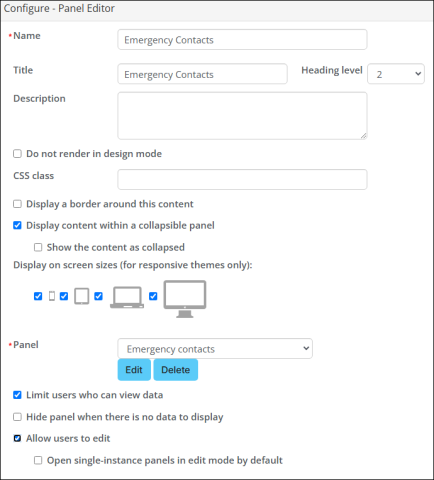
- Configure the panel:
- Name and Title: Emergency Contacts
- Panel: Emergency Contacts
- Enable Allow users to edit.
- Click OK.
- Click Save & Publish.
- Navigate to an account page to confirm the panel was properly added.
Note: If you are not already working with a copy of the standard account pages, you must save a copy before you can save and publish a change. You must also update your site shortcuts to point to your new page. See Understanding and modifying account pages.

Create the recipient query
Recipient queries are IQA queries defined in the Recipients tab of communications to identify the contacts who will receive an email.
In this example, the recipient query is one specific staff user, so no recipient query is required. Other examples may require a recipient query.
For details on how to create recipient queries, review the following articles:
- Creating the recipient queries for communications
- Sending communications to contacts
- Building IQA queries: Tutorials
Create the communication template
A communication template is necessary to send the communication to the staff user notifying them of the change to the emergency contact. See Creating a new communication template.
Do the following to create the communication template:
- Go to Marketing > Communication templates > New > Communication.
- (Header tab) Enter the From address. This is the email address that the recipients receive the email from.
- Enter the Subject. For this example, enter Change in emergency contact information.
- Change the To field to the one staff user who receives updates about emergency contact changes.
- (Body tab) Enter the body of the email.
- Click Preview to review the email.
- Click Save.
Create the Process Automation task that sends the email
A process automation task triggers the communication to be sent to the staff user once a contact updates their emergency contact. This example involves creating a trigger, a data source, and an action. See Understanding scheduled tasks.
Do the following to create the Process Automation task:
- Go to RiSE > Process automation.
- Select Add new task.
- From the Name field, enter Change to emergency contacts.
- (Triggers tab) Select Add trigger:
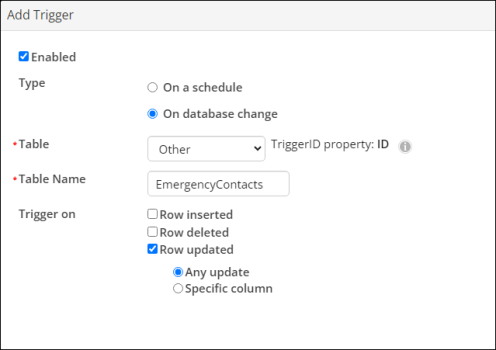
- Type: On database change
- Table: Other
- TableName: EmergencyContacts
- Trigger on: Row updated & Any update
- Enable the trigger.
- Make note of the TriggerID property. In this example, the TriggerID property is the ID property in the EmergencyContacts table.
- Click Save.
Note: This is the name of the panel source created in step 1. Make sure the names match exactly.
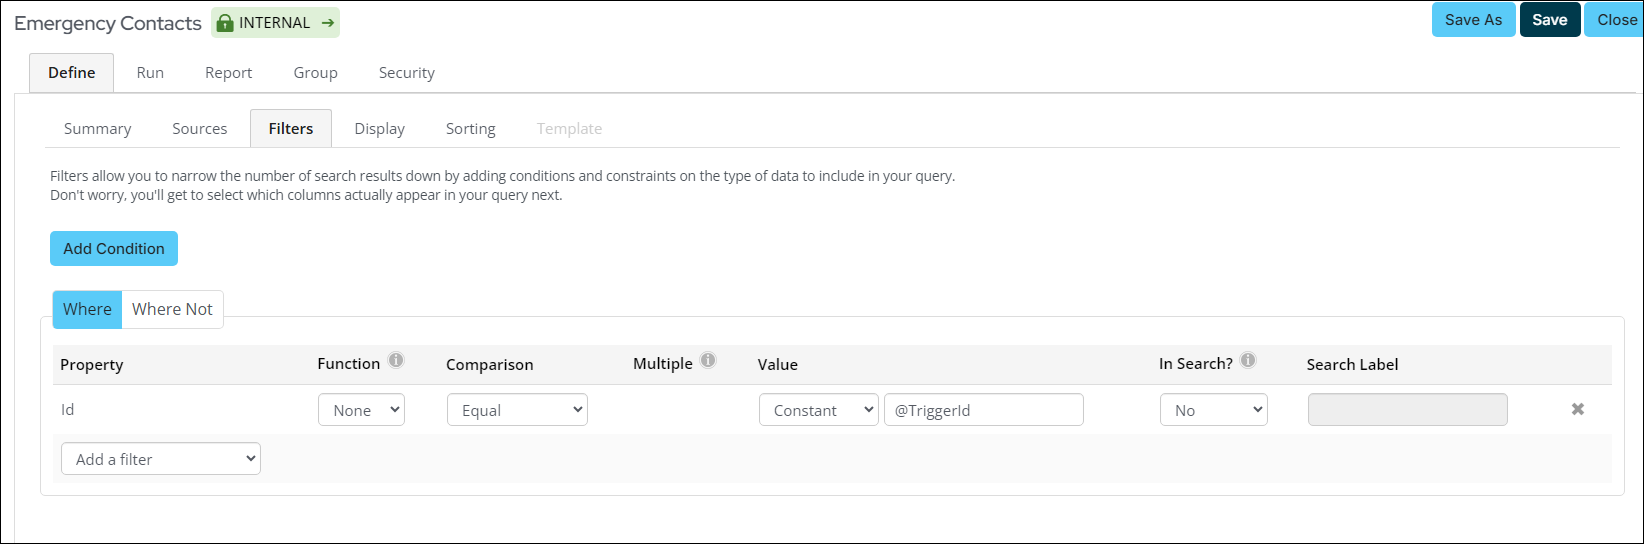
- (Conditions tab) The trigger in the previous step needs to match with a primary key, also known as the TriggerID. For more information about the TriggerID, see Creating and editing scheduled tasks. Do the following to match the trigger to the primary key:
- Select Add data source.
- Select Create source query.
- Enter a Data source name, such as EmergencyContacts. Spaces are not allowed.
- Create the new query using the data source you chose in the trigger. In this example, the data source is EmergencyContacts.
- From the Filters tab, choose the ID property, and enter @TriggerId in the Value area.
- Click Save and Close.
- Click Save.
See Defining queries.
- (Actions tab) Select Add action:
- Type: Send a communication
- Recipient data source: None
- Communication: Emergency Contact Change
-
Click Save, then Enable the scheduled task.
Now, when any change is made to the Emergency Contact panel, the scheduled task is executed and an email is sent, informing the staff user of the change.