Last updated on: June 08, 2026
Recipient queries are IQA queries defined in the Recipients tab of communications to identify the contacts who will receive an email. Accurately defining these queries ensures communications reach the intended audience. Below are the criteria and best practices for crafting these queries effectively.
In This Article
- Requirements for recipient queries
Best practices for defining recipient queries
Defining recipient queries
Using recipient queries
Requirements for recipient queries
Recipient queries must meet the following criteria:
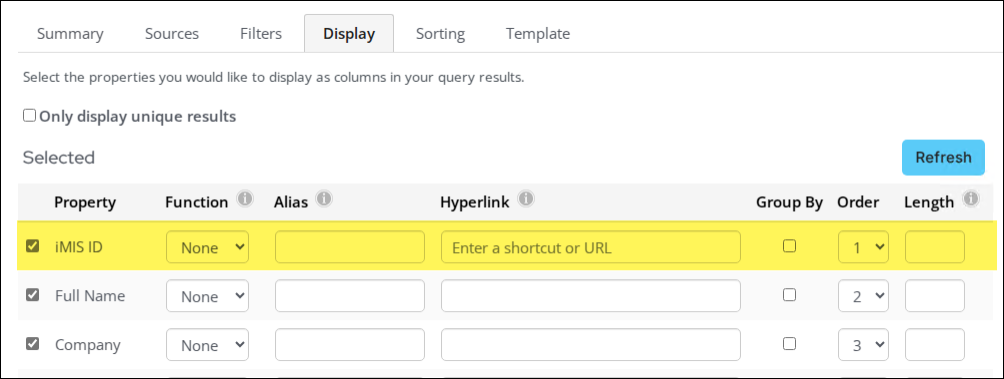
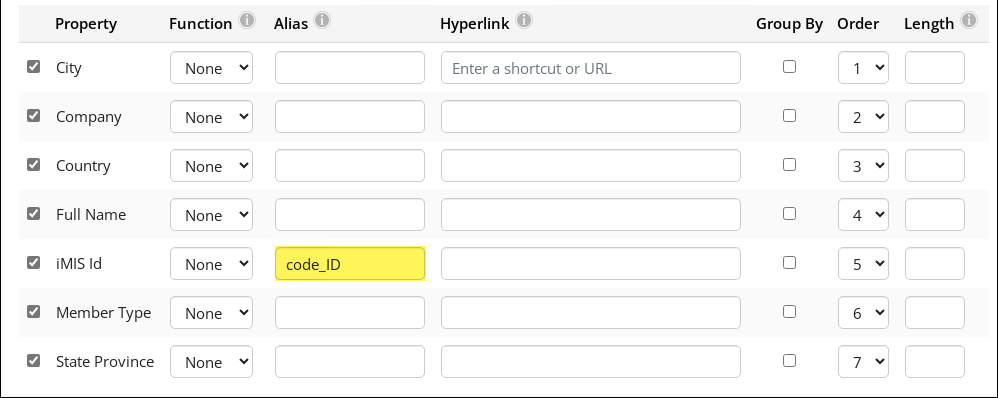
- Include a recognized ID column – The query must contain a column identifying the contact’s ID. From the Display tab of the query, select one of the following recognized ID properties as a column or use one of these terms as an alias:
- PartyId
- codePartyId
- ContactId
- codeContactId
- CustomerId
- codeCustomerId
- ImisId
- codeImisId
- StudentId
- codeStudentId
- Id
- codeId
Additionally, the ID column should NOT include the following:
- Do not use ContactKey as an alias.
- ID columns should not contain spaces; avoid names like Contact Id, Customer Id, or iMIS Id.
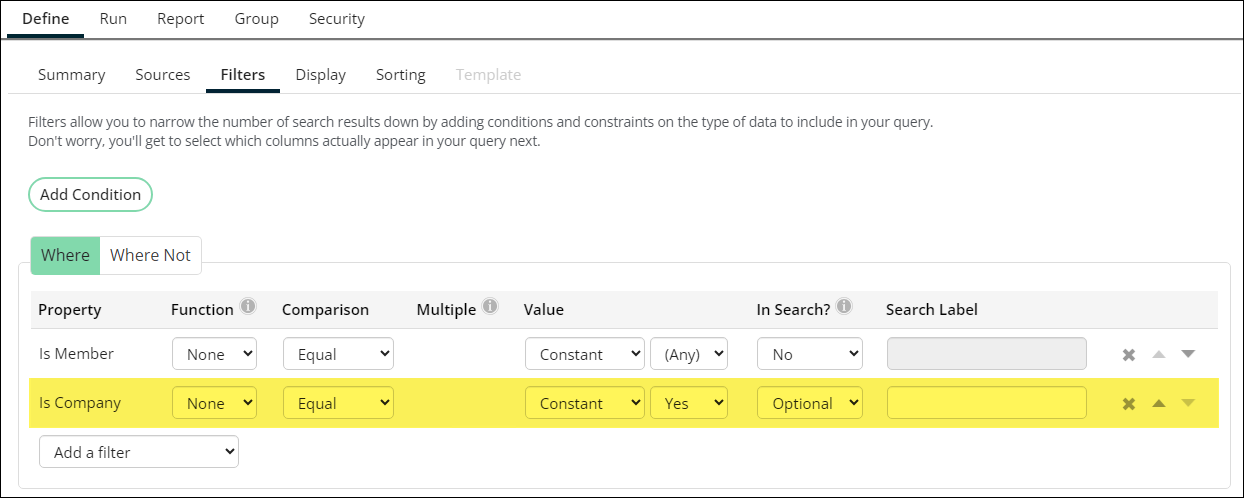
- Set default values for filters – If the query contains In Search? filters that are Required or Optional, ensure these filters have default values. You cannot deselect recipients from the list before sending an email if these filters are in place:
- If additional filtering of the intended recipient set is desired, the recipients query should be defined with additional joins, to limit the intended recipients upfront.
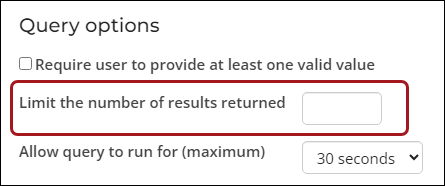
- Do not limit results – Make sure the Limit the number of results returned field (Filters tab) is empty. This ensures that all intended recipients are included in the communication.
Note: The Preview does not take this setting into account.
Note: The following error will appear if the query has Optional or Required filters: Viewing and selecting recipients is not available because the current query contains filters. If this is a shared query that is used in various places throughout iMIS, it is not recommended that the query is modified; instead, copy the query and remove or populate the filter values. Update the template with the copied query.
Best practices for defining recipient queries
Consider the following best practices when defining recipient queries:
- Include the required elements - Ensure the recipient query contains the required elements.
- Use the code_ prefix to hide columns in the Query Menu – To avoid displaying columns in the Query Menu content item, prefix the alias with code_ (for example, code_PartyId or code_ID).
- Avoid using recipient query properties in the template body – Use additional data sources instead of inserting properties from the recipient query to ensure the template works correctly if the query is replaced. For example, the recipient query for a template is replaced in the following scenarios:
- When using an Email button on a Query Menu content item, the recipient query stored in the template is replaced by the query shown in the content item.
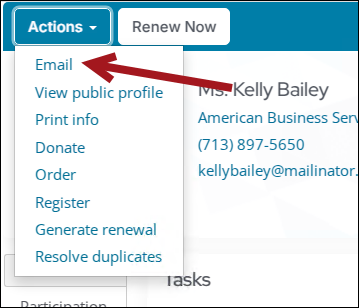
- When using the Email action from an account page, the recipient query stored in the template is replaced by the selected contact.
- When issuing receipts (Fundraising > Receipting > Issue receipts), the recipient query stored in the template is replaced by the query selected for issuing the receipts.
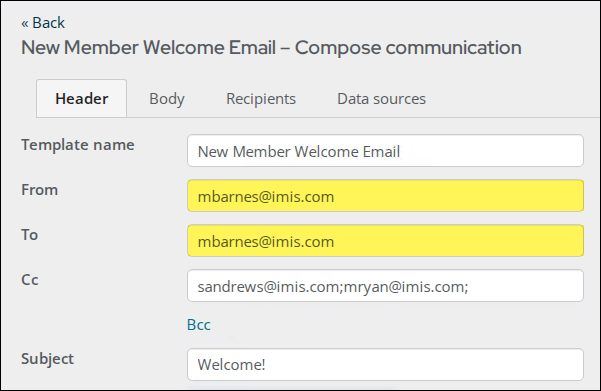
- Handling additional email addresses - Use the To field for the main recipient list ({#party.Email}) and the Cc or Bcc fields for additional addresses to avoid duplicate communications.
- Addresses entered in the Cc or Bcc fields will be included on each copy of the communication but will not cause additional copies to be sent.
- If you change the To field from {#party.Email} to hard-coded email addresses, the email will be sent only to those addresses, but the communication will still be recorded in the logs of all recipients in the query.
When sending a Standard email using the iMIS mail service, the same email address cannot appear in more than one of the To, Cc, or Bcc fields. If an address is repeated, it will be included only once, with precedence given in the order of To, Cc, and then Bcc.
Example: Entering {#party.Email} and anotheremail@example.com in the To field sends one copy of the communication to the recipient’s primary email address and a second copy to anotheremail@example.com. The recipient will also have two different entries in the communication log for the two copies of the communication. To send only one copy of the communication with one interaction log entry, enter {#party.Email} in the To field, and add anotheremail@example.com in the Cc or Bcc field.
Defining recipient queries
To create the recipient query, do the following:
- Go to Marketing > Communication templates.
- Select New > Query.
- Enter a name for the query.
- (Sources tab) Select a source that contains an ID property. For example, NetContactData.
- (Filters tab) Add filters if necessary.
- Define default values for any filters with To search? set to Optional or Required.
- Leave the Limit the number of results returned field empty.
- (Display tab) Select one of the allowed ID properties from the list above as a column or use these exact terms as a column alias.
- Run the query to review the results. The results of the query determine the list of recipients to include in your email communication.
- Save the query to the desired folder. To keep your email recipient queries organized, use the Queries folder at $ /Common/Communications.
See Building IQA queries: Tutorials for more information about creating queries.
Using recipient queries
To add the query to a communication template, do the following:
- Go to Marketing > Communication templates.
- Open an existing template or add a new template.
- Click the Recipients tab.
- Select the recipients query you just created.
- (optional) The full results of the query appear in a grid. By default, all recipients are selected. To remove recipients from the list, review each page, and uncheck the option box for each name you want to exclude.
By default, the maximum recipients returned by communication queries is 500. If your query returns more than 500 recipients and you want to deselect a contact that is not shown, you must modify the limit in the web.config file. If you are not self-hosted, you must contact your host for assistance modifying web.config files.
Note: You cannot deselect recipients if the query contains optional or required search filters.
- Compose the remaining elements of the communication. For more details, see Creating a new communication template.
- Click Preview to view a preview of the email for each recipient. Click Prev or Next to review the email for each recipient. Then, Send the communication.
- (optional) To save the email as a draft for future use, click Save As.
Alternatively, add the query to a Query Menu content item and click Email from the content item. For more information, see Sending communications to contacts.