Last updated on: January 27, 2026
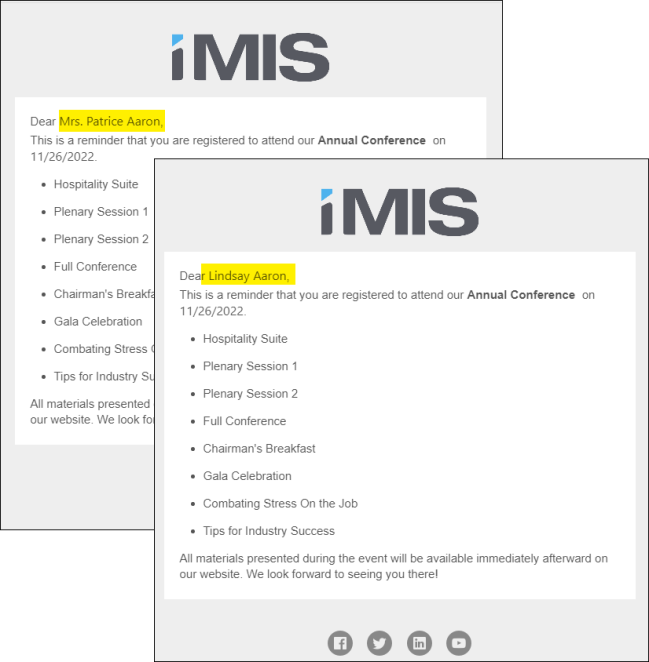
You can insert repetitive data from an IQA query by using only one small line of "code" in a communication called the "for each placeholder." An example of repetitive data in an IQA query is something like a query that returns multiple rows for a single contact, with each row containing all of the program items an event registrant is registered for.
Example of query with repetitive data.
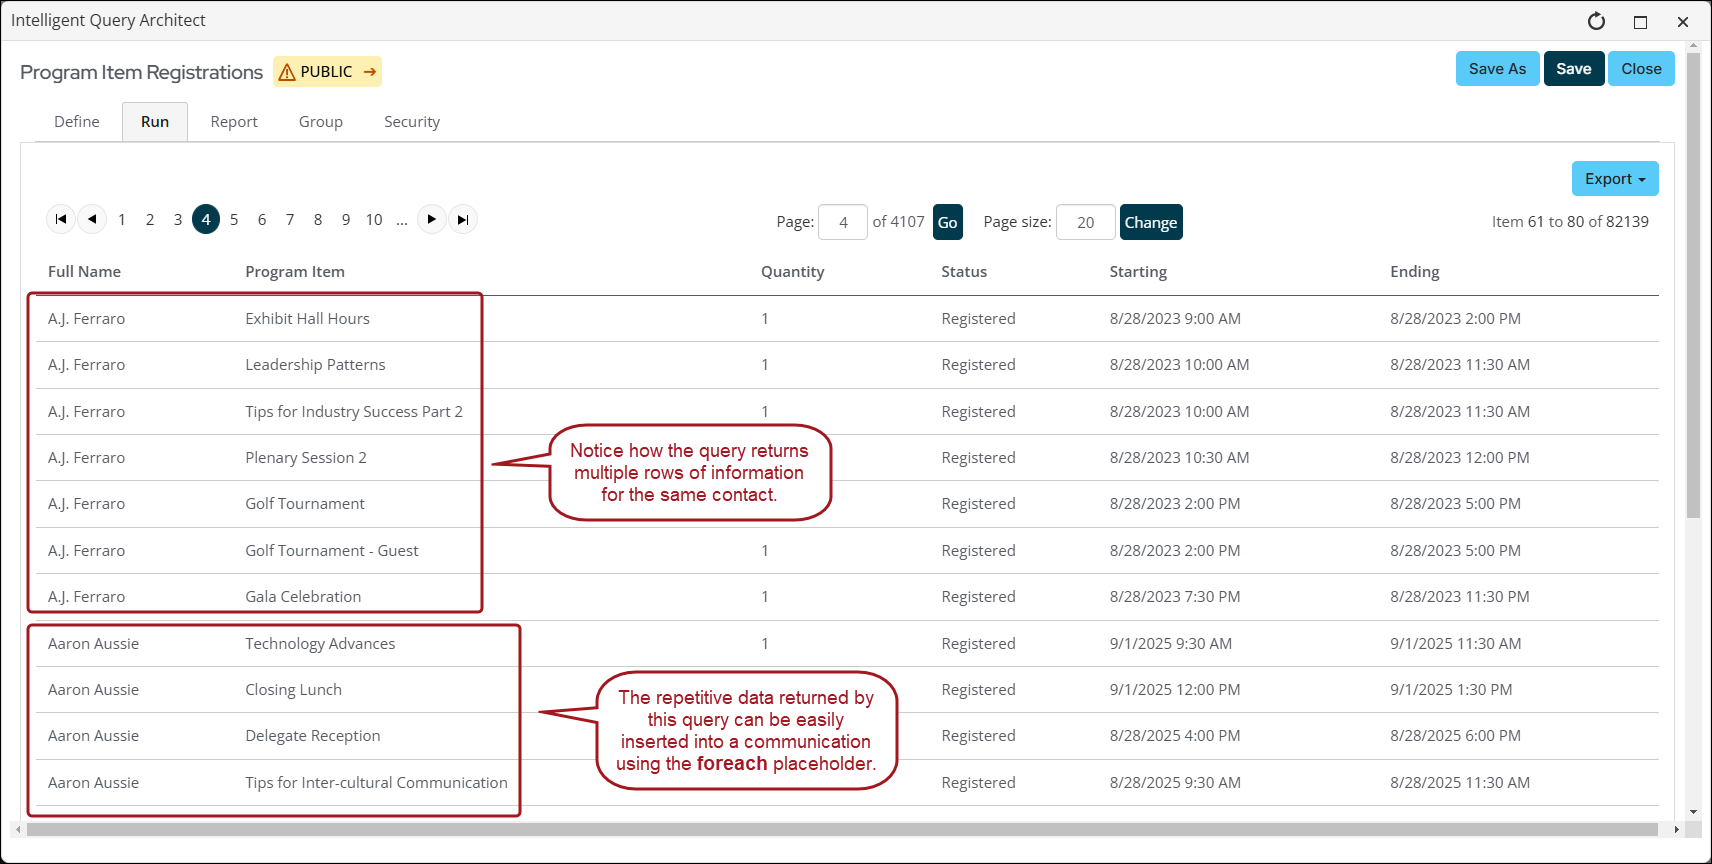
For this example, the Annual Conference event is coming up and you want to remind registrants of the registration options and program items they registered for. Instead of manually typing out each registration option and program item for each registrant, you use the foreach placeholder. This placeholder allows you to neatly insert repeated data from a query.
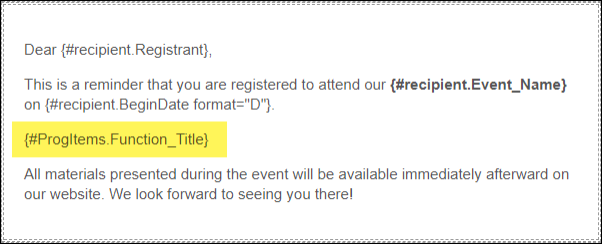
Example of the placeholder being used in a communication.
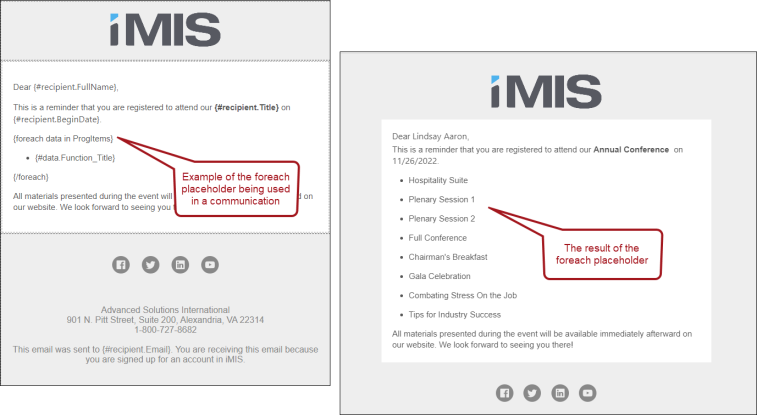
The foreach placeholder is borrowed from JavaScript. For our purposes, the foreach method will grab each program item for an event and then organize the information per registrant in each communication.
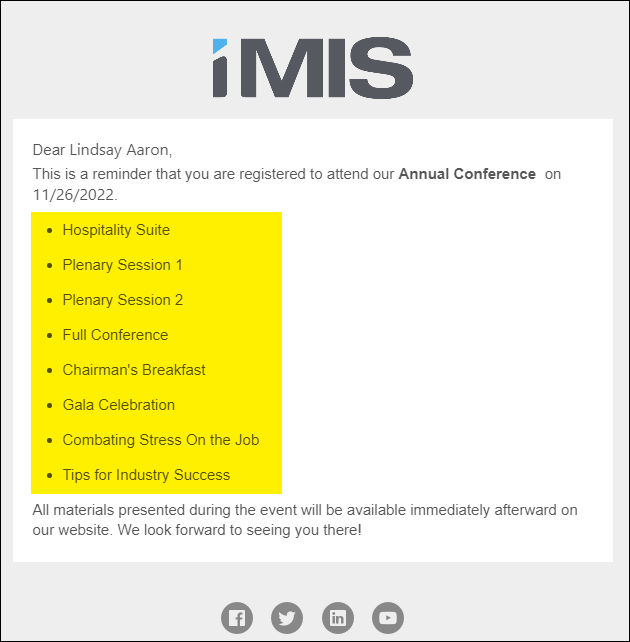
Example communication using the foreach placeholder.
Warning! The foreach placeholder cannot be used in Advanced Email Marketing communications.
In This Article
- Reviewing the query requirements
Building the queries
Using the foreach placeholder in a communication
Reviewing the advanced foreach information
Reviewing the query requirements
To properly use the foreach placeholder, you must use two different queries:
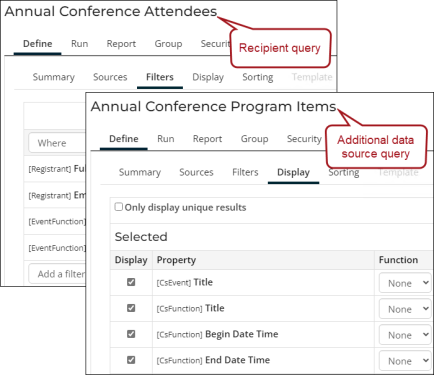
- Recipient query - This query returns the results of everyone you want to send the communication to. For this example, the query results are everyone who is registered for the Annual Conference.
- Additional Data Source query - This query returns the results of the repeated data. For this example, the query results are program items that each registrant is registered for.
In order for the two queries to properly communicate in the communication template, they must be connected. For example, you want to make sure that each registrant is only seeing their related program items in the communication they receive. To ensure the queries are properly communicating, they must have the following requirements:
- The recipient query must contain a Display property that matches a Filter property in the additional data source query.
- The Filter property in the additional data source query must have a Prompt of Required.
These required properties are demonstrated in the Building the queries section.
Building the queries
As a staff member, I want to send a communication to all event registrants of the Annual Conference to remind them of their event registration and the program items they registered for. To do this, I need to create two queries:
- A recipient query - This query is a simple query that will return every registrant who is attending the Annual Conference. This list of people returned in this query are the ones who are receiving the communication.
- Additional data source query - This query will return the program items that the registrants have registered for. The data from this query will tell you what program items and registration options that registrants are registered for. This data will be used as information in the communication.
Building the recipient query
Do the following to create the recipient query:
- Go to RiSE > Intelligent Query Architect.
- Navigate through the following path: $/Common/Query Sources/Events.
- Select the Event registration data query, then click Organize > Copy.
- Navigate to the following folder: $/Common/Communications/Queries.
- Click Organize > Paste.
- Open the query for edit.
- (Summary tab) Rename the query to Annual Conference attendees.
- (Filters tab) Specify that you only want the query result to return registrants of the Annual Conference event:
- From the Property drop-down, select Event.Event Code.
- In the Value field, enter ANNCONF.
- (Display tab) Make sure the following Display properties are selected:
- [Registrant] Full Name
- [Registrant] ID - This property will connect the two queries.
- [Registrant] Email
- [Event] Title
- [Event] Begin Date
Note: Remove any content under Alias and Hyperlink; otherwise, the query will not display properly when creating a communication.
- Save the query.
Building the additional data source query
Do the following to create the additional data source query that will return what program items each registrant of the Annual Conference has registered for:
- Go to RiSE > Intelligent Query Architect.
- Navigate through the following path: $/Common/Query Sources/Events.
- Select the Program item registrations query, then click Organize > Copy.
- Navigate to the following folder: $/Common/Communications/Queries.
- Click Organize > Paste.
- Open the query for edit.
- (Summary tab) Rename the query to Annual Conference Program Items.
- (Filters tab) In addition to the existing filter, add the following filters:
- [ProgramItem1] Event Code
- Value - ANNCONF
- [Registrant] ID
- In Search? - Required
- [ProgramItem1] Event Code
- Save the query.
| Property | Value | In Search? |
|---|---|---|
| ProgramItem1.Event Code |
ANNCONF |
- |
| Registrant.ID | - | Required |
Using the foreach placeholder in a communication
Note: This example assumes you have already constructed the queries in Building the queries.
The following example assumes you are a staff member who wants to send a communication to all registrants of the Annual Conference. The purpose of the communication is to remind the registrants of the conference date, and to remind them of the program items they registered for. To do this, you want to use a formula so you can send the same communication to all registrants, and not have to worry about customizing the email for each individual person.
Before you can begin composing the communication, you need to make sure the two queries you will use in the communication are properly constructed, and contain all required components.
Once your queries are correctly built, you can begin composing the communication. To use the foreach placeholder in a communication, do the following:
- Go to Marketing > Communication templates.
- Open the Templates > Samples folder to select an out-of-the-box template, or select New > Communication to use a blank communication. For this example, use the Event Reminder template.
- Click the Recipients tab, then select the Annual Conference attendees query.
- Click OK. The list of recipients appears.
- Click the Body tab to continue composing the communication.
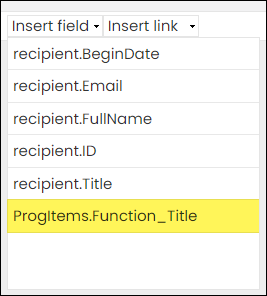
- The communication creator allows users to use information from queries in the communication. Click the Insert field drop-down. You will see the display fields from the recipient query you just selected.
- Next, you need to add the second query that returns the program item information. Click the Data sources tab.
- Select Add data source.
- Select the Annual Conference Program Items query.
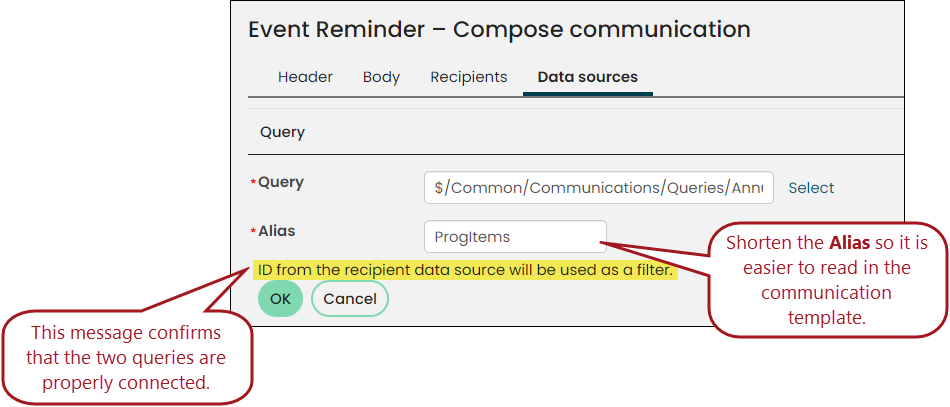
- You can change the data source Alias, or leave it as the title of the query. For this example, change the Alias to ProgItems.
- Click OK.
- Click the Body tab. Now when you select the Insert field drop-down, the display property from the Annual Conference Program Items (shortened to ProgItems) query is listed. You can insert information from the additional data source query into the communication. Edit either of the queries at any time to add additional fields to this drop-down.
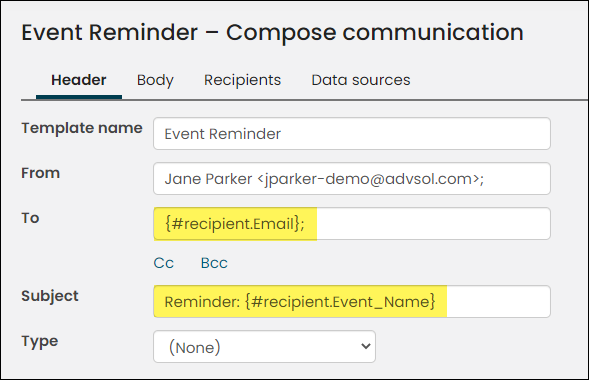
- Click the Header tab. Update the To and Subject fields to use the data from the recipient query:
- To: Change {#party.Email} to {#recipient.Email}
- Subject: Change {#iqa.code_EventName} to {#recipient.Event_Name}
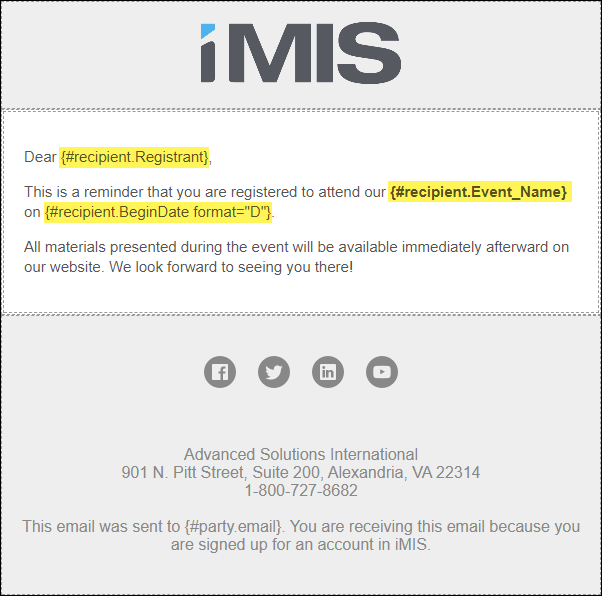
- Update the existing insert fields located in the body of the communication to use the recipient query data:
- Greeting: Change {#party.FirstName} to {#recipient.FullName
- Event Name: Change {#recipient.EventName} to {#recipient.Event_Name}
- Event Start Date: Change {#recipient.StartDate format="D"} to {#recipient.BeginDate format="D"}
- Start a new paragraph after the event start date, then make sure you Save the communication.
- From the Insert field drop-down, select {#ProgItems.Function_Title}.
- Insert the foreach placeholder:
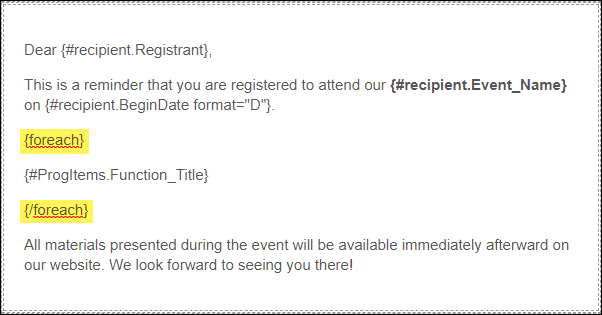
- On the line above {#ProgItems.FunctionName}, type {foreach}.
- On the line below {#ProgItems.FunctionName}, type {/foreach}.
The content between the open and closed foreach brackets is the data that is repeated.
- data - This is the data you want to include. For this example, the data is the FunctionName. In the foreach formula, "data" can be replaced with any word you choose, but you must use the word throughout the rest of the formula.
- data source - This is where the data is being pulled from. In this example, the data source is ProgItems.
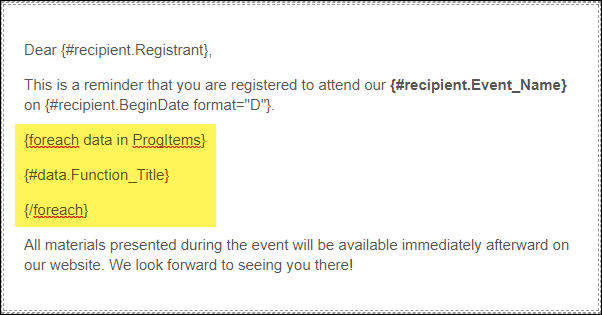
- Update the opening {foreach} placeholder to read {foreach data in ProgItems}.
- Update {#ProgItems.FunctionName} to use data instead of ProgItems: {#data.FunctionName}
- Add any desired styling changes, then click Preview.
- Click Prev and Next to see how each recipient's program items are different.
If the two queries are properly linked together, the message ID from the recipient data source will be used as a filter is displayed. It is important that the two queries are linked together because this ensures each recipient will only receive program item information pertaining to them. If the queries are not properly linked, recipients will receive program item information for all recipients and not just themselves.
Note: The Alias is used to identify the data source when inserting a field into the communication from the Insert field drop-down, so a short Alias is recommended.
The syntax of the foreach place holder is {foreach data in data source}:
Reviewing the advanced foreach information
Warning! The foreach placeholder cannot be used in Advanced Email Marketing communications.
The following is a more complex syntax of the opening {foreach} placeholder:
{foreach alias in source [orderby [property,...]] [limit [number]]}
This syntax consists of the following components:
- alias - A name for a record in the data source that contains the repeating data.
- source - A data source associated with the email that contains the repeating data. Within the {foreach} placeholder, the source is referred to by the alias for the additional data source.
- orderby -(optional) To sort the data, use the orderby keyword followed by a comma-delimited list of properties to sort the data by.
- A maximum of five sorting properties can be specified.
- Property names must refer to properties in the data source.
- Do not specify a data source in the property names. The data source is ordered before the optional limit clause is applied.
- limit - (optional) To limit the number of records processed in the data source, use the limit keyword followed by the maximum number of records. Limit is applied after the entire collection has been sorted using the orderby clause.
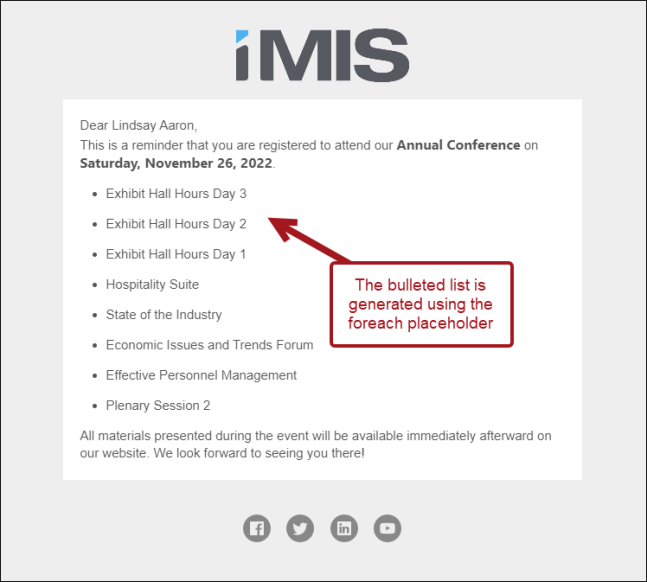
- You can use HTML tags within the placeholders to format the repeating data. Add the HTML tags in the HTML view. For example, you can use the <ul> tag to create a bulleted list.
- In the following example, merge fields from an associated data source (aliased as lines) that retrieves product order information would repeat in the email. The l is the alias within the {foreach} placeholder for a record in the data source. The descriptions, quantity ordered, unit price, and extended amount properties are repeated for each record in the query results. The quantity ordered property is formatted to use 0 decimal places.
{foreach l in lines}
{#l.Description} {#l.QuantityOrdered format="0"} @ ${#l.UnitPrice} = ${#l.ExtendedAmount}
{/foreach}
Several lines in the email sent to a contact might look like the following:
- Certification Practice Exam 1 @ $39.00 = $39.00
- Conference Practice Exam 1 @ $39.99 = $39.99
- Software Basics: New Hybrid Edition 1 @ $19.99 = $19.99
Note: In this scenario, the email uses a recipient query with a display property that matches a filter property in the additional data source. This links the recipient query and the data source, so only product information for the contact receiving the email displays. If the data source with the repeating data is not linked to the recipient query, all of the records in the data source will be listed in the email.


